Garden with Grace

"I hope that while so many people are out smelling the flowers, someone is taking the time to plant some." ~H.Rappaport


5 Comments

2020 Started with the Birds and Ends with the Bees

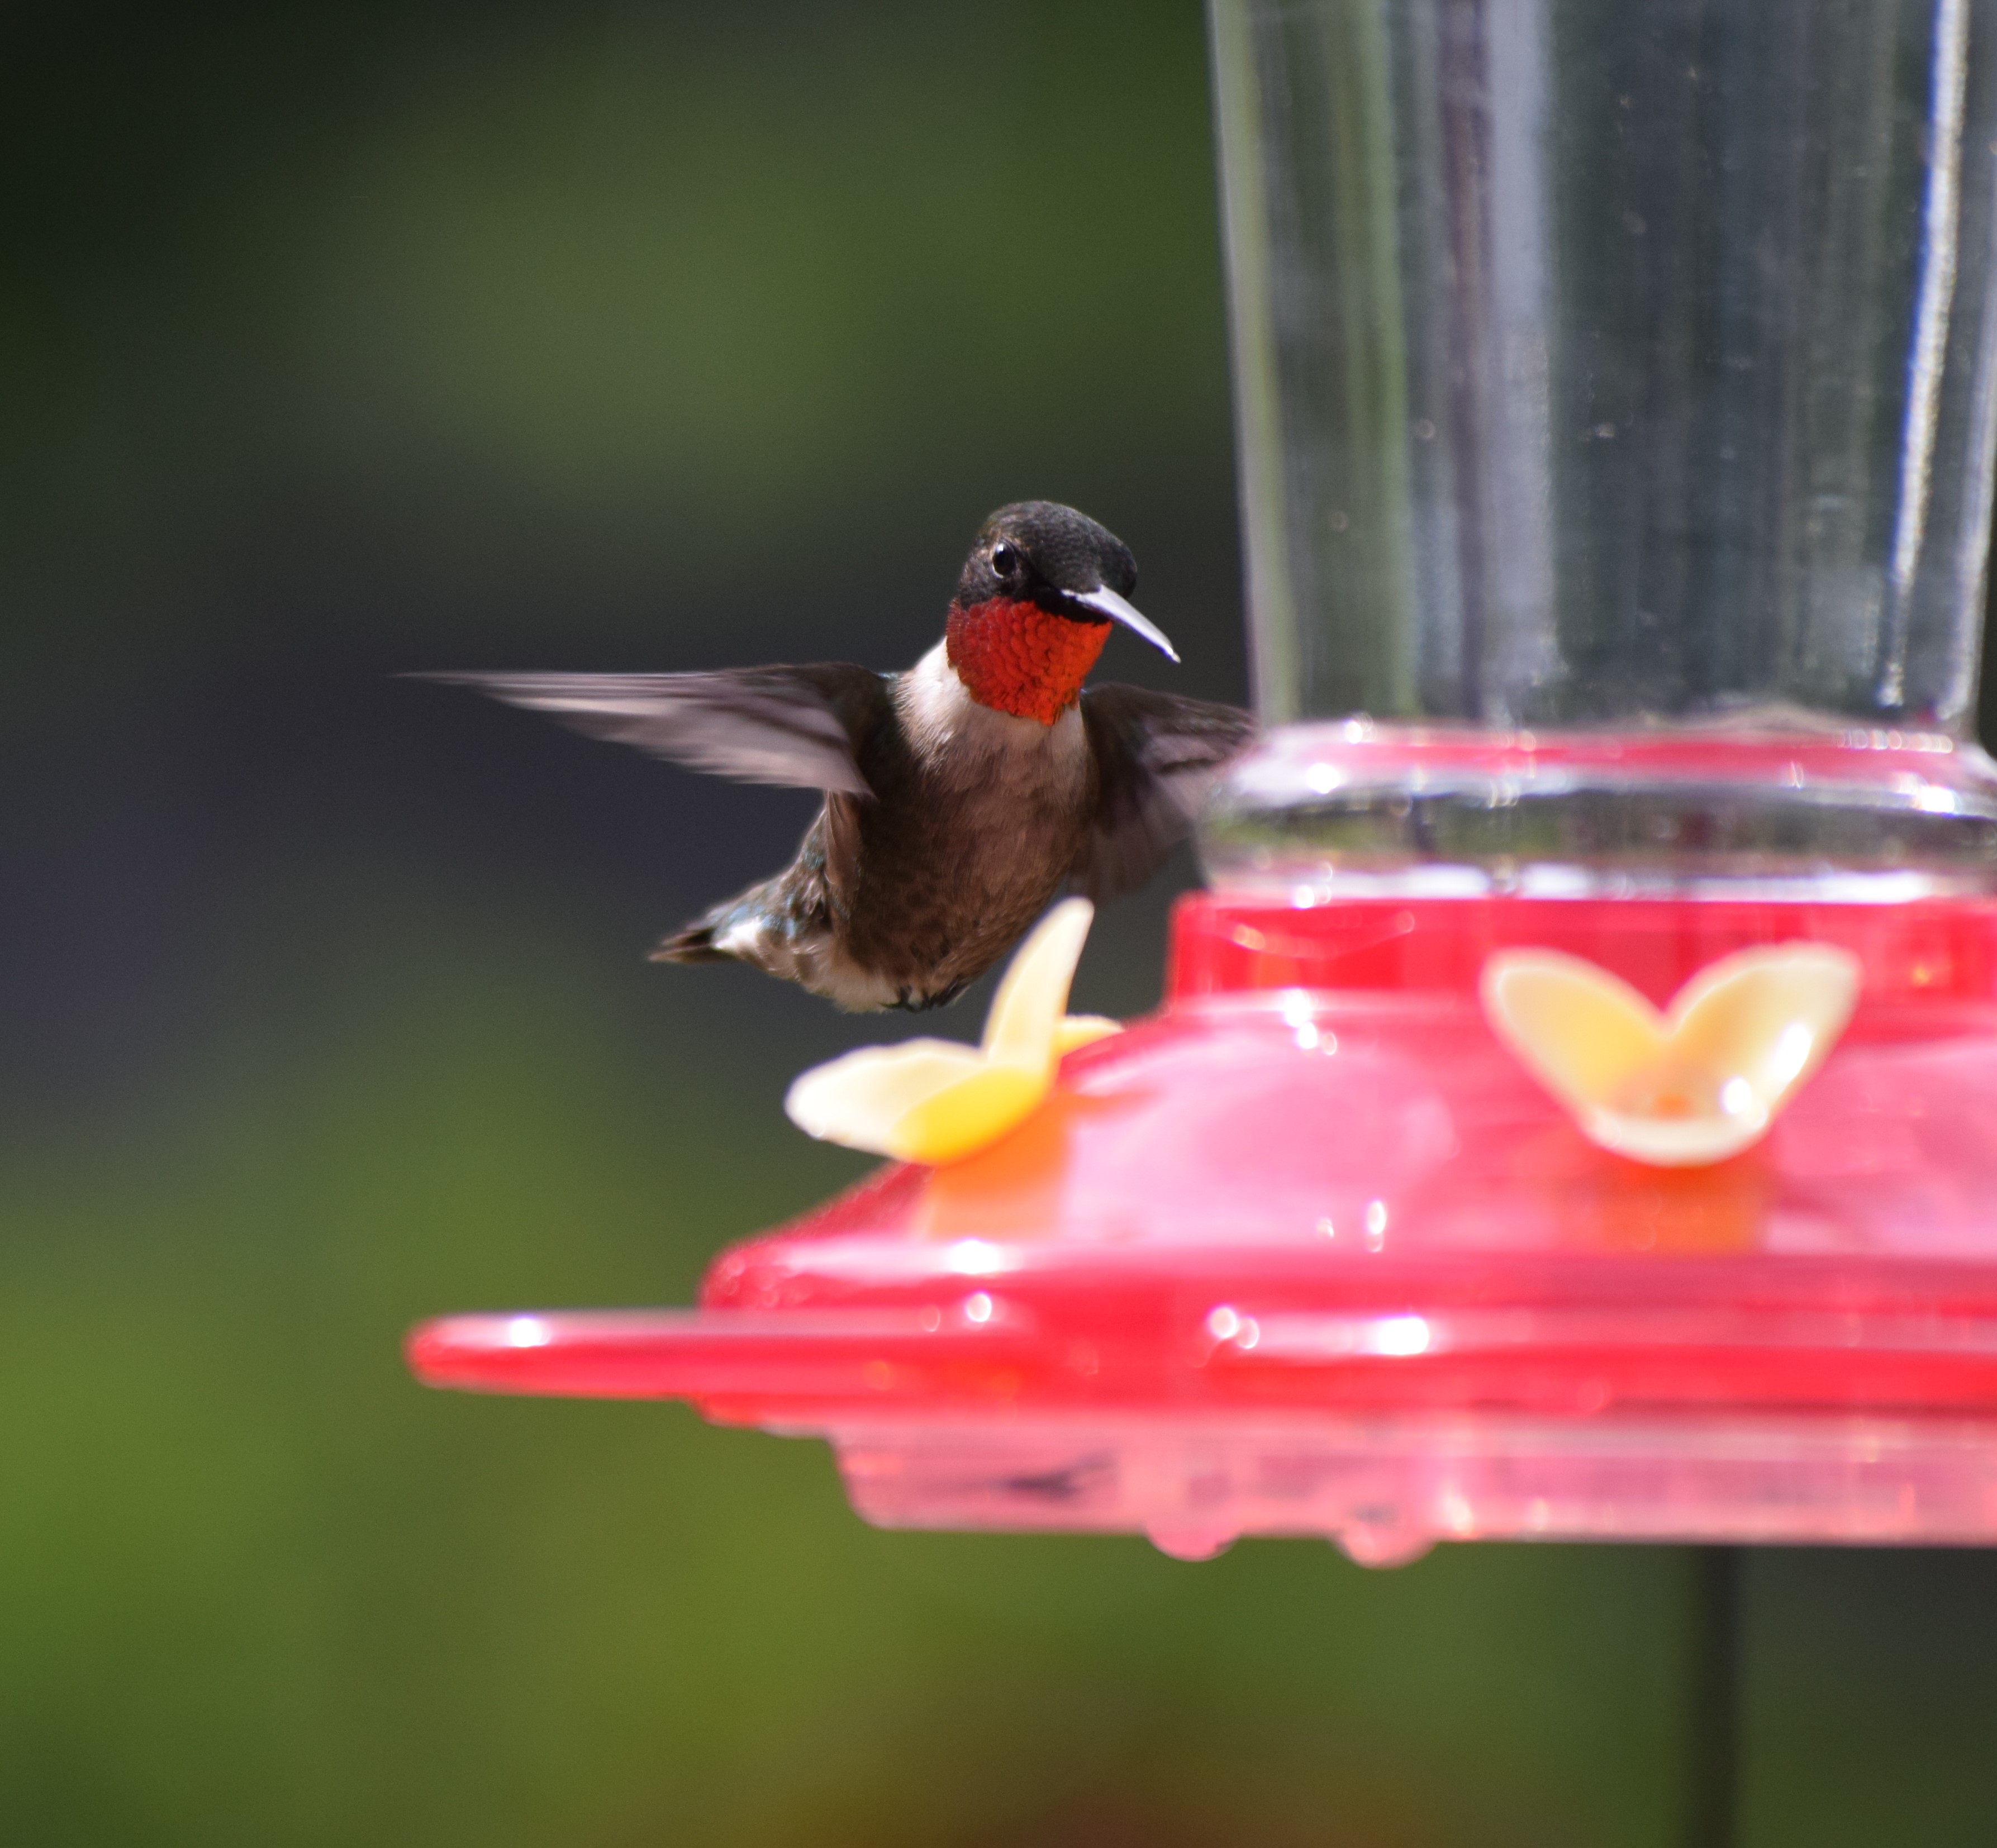
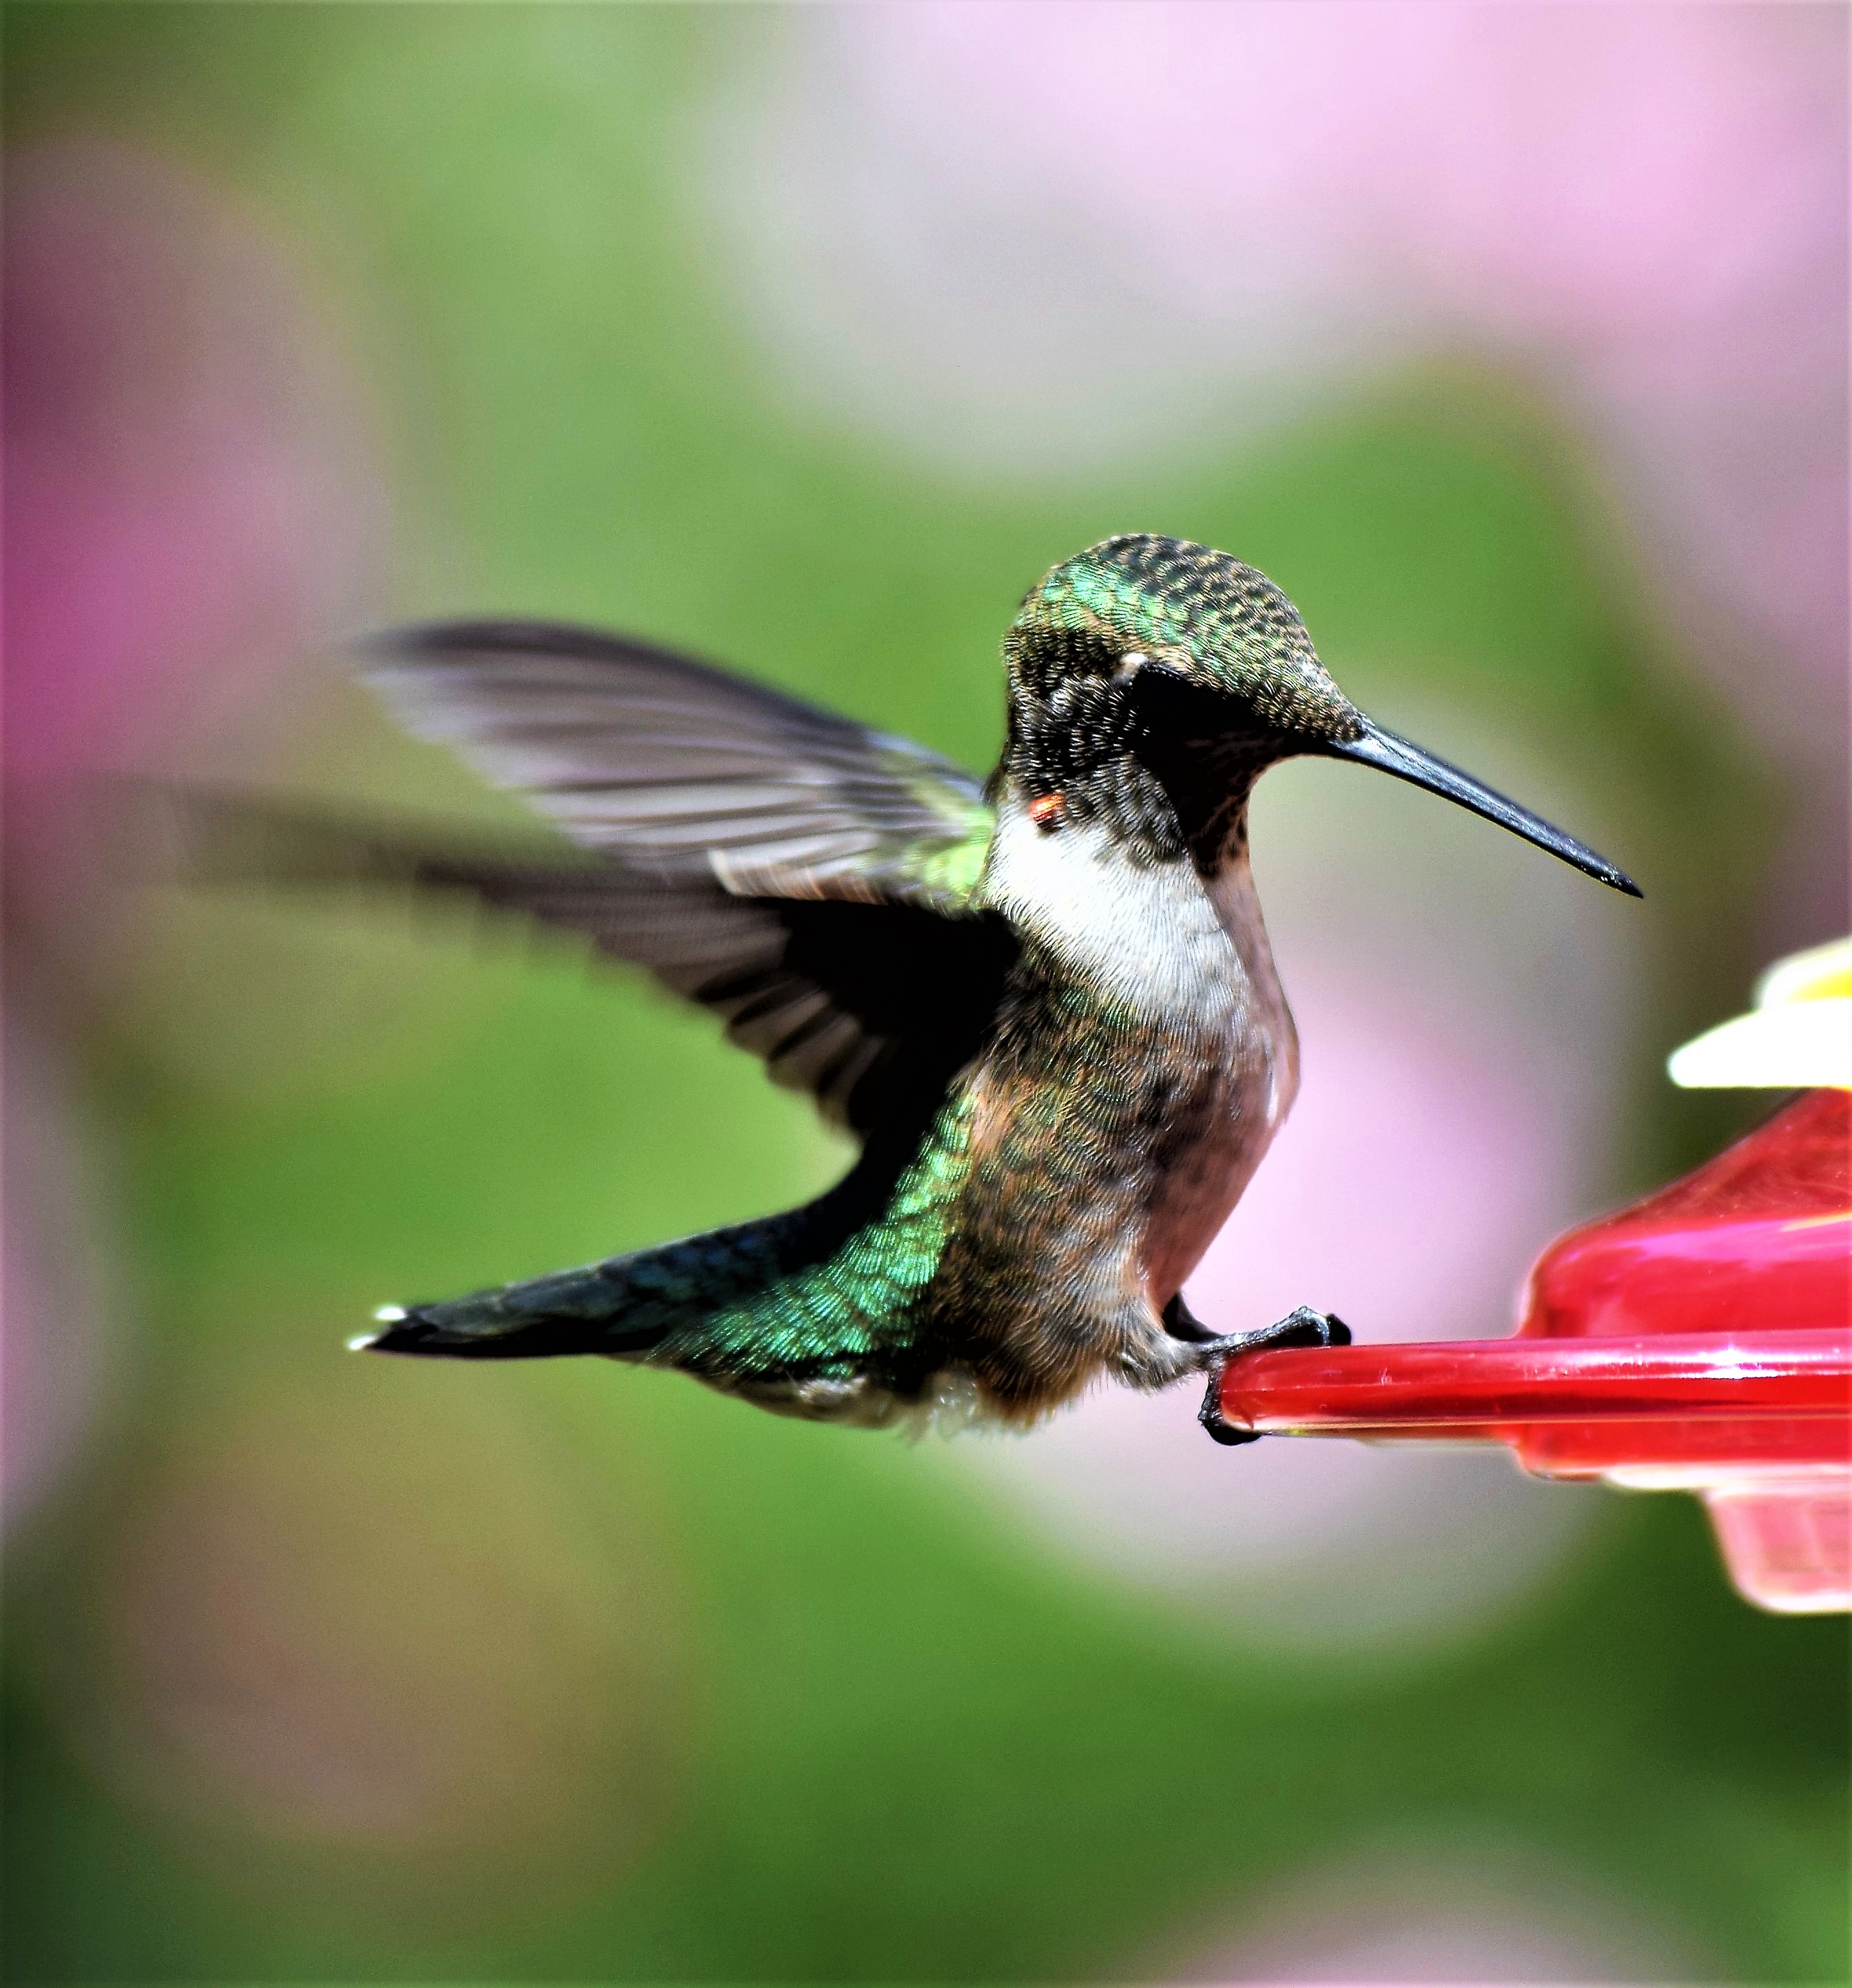
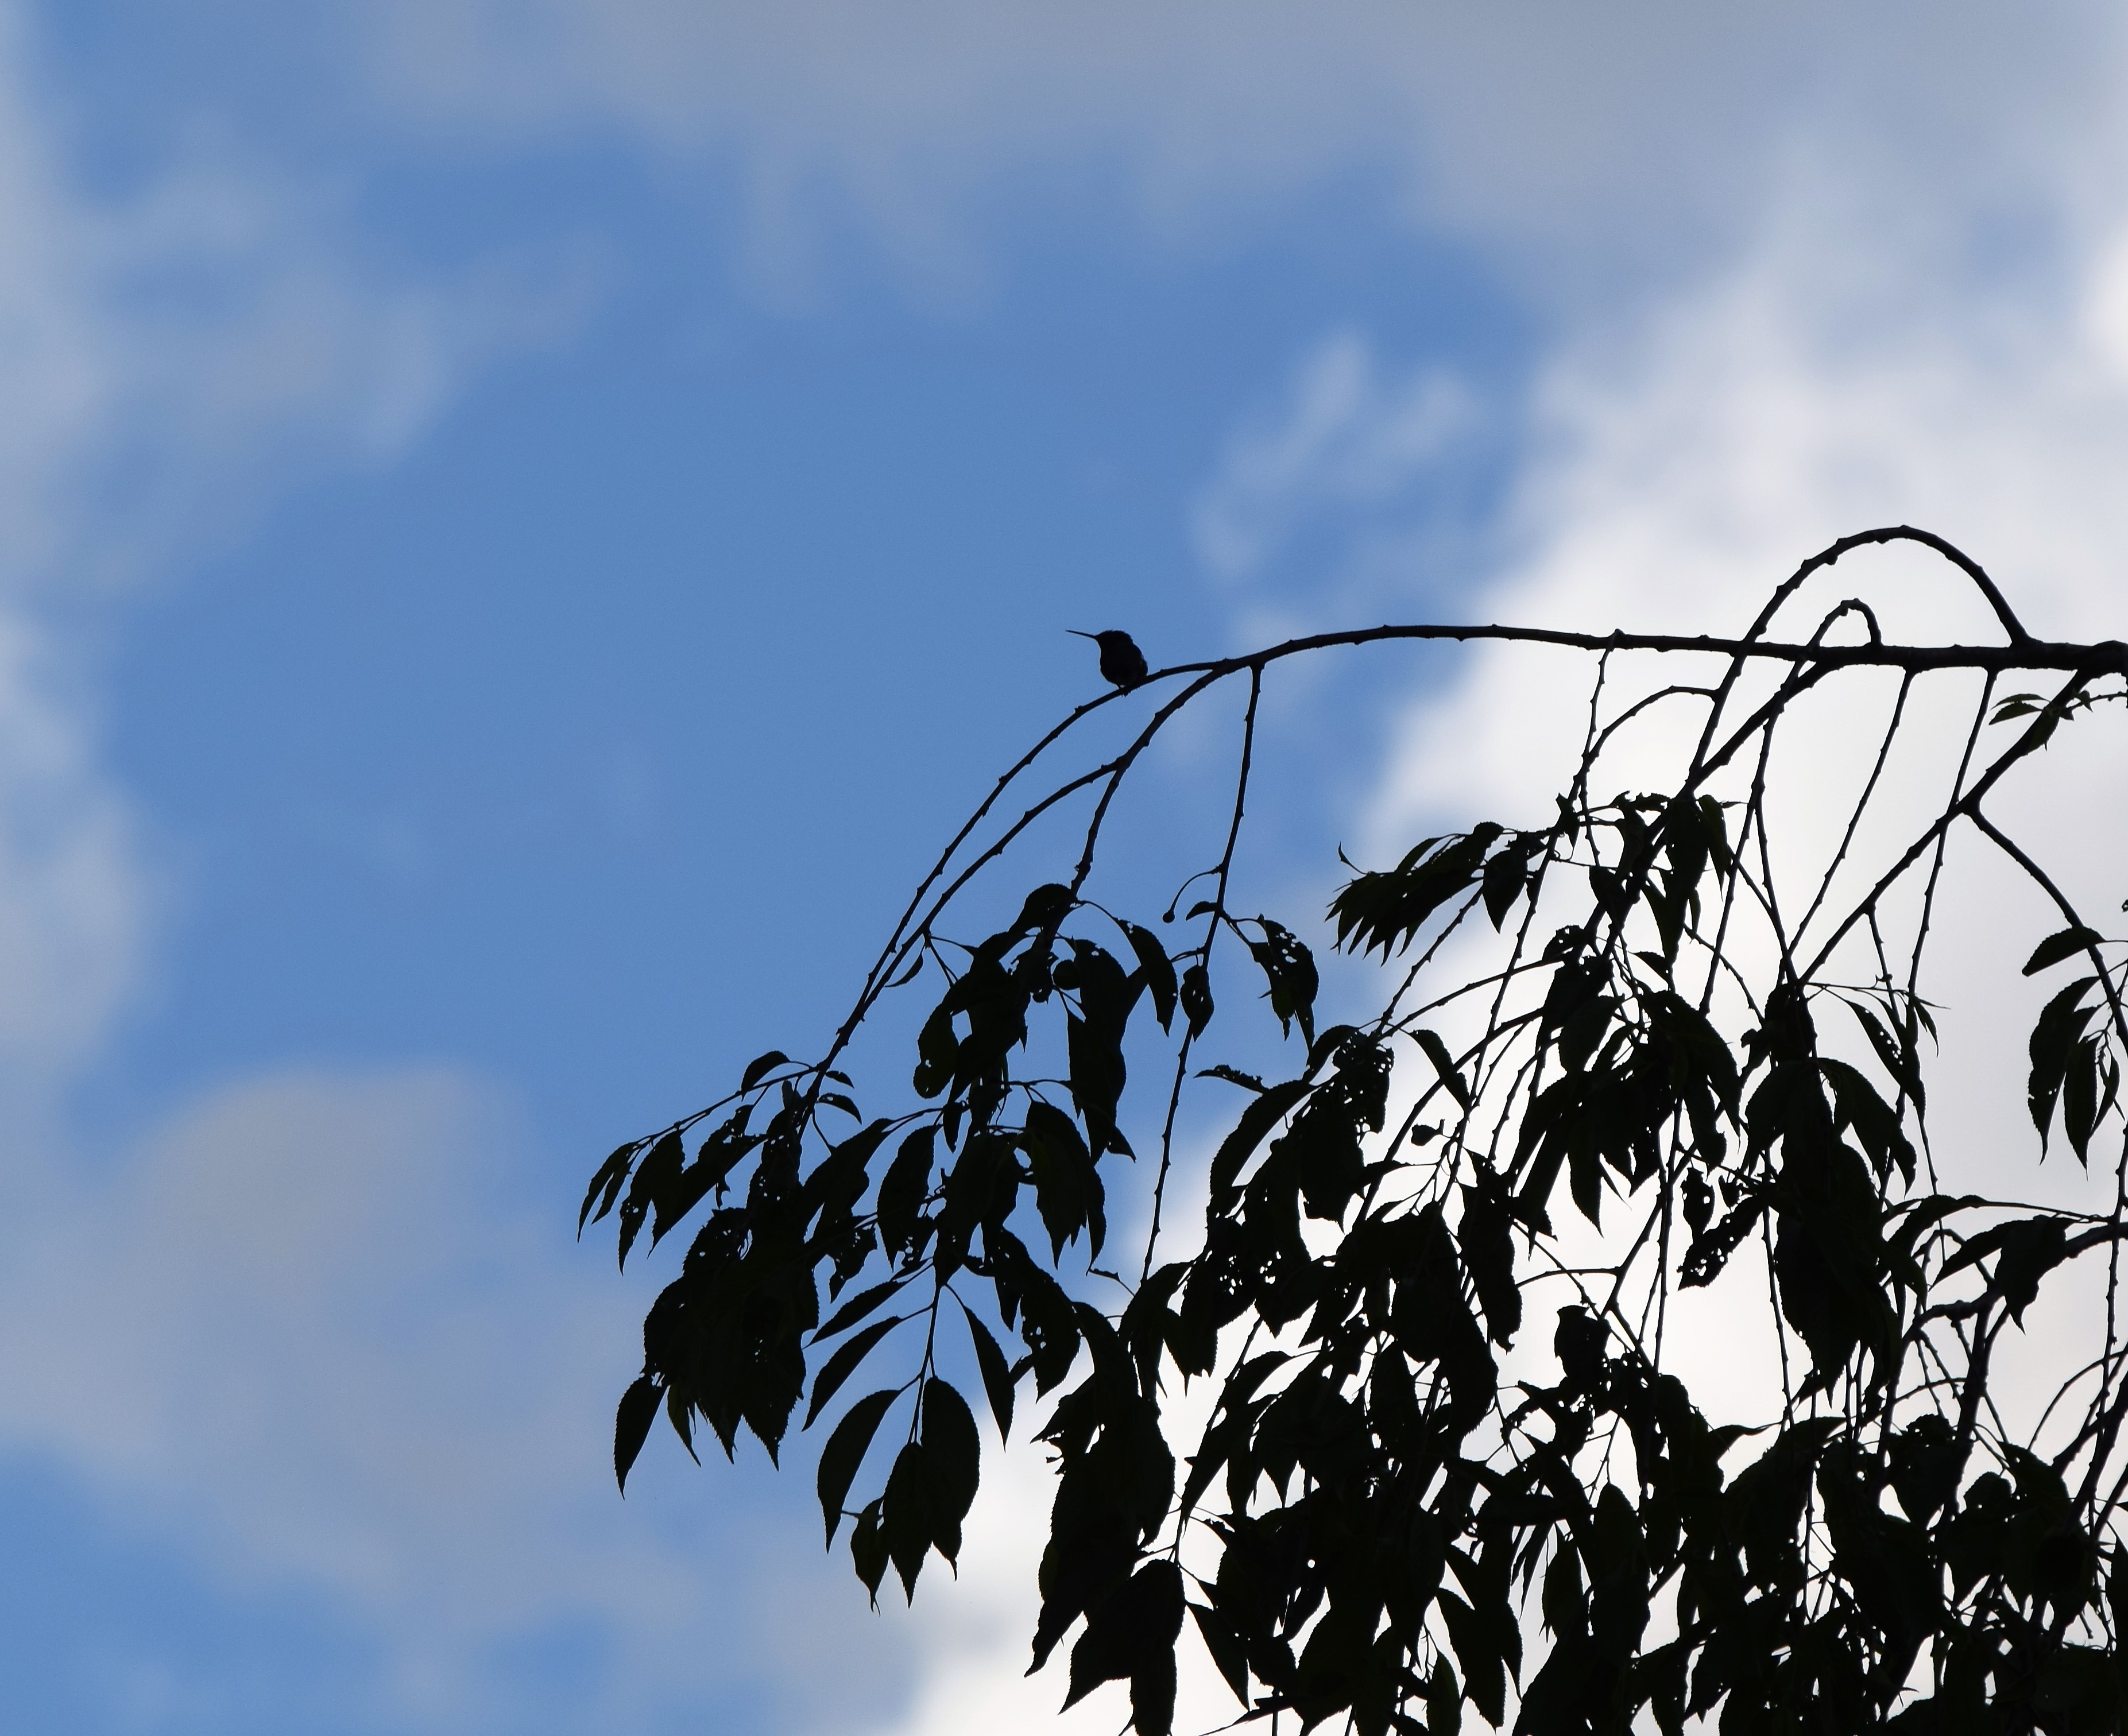
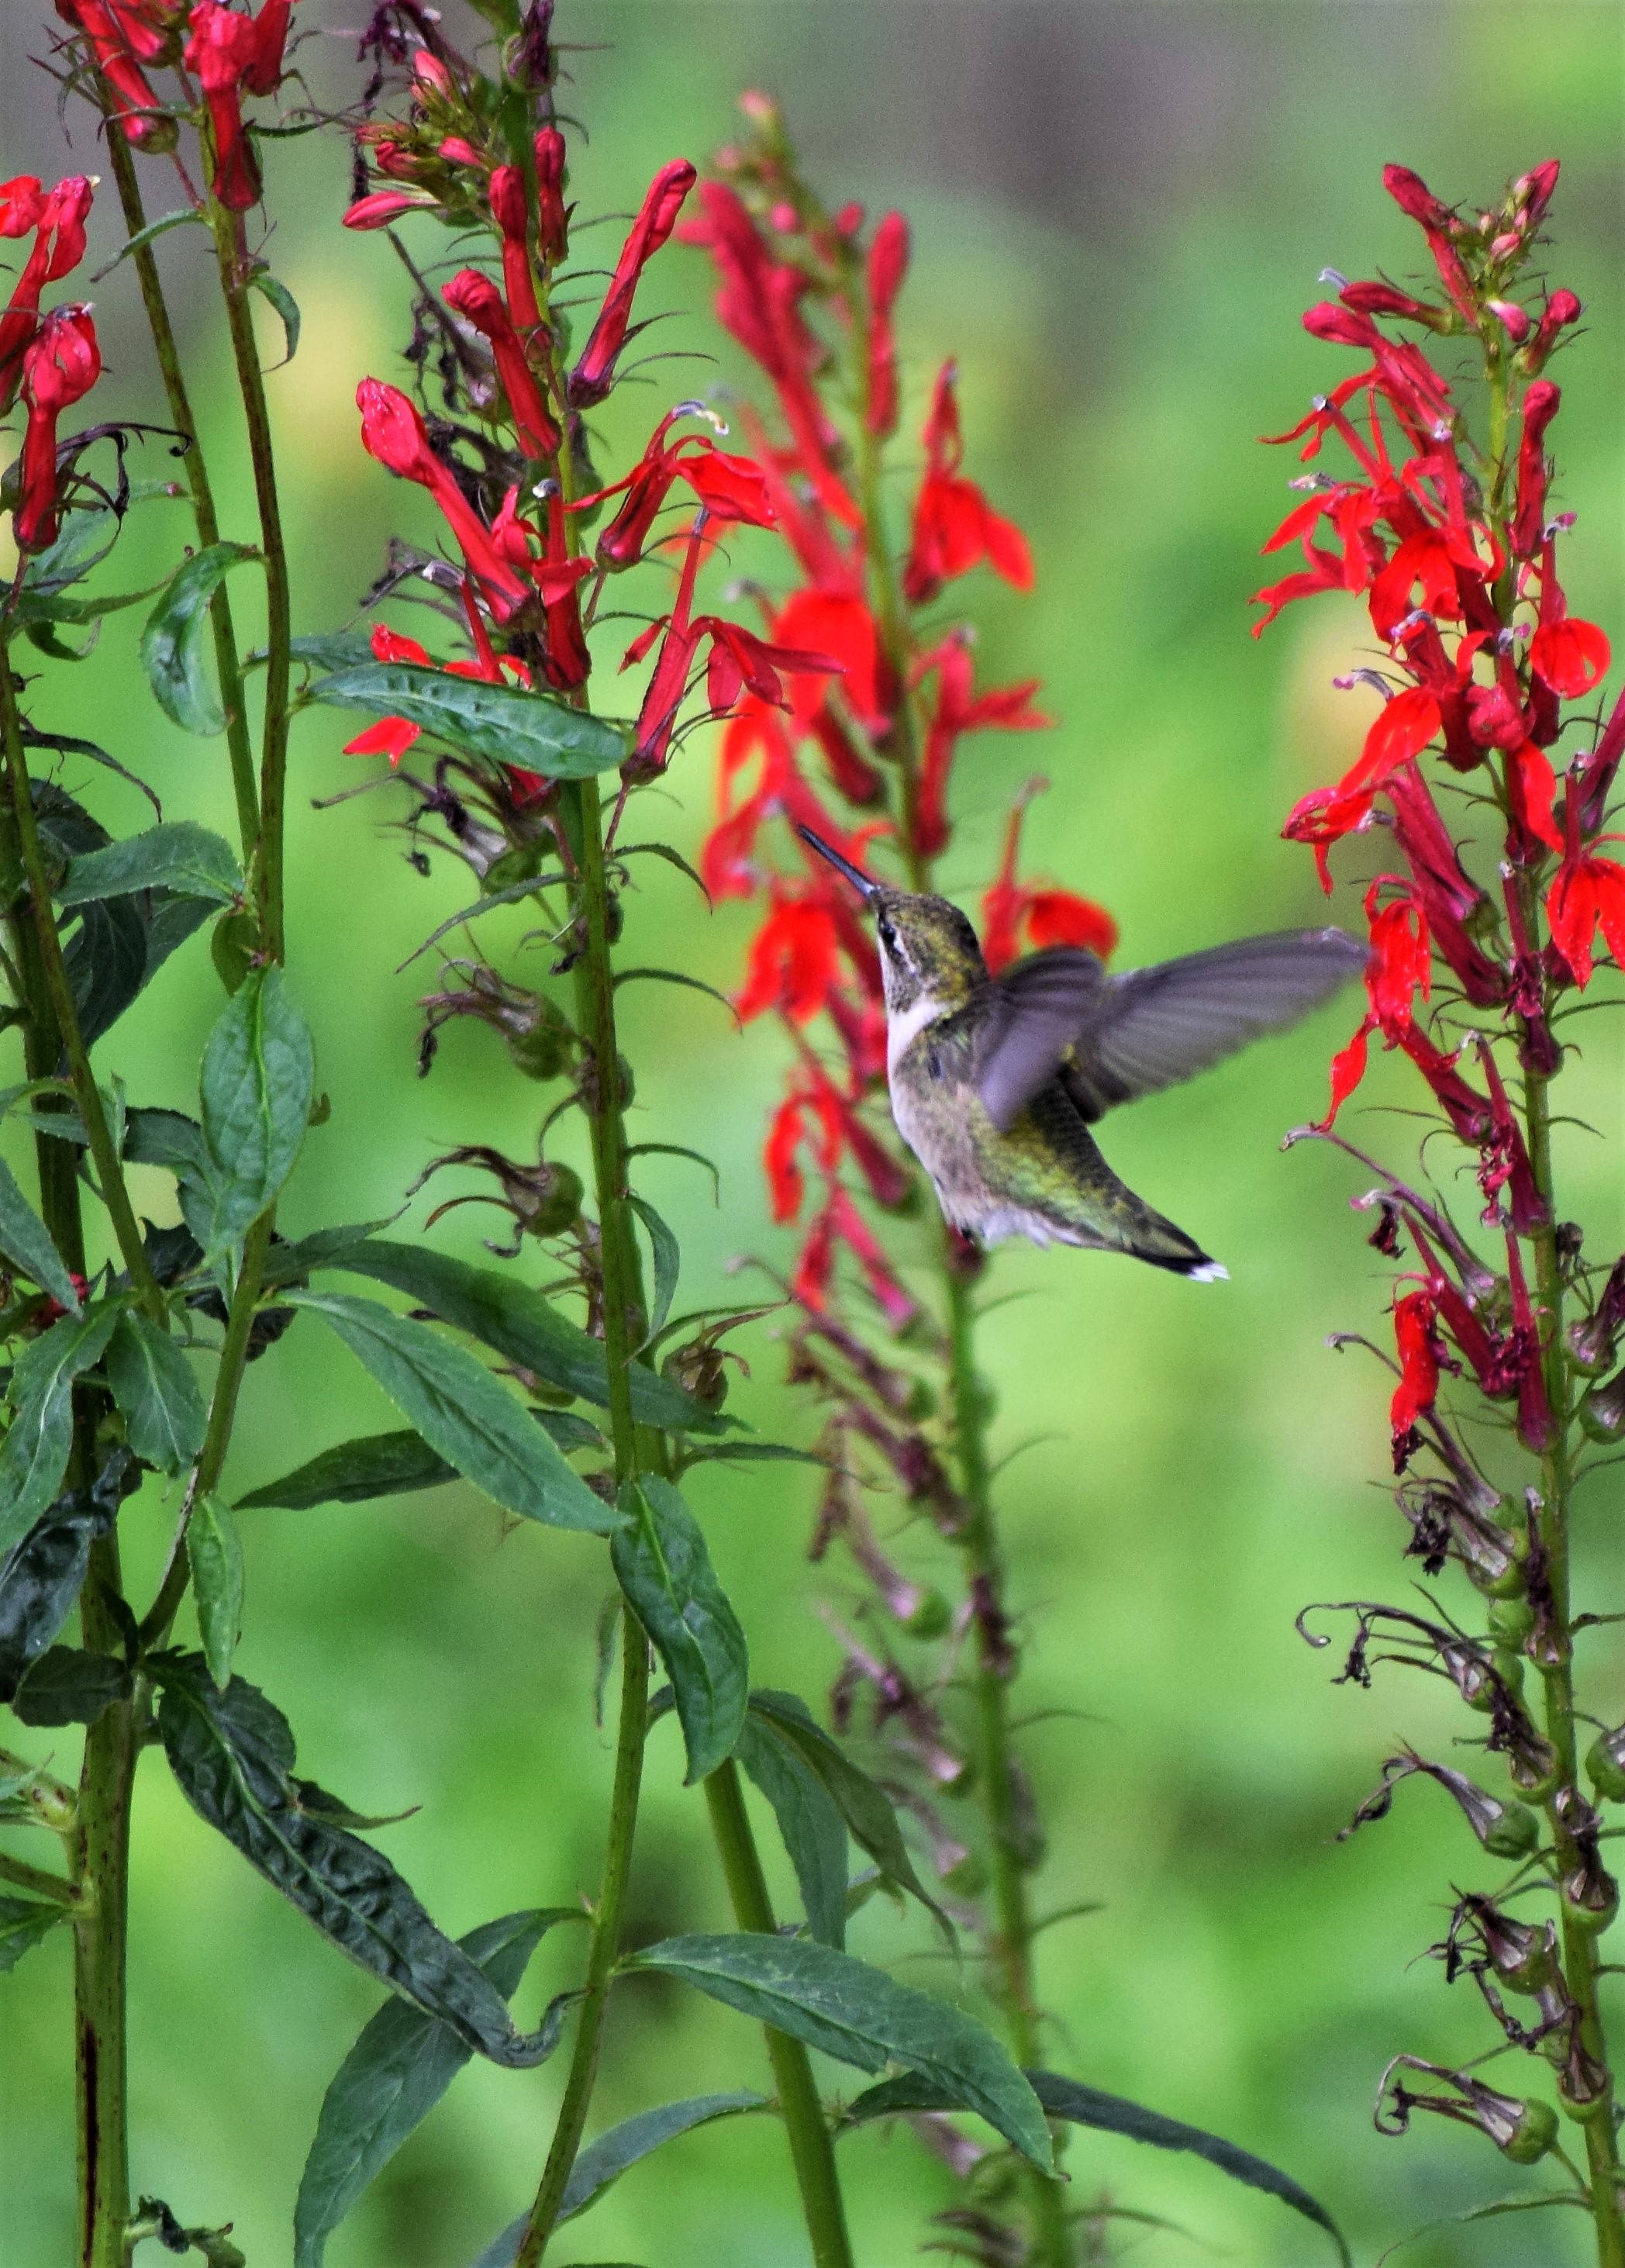
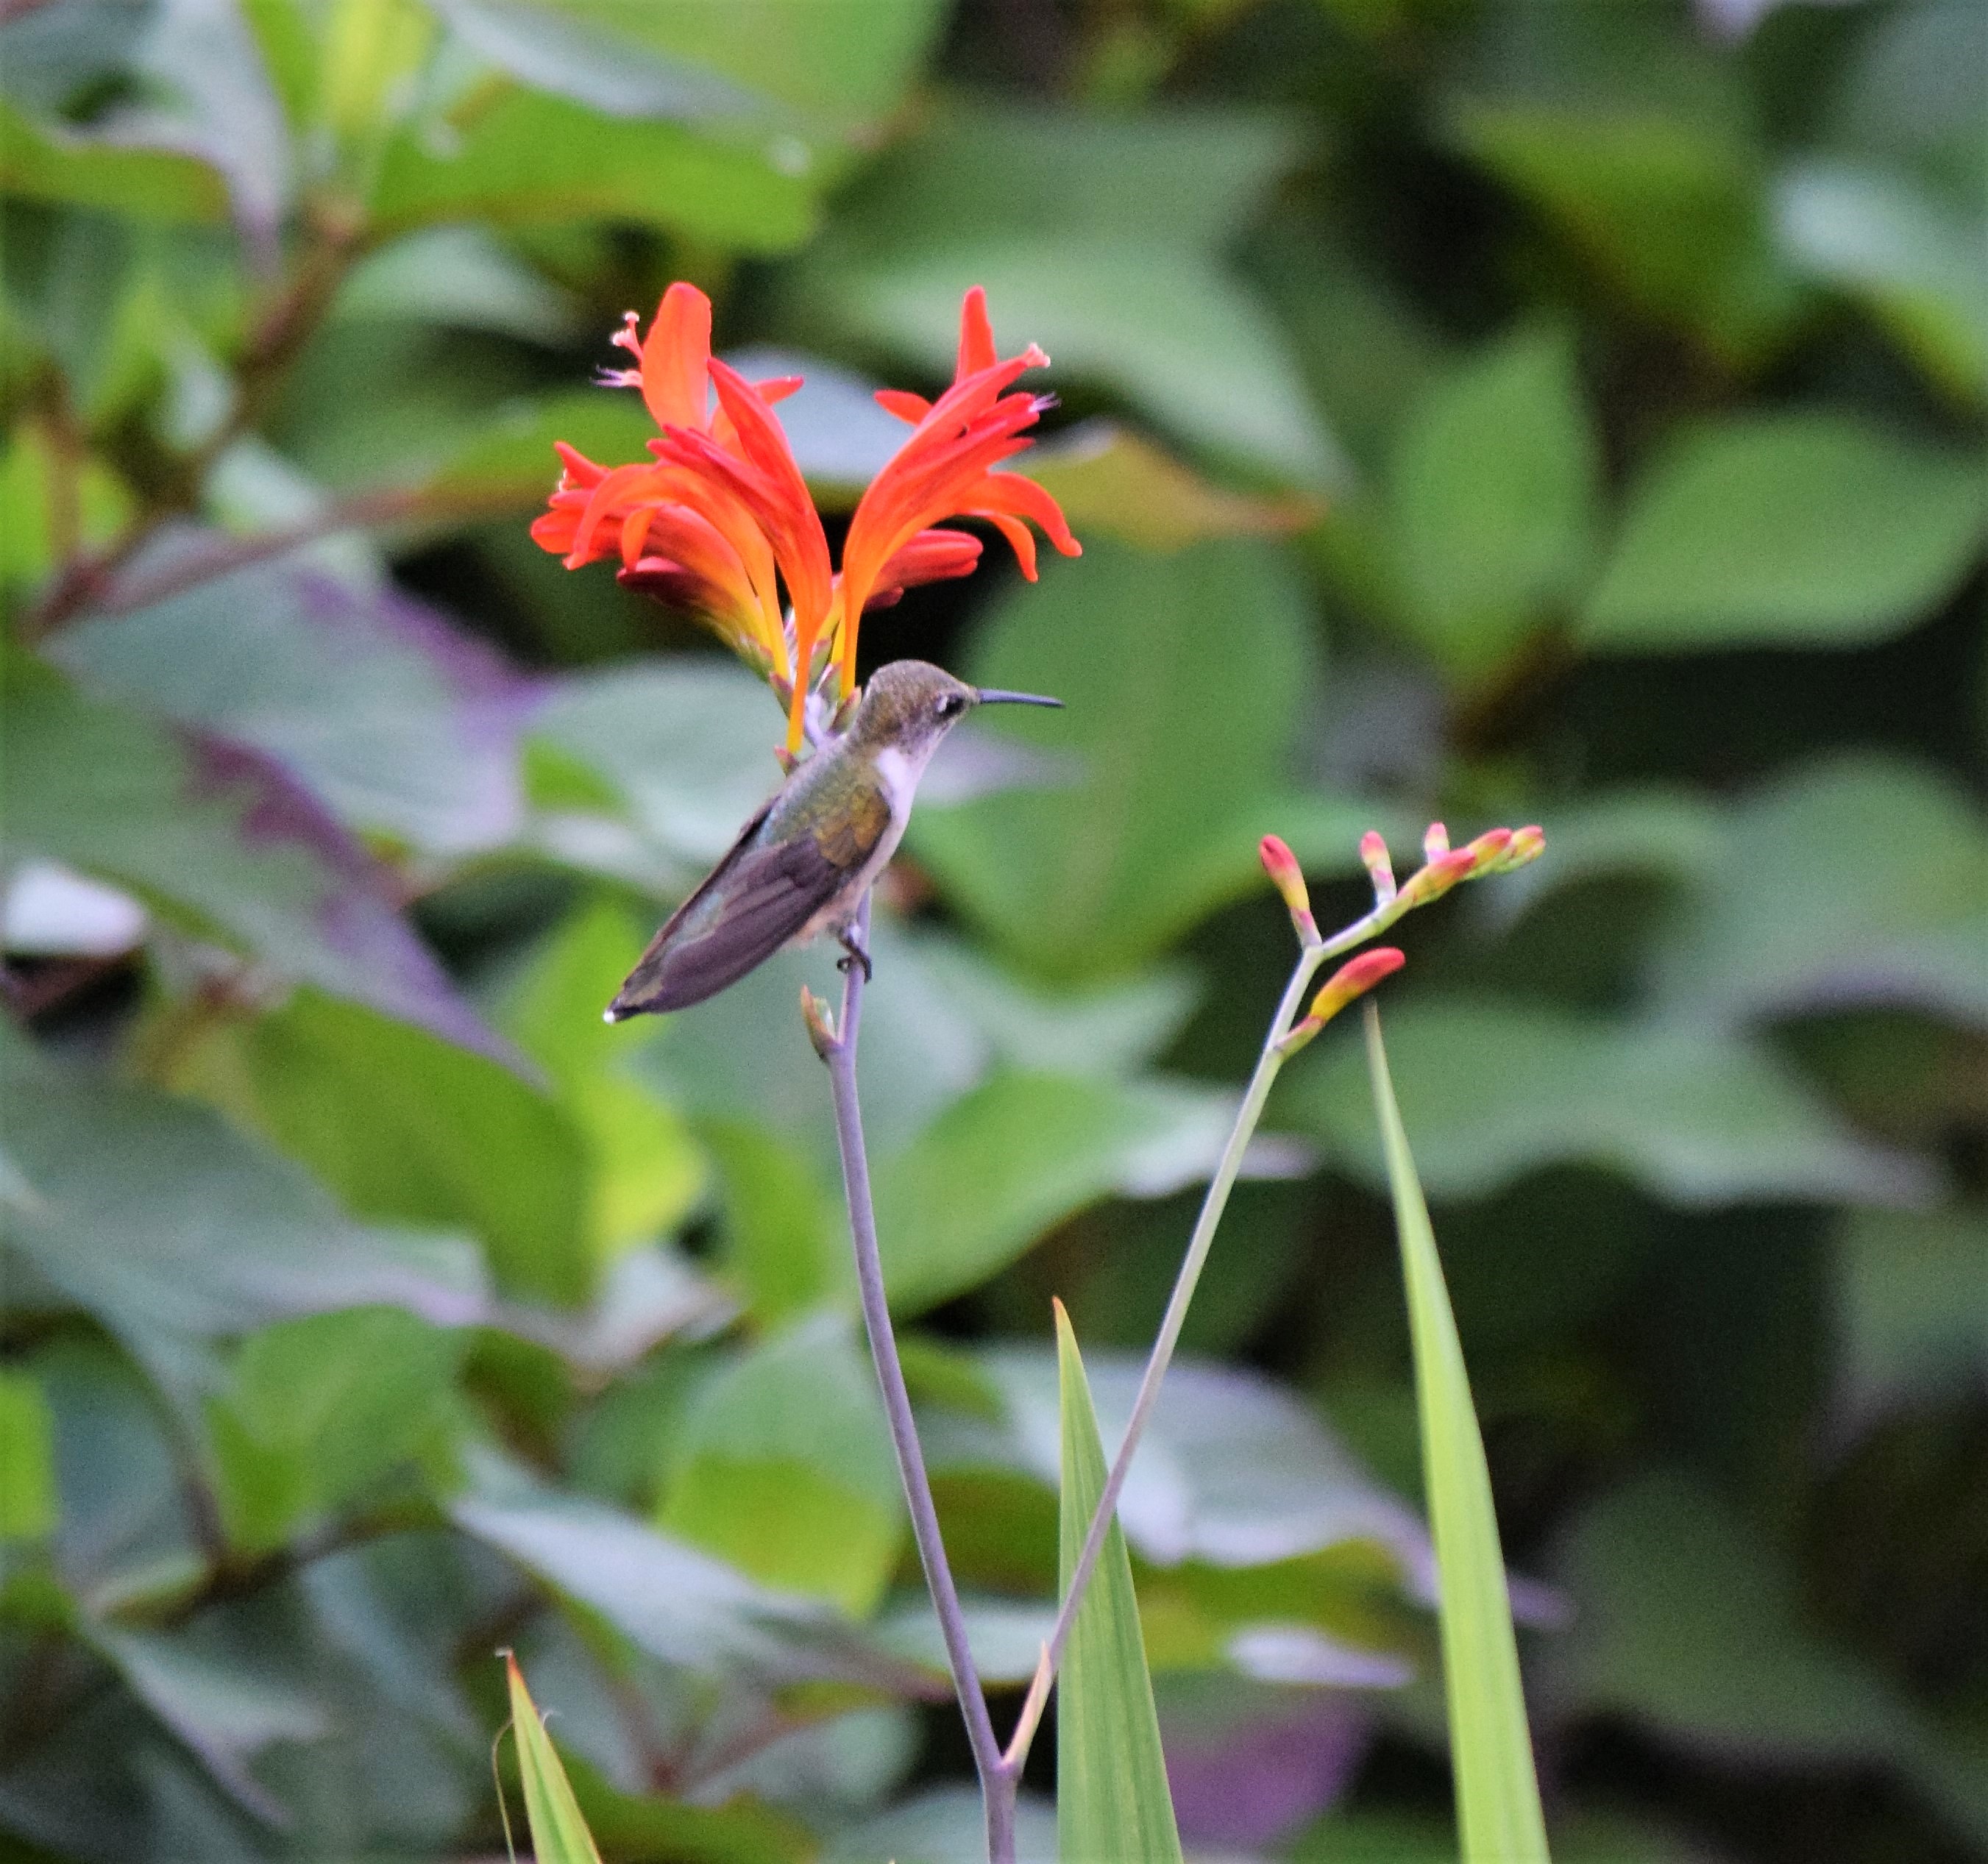
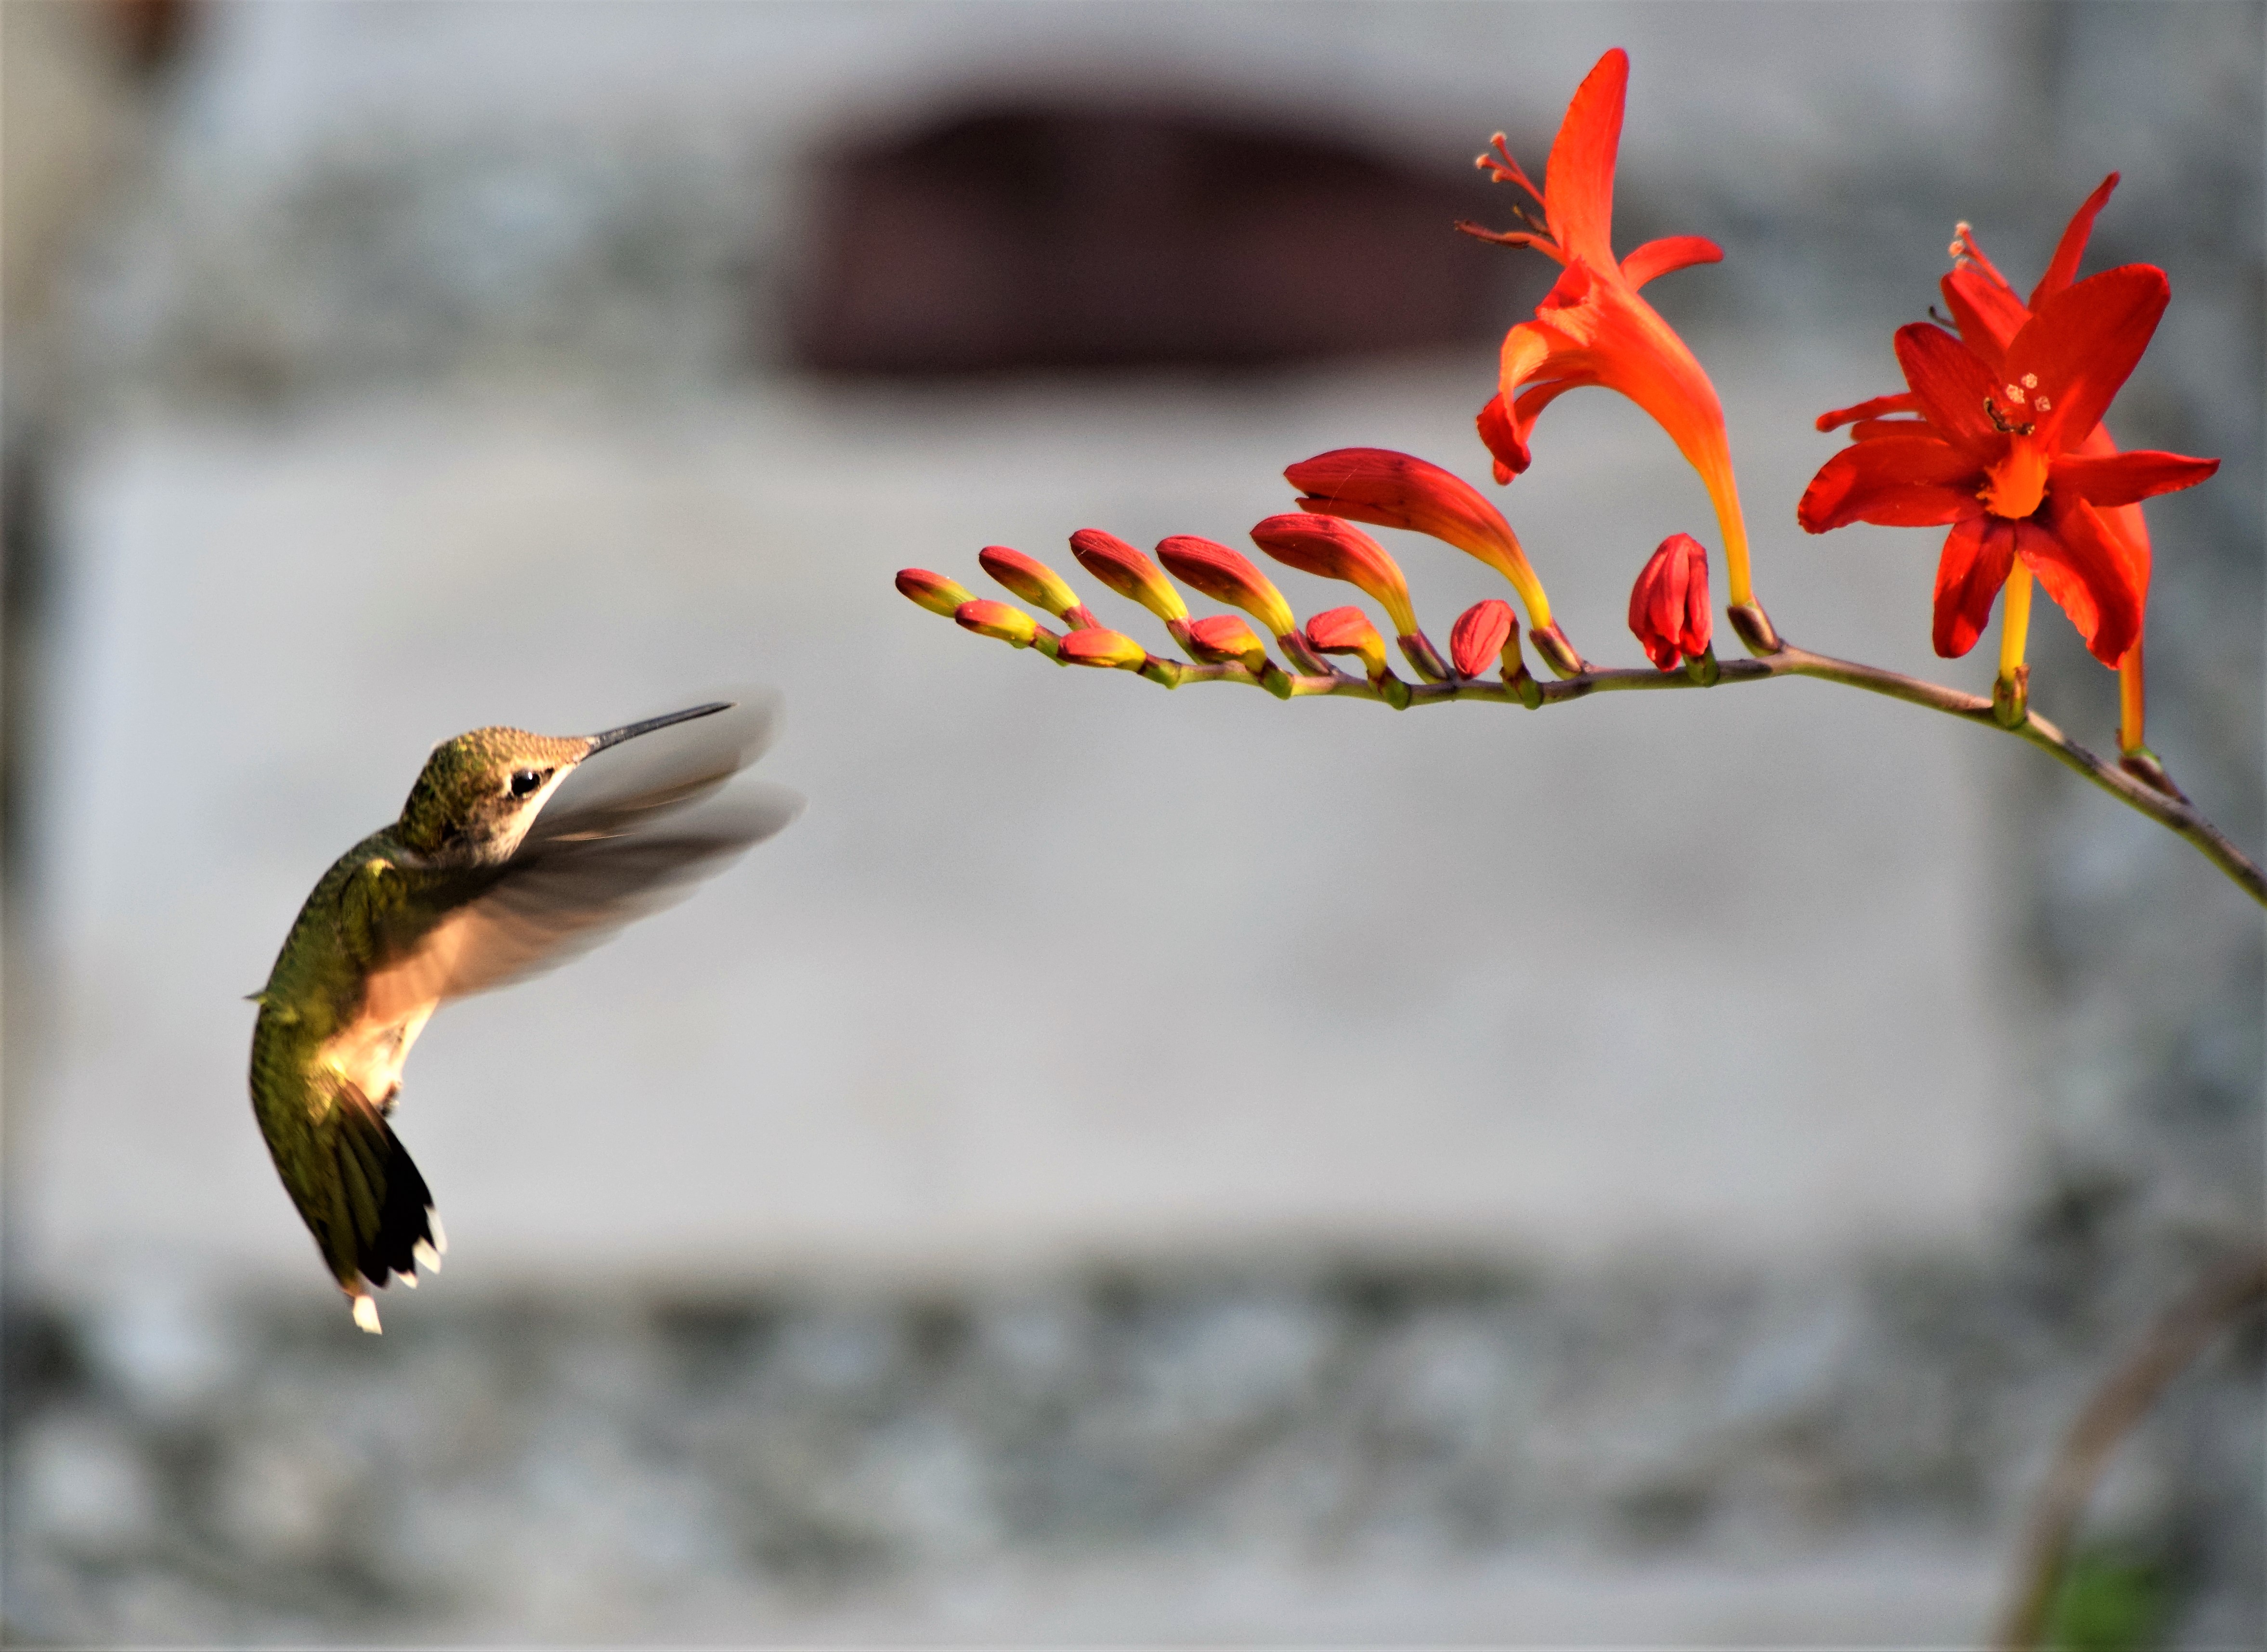
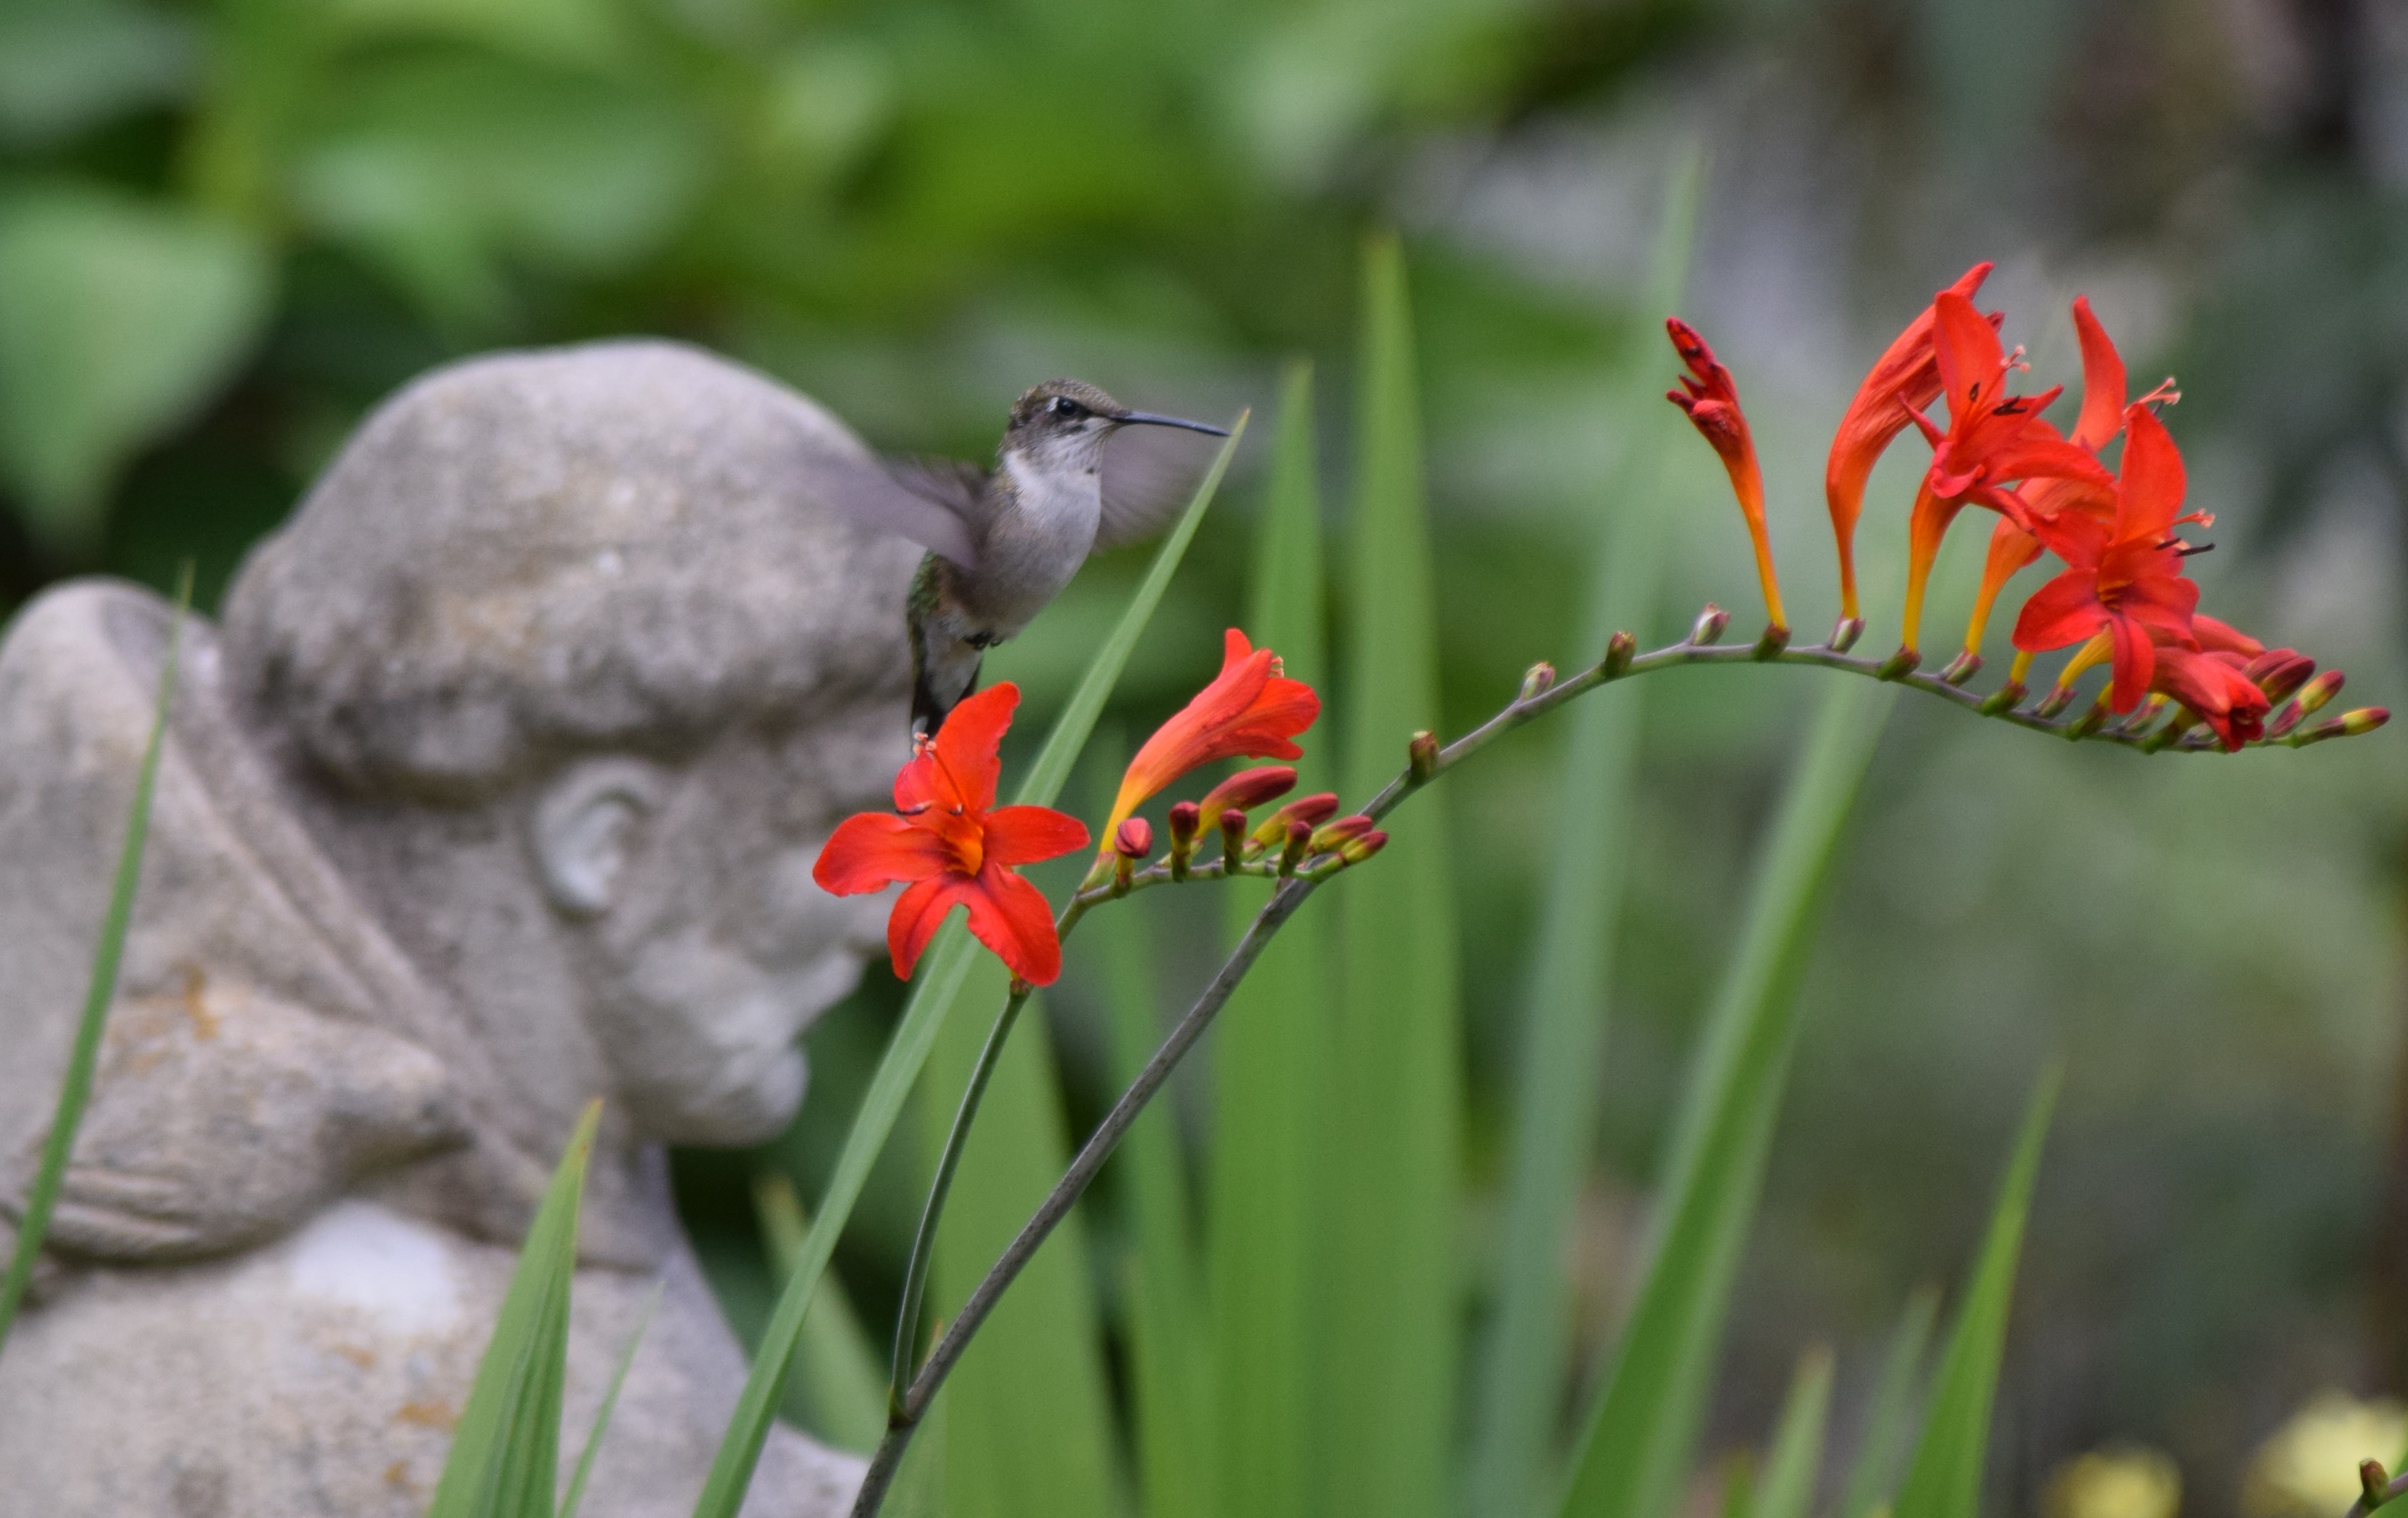
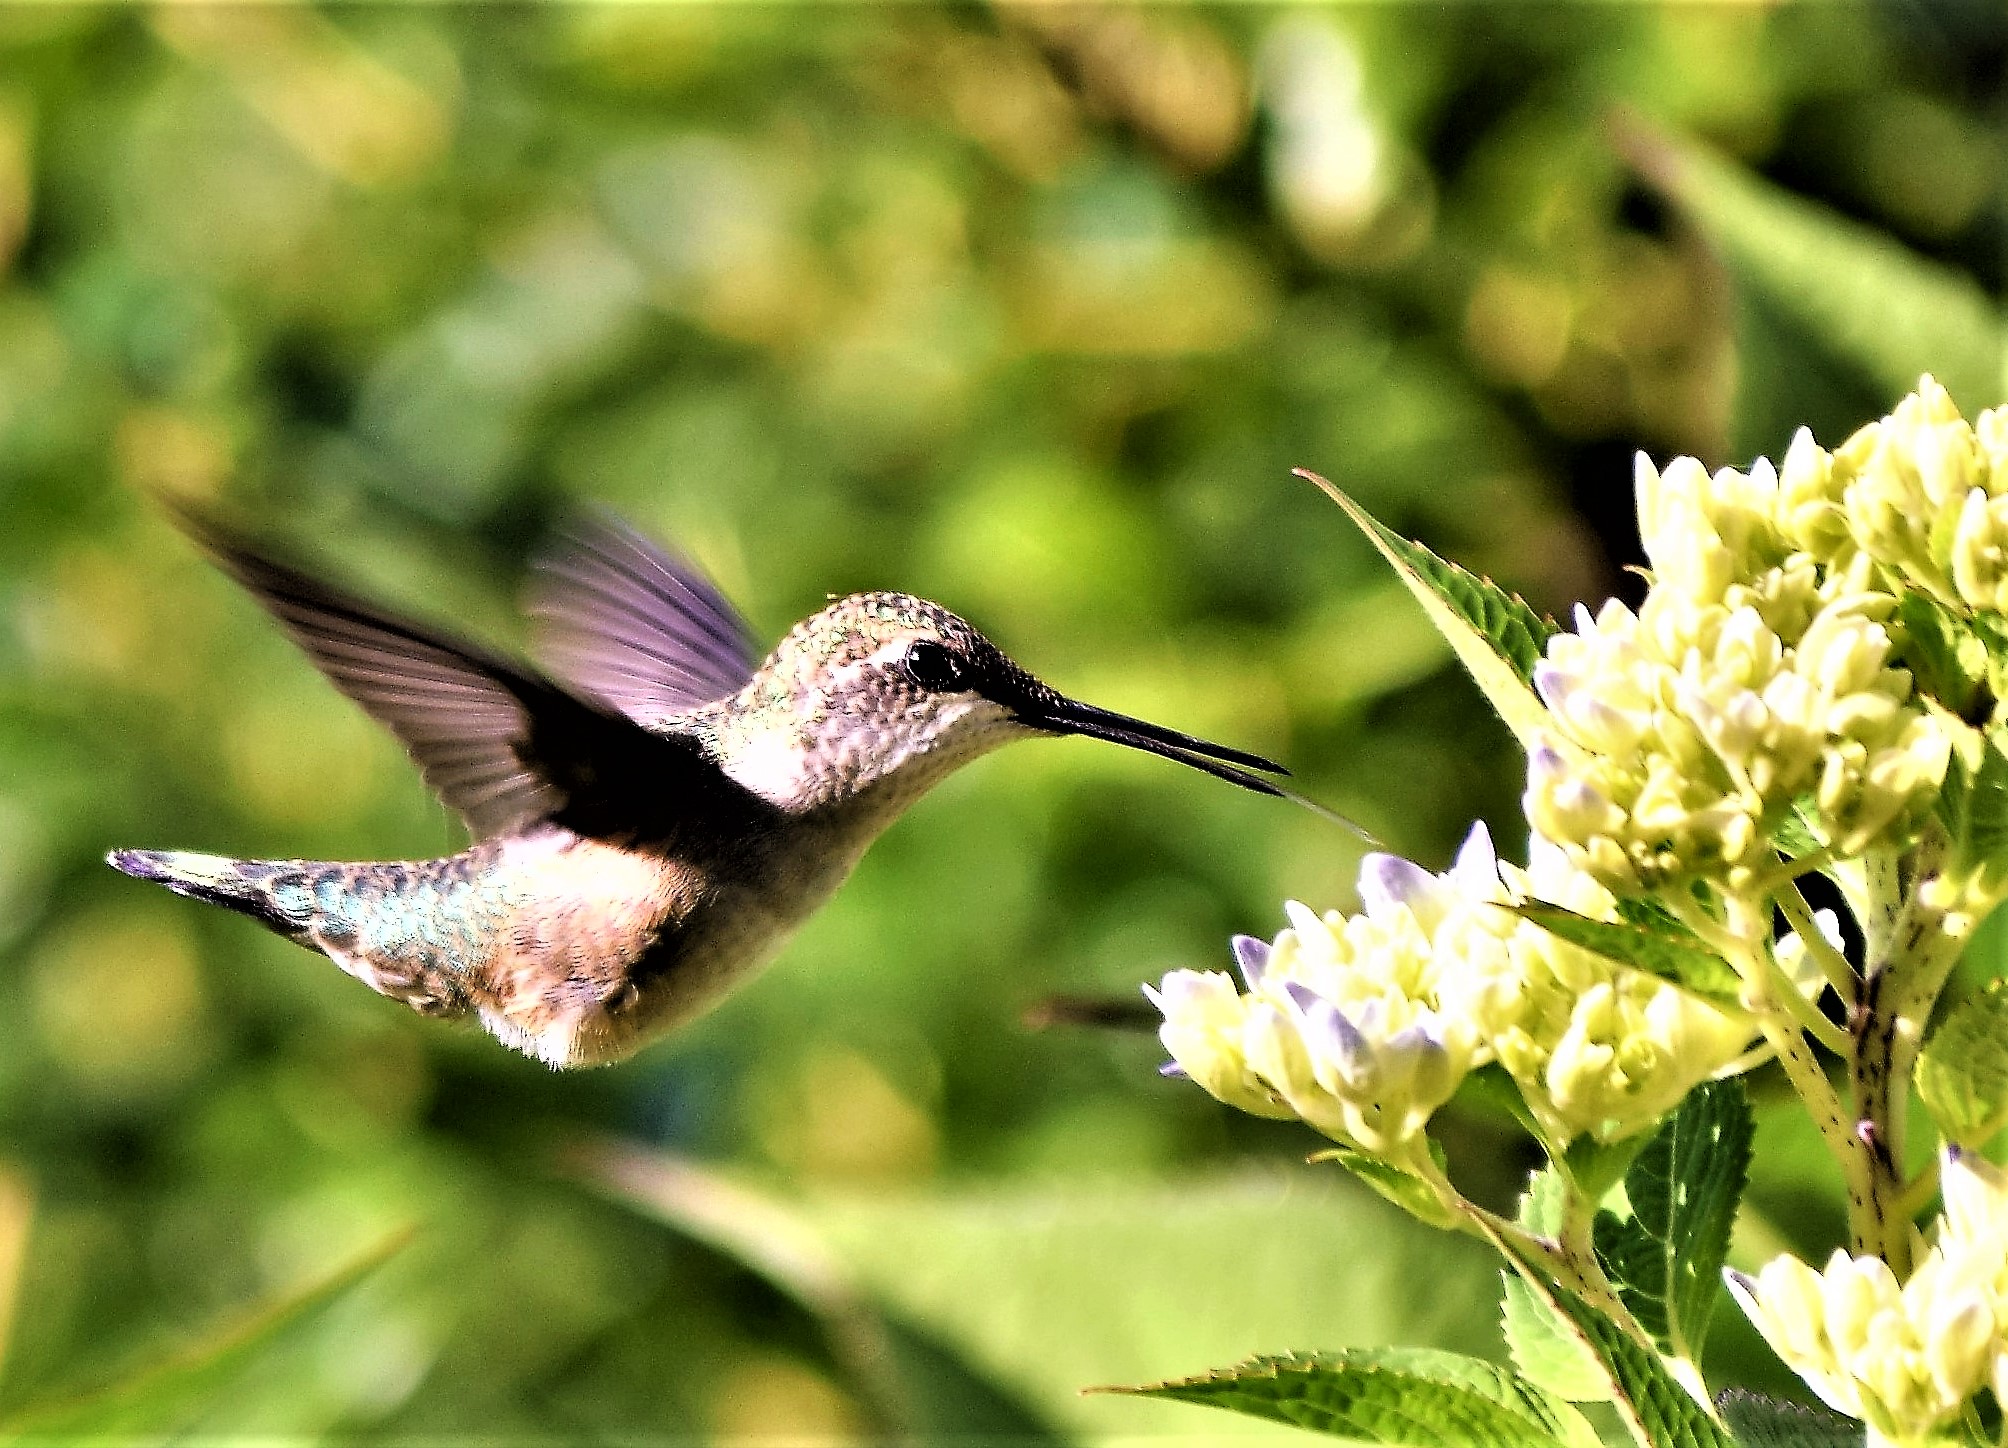
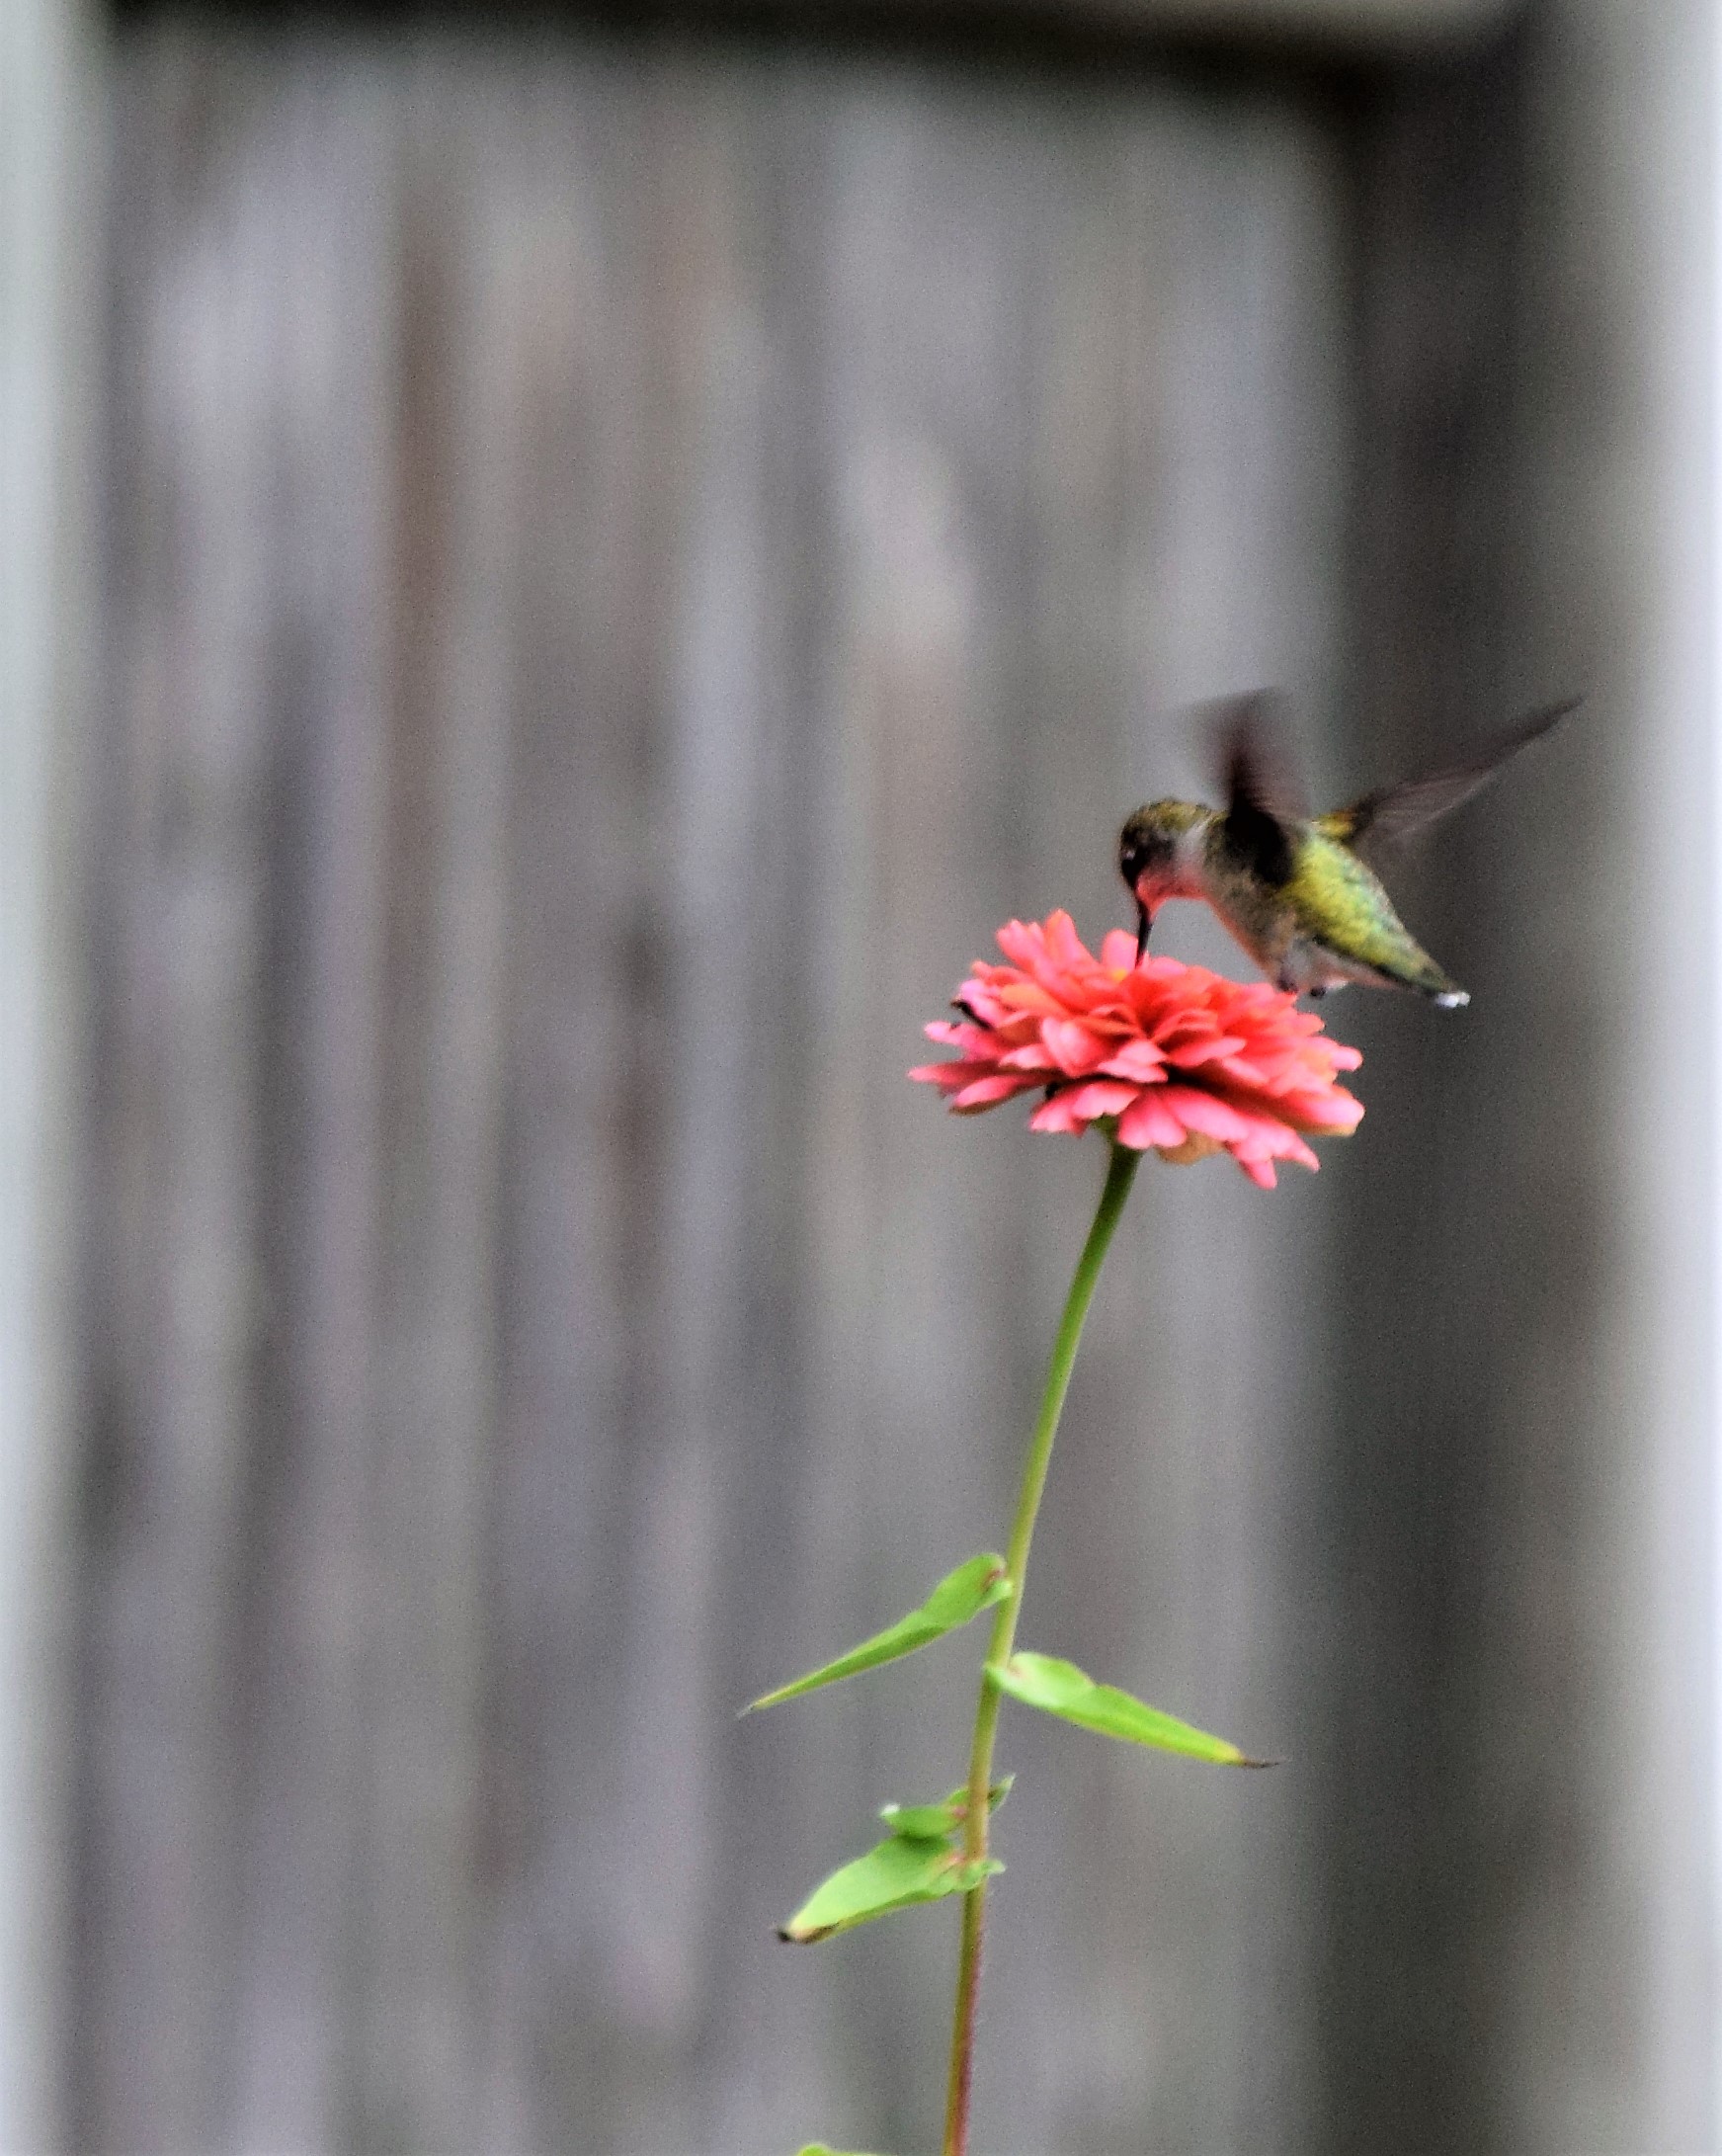
Each gardening season, I ‘discover’ something new – and usually very exciting (at least to me!) – about our backyard garden habitat. Over the past few years, I’ve spent time getting to really know ‘my’ Ruby-Throated Hummingbirds, Cedar Waxwings, and American Gold Finches. Initially, 2020 appeared to be on track to be the year of ‘my Bluebirds‘.

My Eastern Bluebird pair watching over their nesting box in early 2020 to bring food to their tiny nestlings.

While the Bluebirds were such a gift of hope this past spring – they started a new family of at least three little ones that fledged in late June – the reality of the 2020 garden turned out to be all about ‘my bees’. While not necessarily a new discovery this year, the sheer number and variety of ‘bees’ in the garden has been interesting, and on some days, even a bit exciting. Perhaps so much extra time in the garden in 2020 just provided the opportunity to become more observant, appreciative, and aware of the creatures keeping me company outside. Even as late as Christmas Day this year – when we had unusual warmth for a few days – I saw and heard bees in my New Hampshire garden — they were especially interested in the holly and the faded enkianthus tree.

Let’s get this out of the way before I continue. I am not an ‘apiarist’ aka: bee expert. I became fascinated with bees after reading Sue Monk Kidd’s ‘The Secret Life of Bees’ almost 20 years ago. That book inspired me to learn more about beekeeping, but my career in the tech industry was a higher priority back then…and I knew I just couldn’t make a living by selling honey in New Hampshire for a few months a year.

Over the years since, I’ve chatted with beekeepers and while I continue to be fascinated by these beautiful and important creatures that are detrimental to our own survival, I’ve still not pursued hive-tending or honey-gathering. Instead I’ve targeted my focus on ensuring a better environment for the bees that reside in our garden. It’s a focus that both my mom and I have become committed to in our shared garden, especially over the past decade. It’s one small way to have a personal and positive impact to address climate change.

I have friends and neighbors who are afraid of bees and when they complain to me about them, I always think about this passage from ‘The Secret Life of Bees’. It still stands out in my mind, two decades after first reading it.

I hadn’t been out to the hives before, so to start off she gave me a lesson in what she called ‘bee yard etiquette’. She reminded me that the world was really one bee yard, and the same rules work fine in both places. Don’t be afraid, as no life-loving bee wants to sting you. Still, don’t be an idiot; wear long sleeves and pants. Don’t swat. Don’t even think about swatting. If you feel angry, whistle. Anger agitates while whistling melts a bee’s temper. Act like you know what you’re doing, even if you don’t. Above all, send the bees love. Every little thing wants to be loved.”

The Secret Life of Bees

The last two sentences from that passage are key. Specifically, “Send the bees love.” I whisper to the bees while I garden (and I no longer care what my neighbors think if they hear me!) Especially in mid to late summer, I thank the bees for their hard work to keep my garden blooming all season. I also thank them for not stinging me!

Enjoying the Autumn Joy Sedum in September. My mobile phone camera captured detail that’s hard to see with the naked eye.

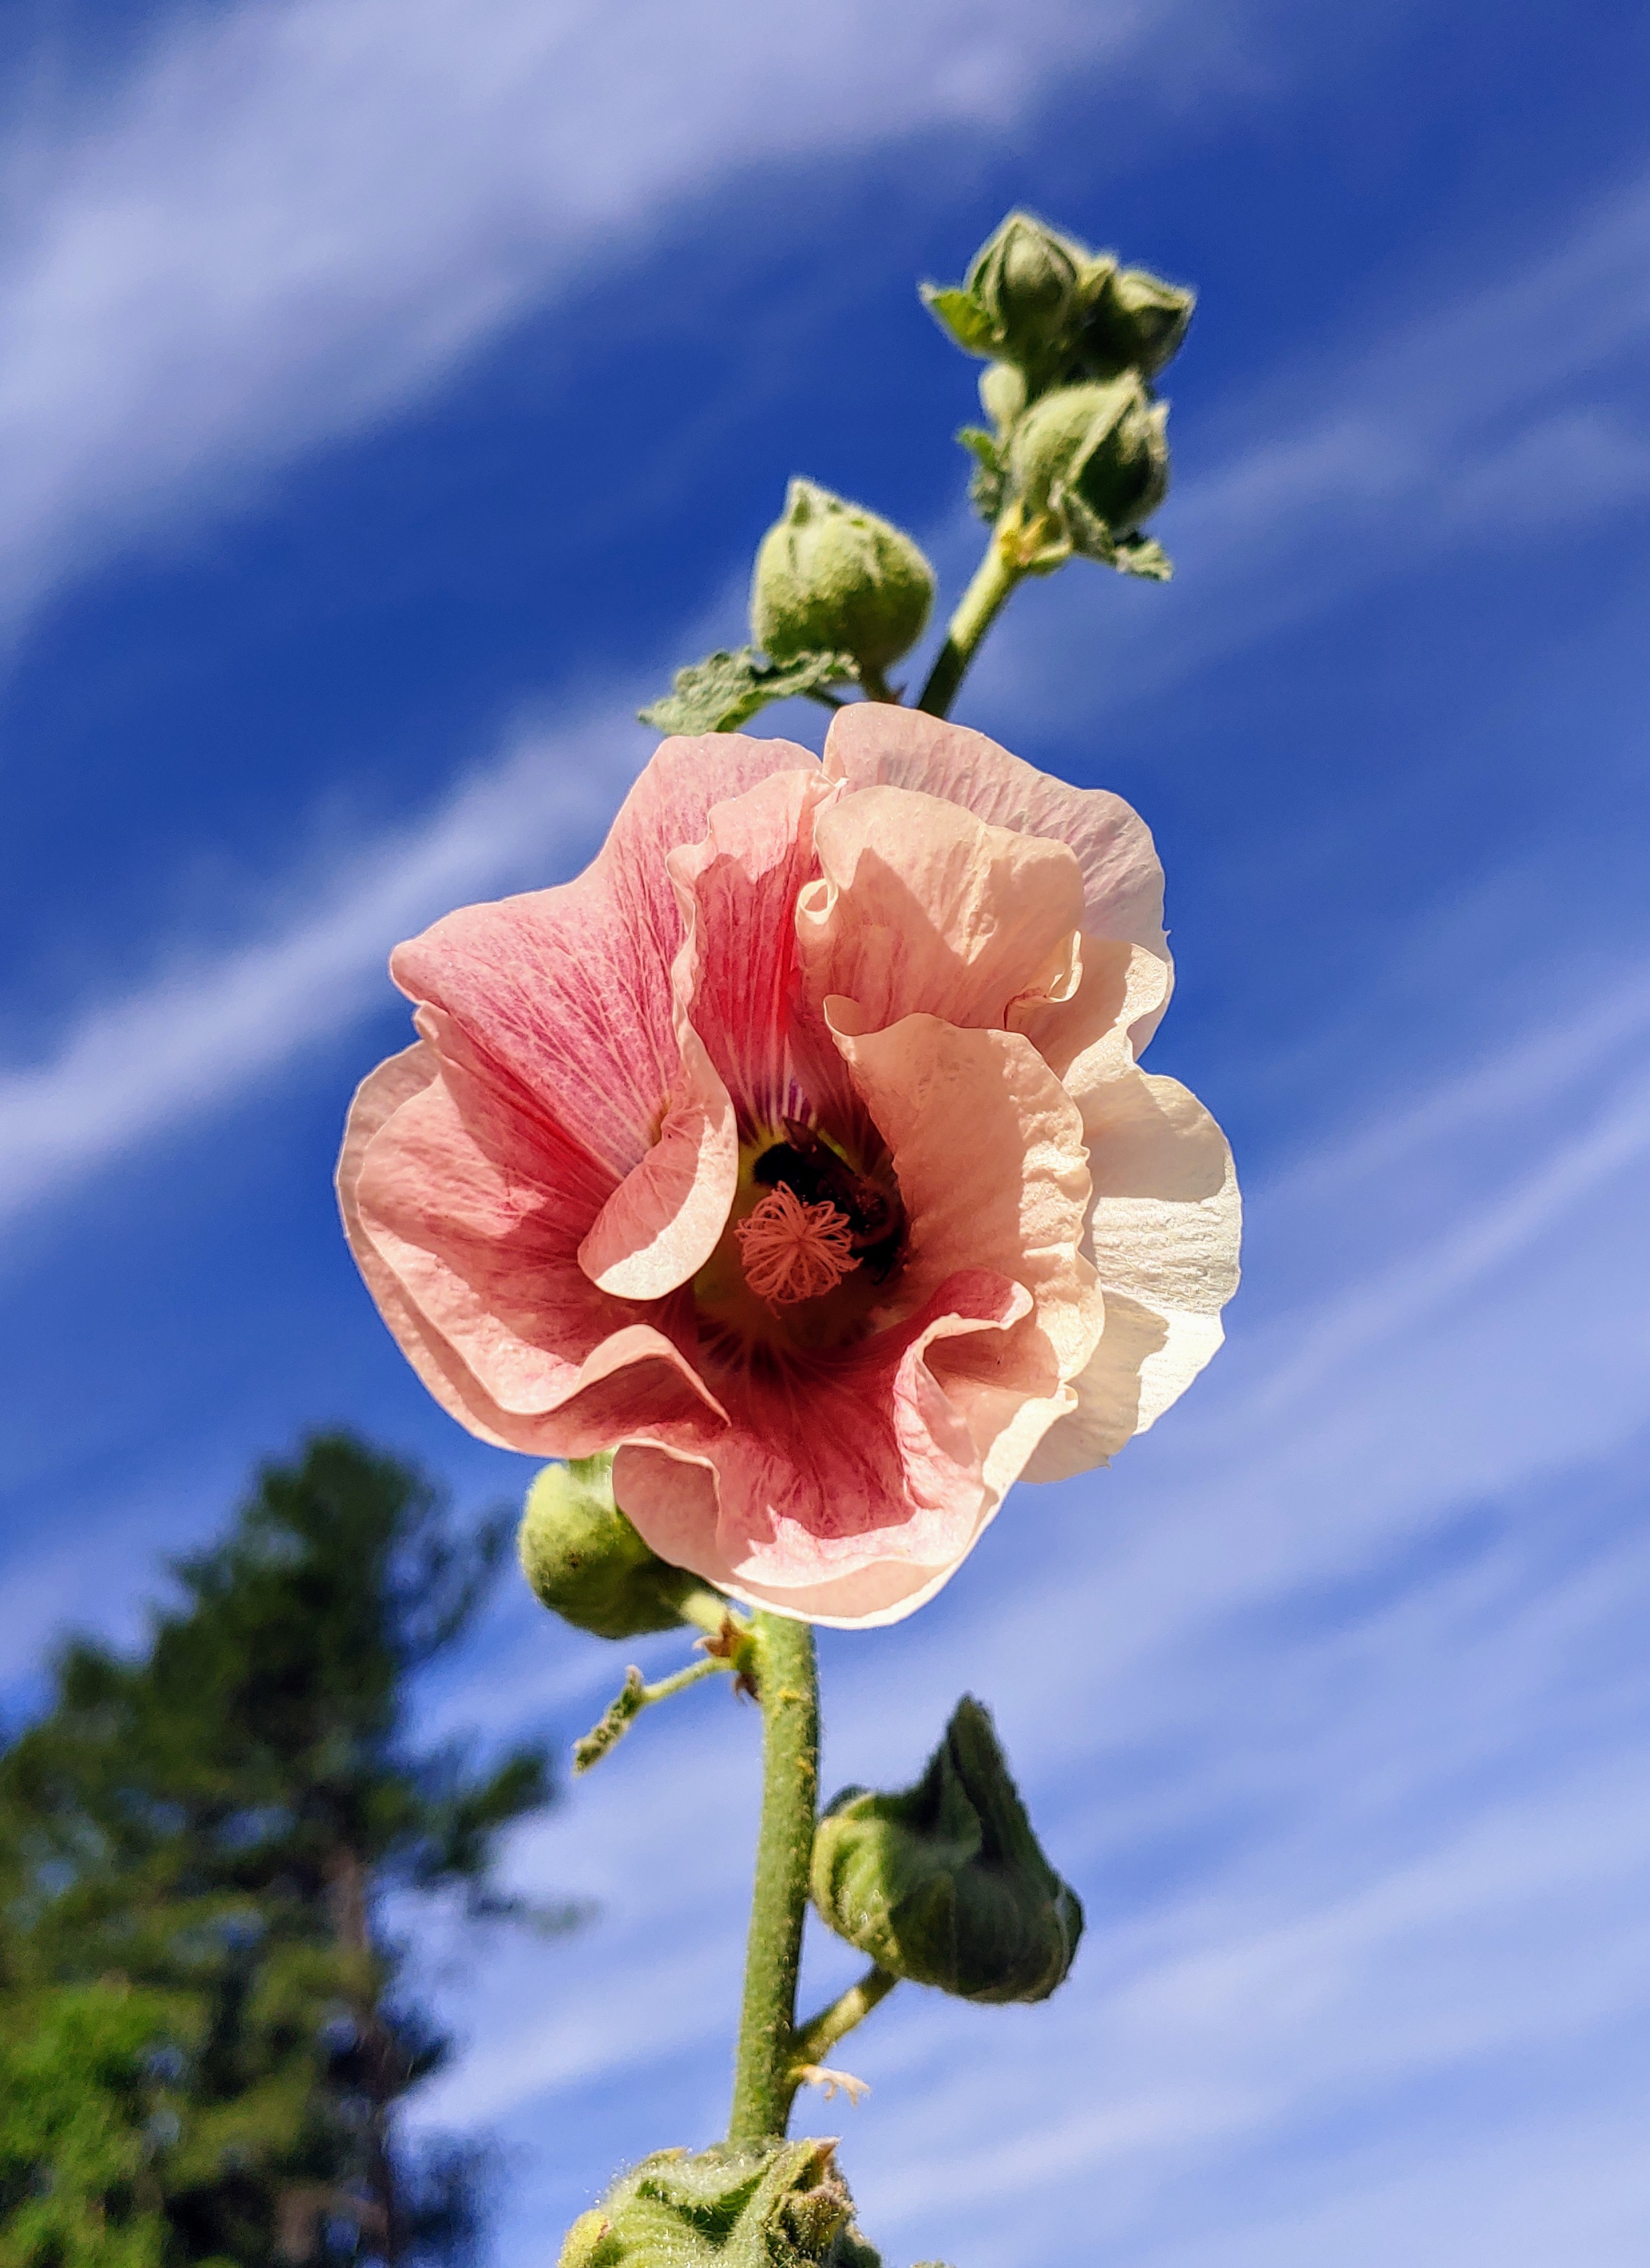
I believe the bees feel my love when I check on their well-being. On some August mornings when they are motionless, especially in my zinnias, I offer a very gentle nudge and soft hello (yes, I pat the bees like I would cat or a dog!) Every single time, they move just a bit, as if to ask me for just a little more time to rest. They certainly deserve it, so I quietly walk away and wish them a good day (with a sense of relief after seeing life). The bee in this zinnia seemed to actually roll over upon being roused when I gave it a little pat. It was just fine. Perhaps only a little overworked from a busy morning of pollinating!

A little nap on an August zinnia.

The only other times I will touch bees is when they get swept into the deep end of our many birdbaths found throughout the garden. Like all living things, bees need water. In my garden, bees can often be found around the perimeter of the birdbaths, especially after they’ve been refreshed with clean water each morning. This summer, I pulled more bees (honeybees and bumblebees) and their cousins (yellow jackets and wasps) out of their giant watering holes when I’ve seen them struggle to escape. I gently scoop them up with my hands (or a small stick for yellow jackets) and place them on the rocks or soft ground in nearby shade to dry off. Every single time, they’ve flown away a few minutes after regaining their composure. (And of course, the wasps and yellow jackets deserve a little love and to be saved, too.)

An important similarity among all of these creatures is they provide an important service to benefit our environment — they are pollinators. They do so much more than gift us with sweet honey. Without pollination, our backyard gardens wouldn’t produce tomatoes, squash, or even the beautiful berries on our shrubs, like holly. And, did you know one third of all agricultural output in the United States depends on pollinators? The produce department at your local market would be empty if it were not for bees.

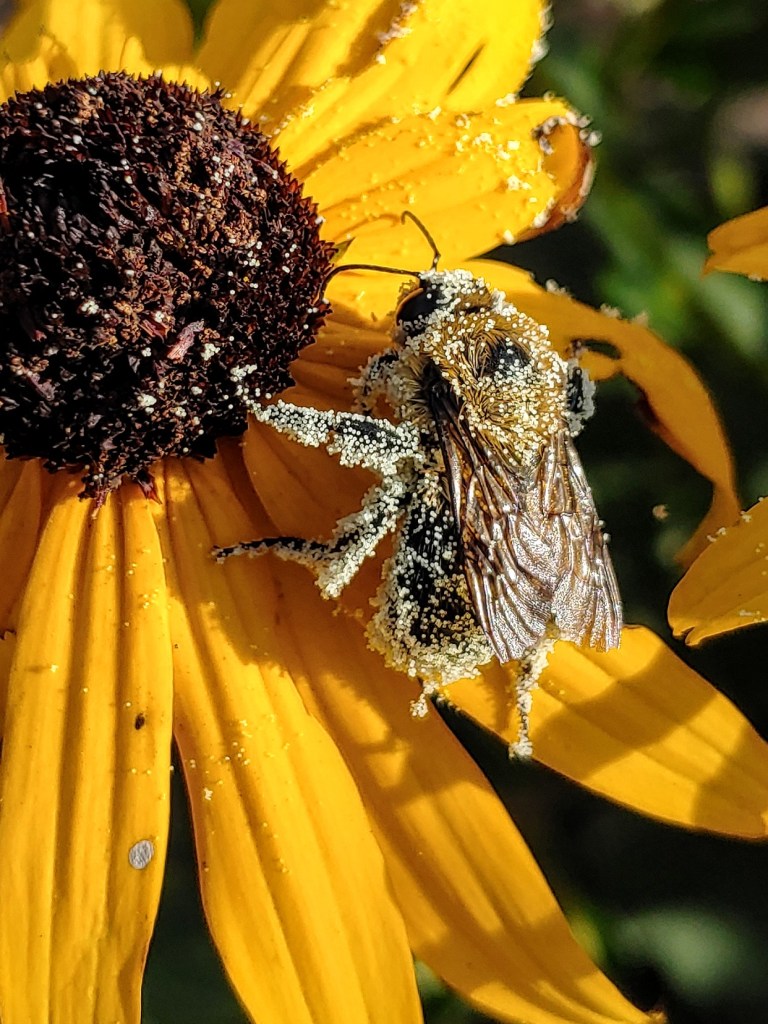
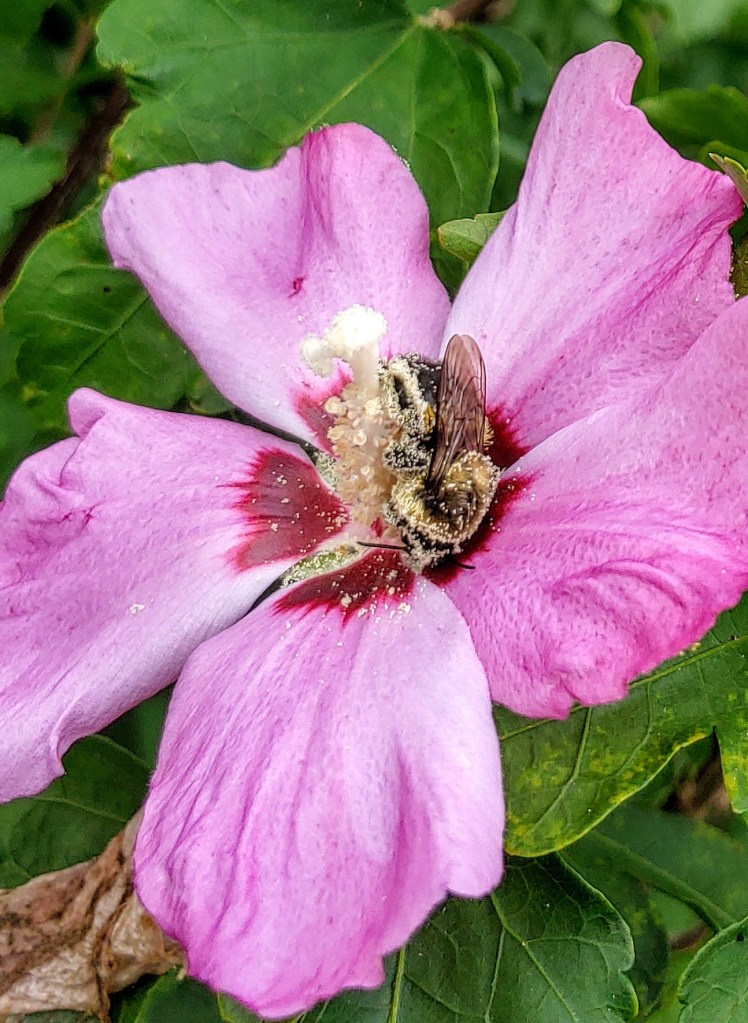
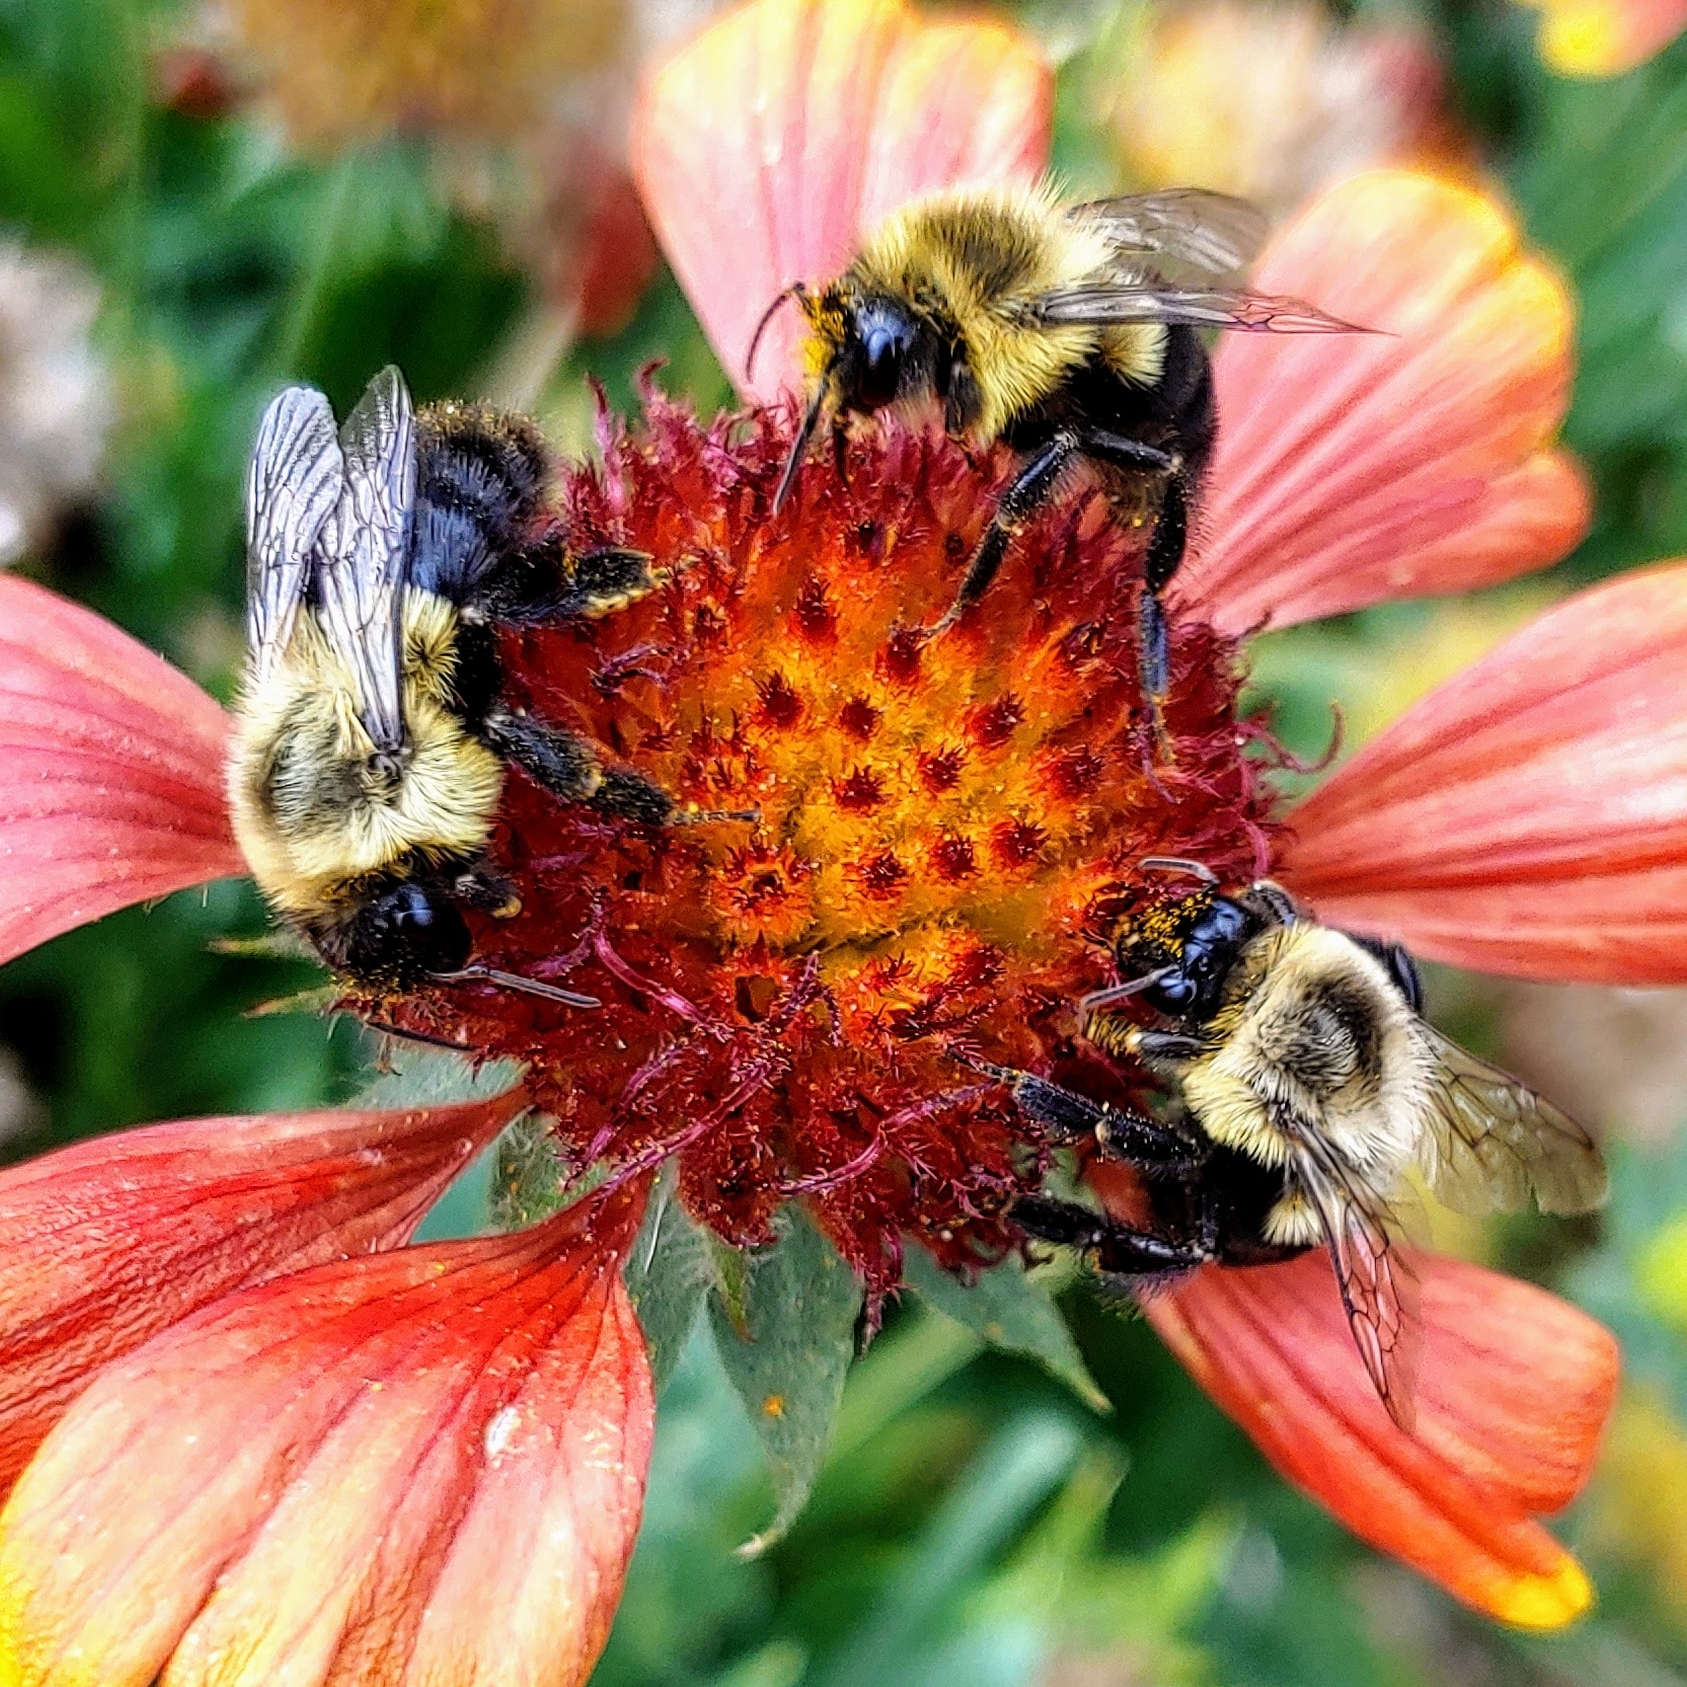
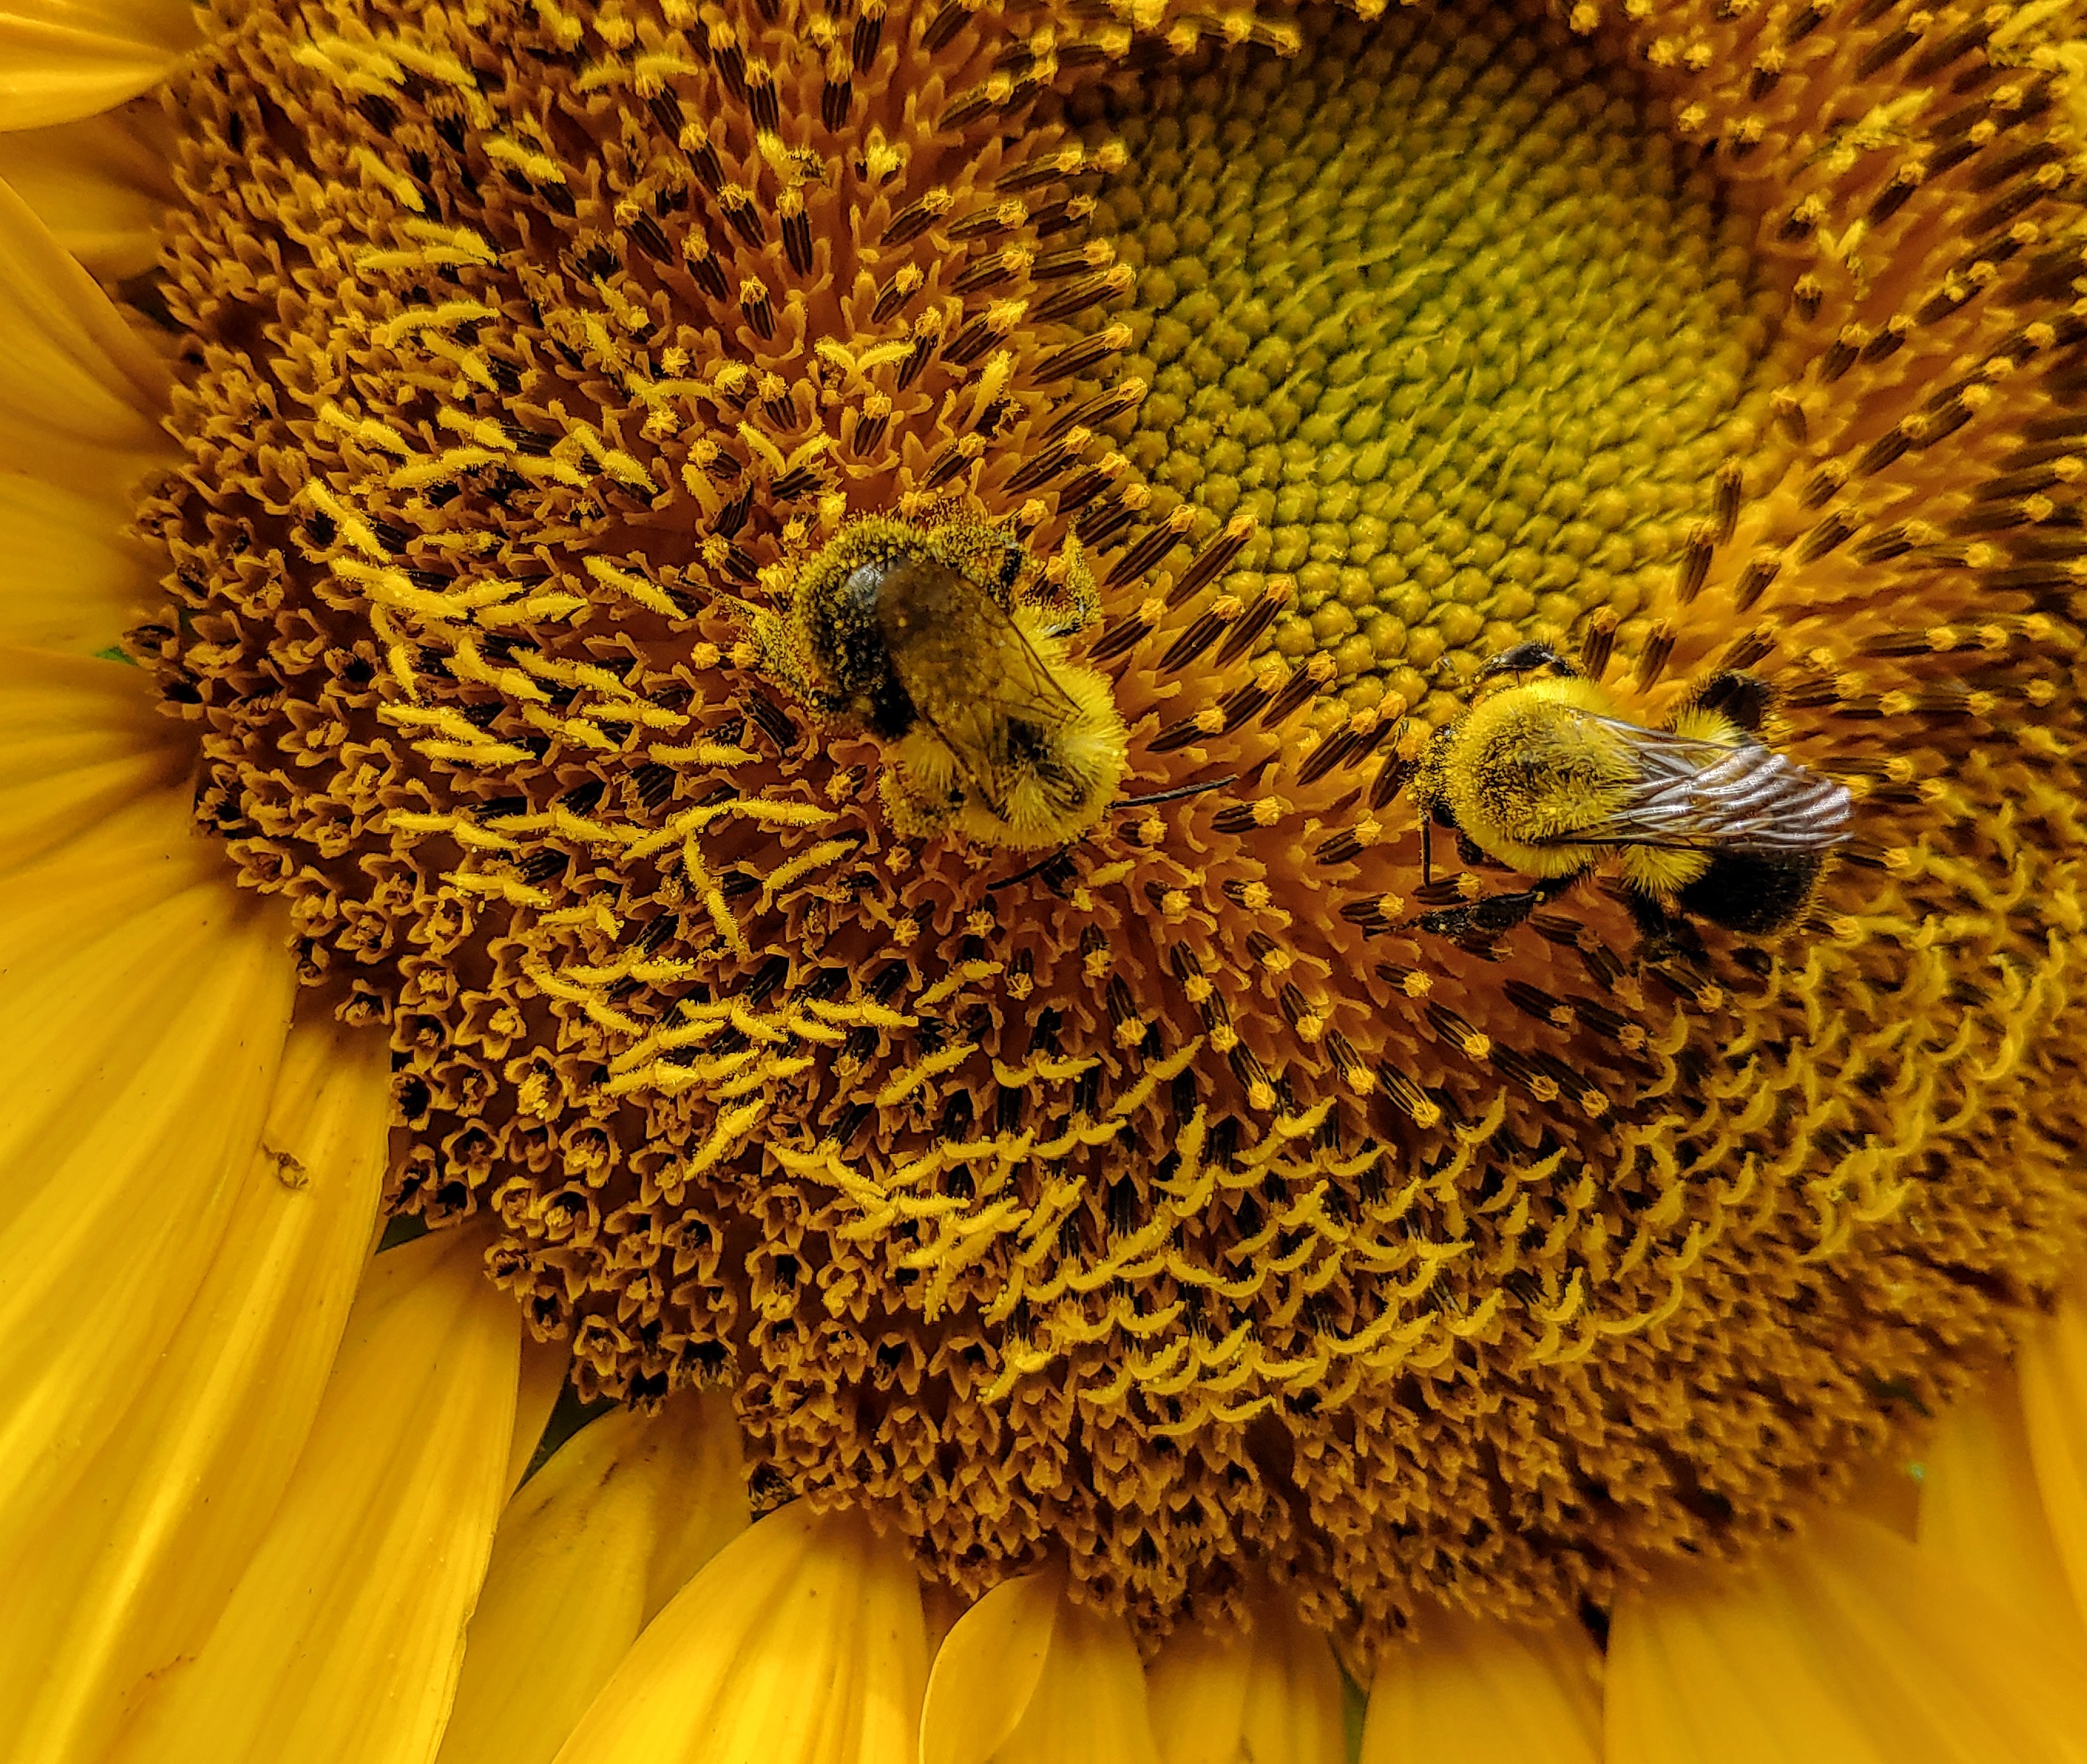
While we may read about bees pollinating flowers, we don’t often get the chance to see this process up close. Again, the extra time in my garden afforded me the opportunity in 2020 to capture why we need to better care for our bees — the amount of pollen they carry from flower to flower is nothing short of amazing. Just flying with such a heavy load looks painfully difficult when you get a look up close. These bees, fully enthralled in the pollination process of the Rudbeckia and Rose of Sharon made me think of Bess, from Porgy & Bess, and the reference to ‘Happy Dust’ in the play. (I took all of these photos with my mobile phone camera – so please ask permission before you use them for your own posts.)

So, how can you take better care of bees to ensure we all have the pollinators needed to keep our world alive? Again, I’m not an apiarist, but I do have five suggestions based on the success of expanding the bee and overall pollinator population in our own New Hampshire garden. These suggestions are ideal for any where you may garden and want to better support your own pollinators.

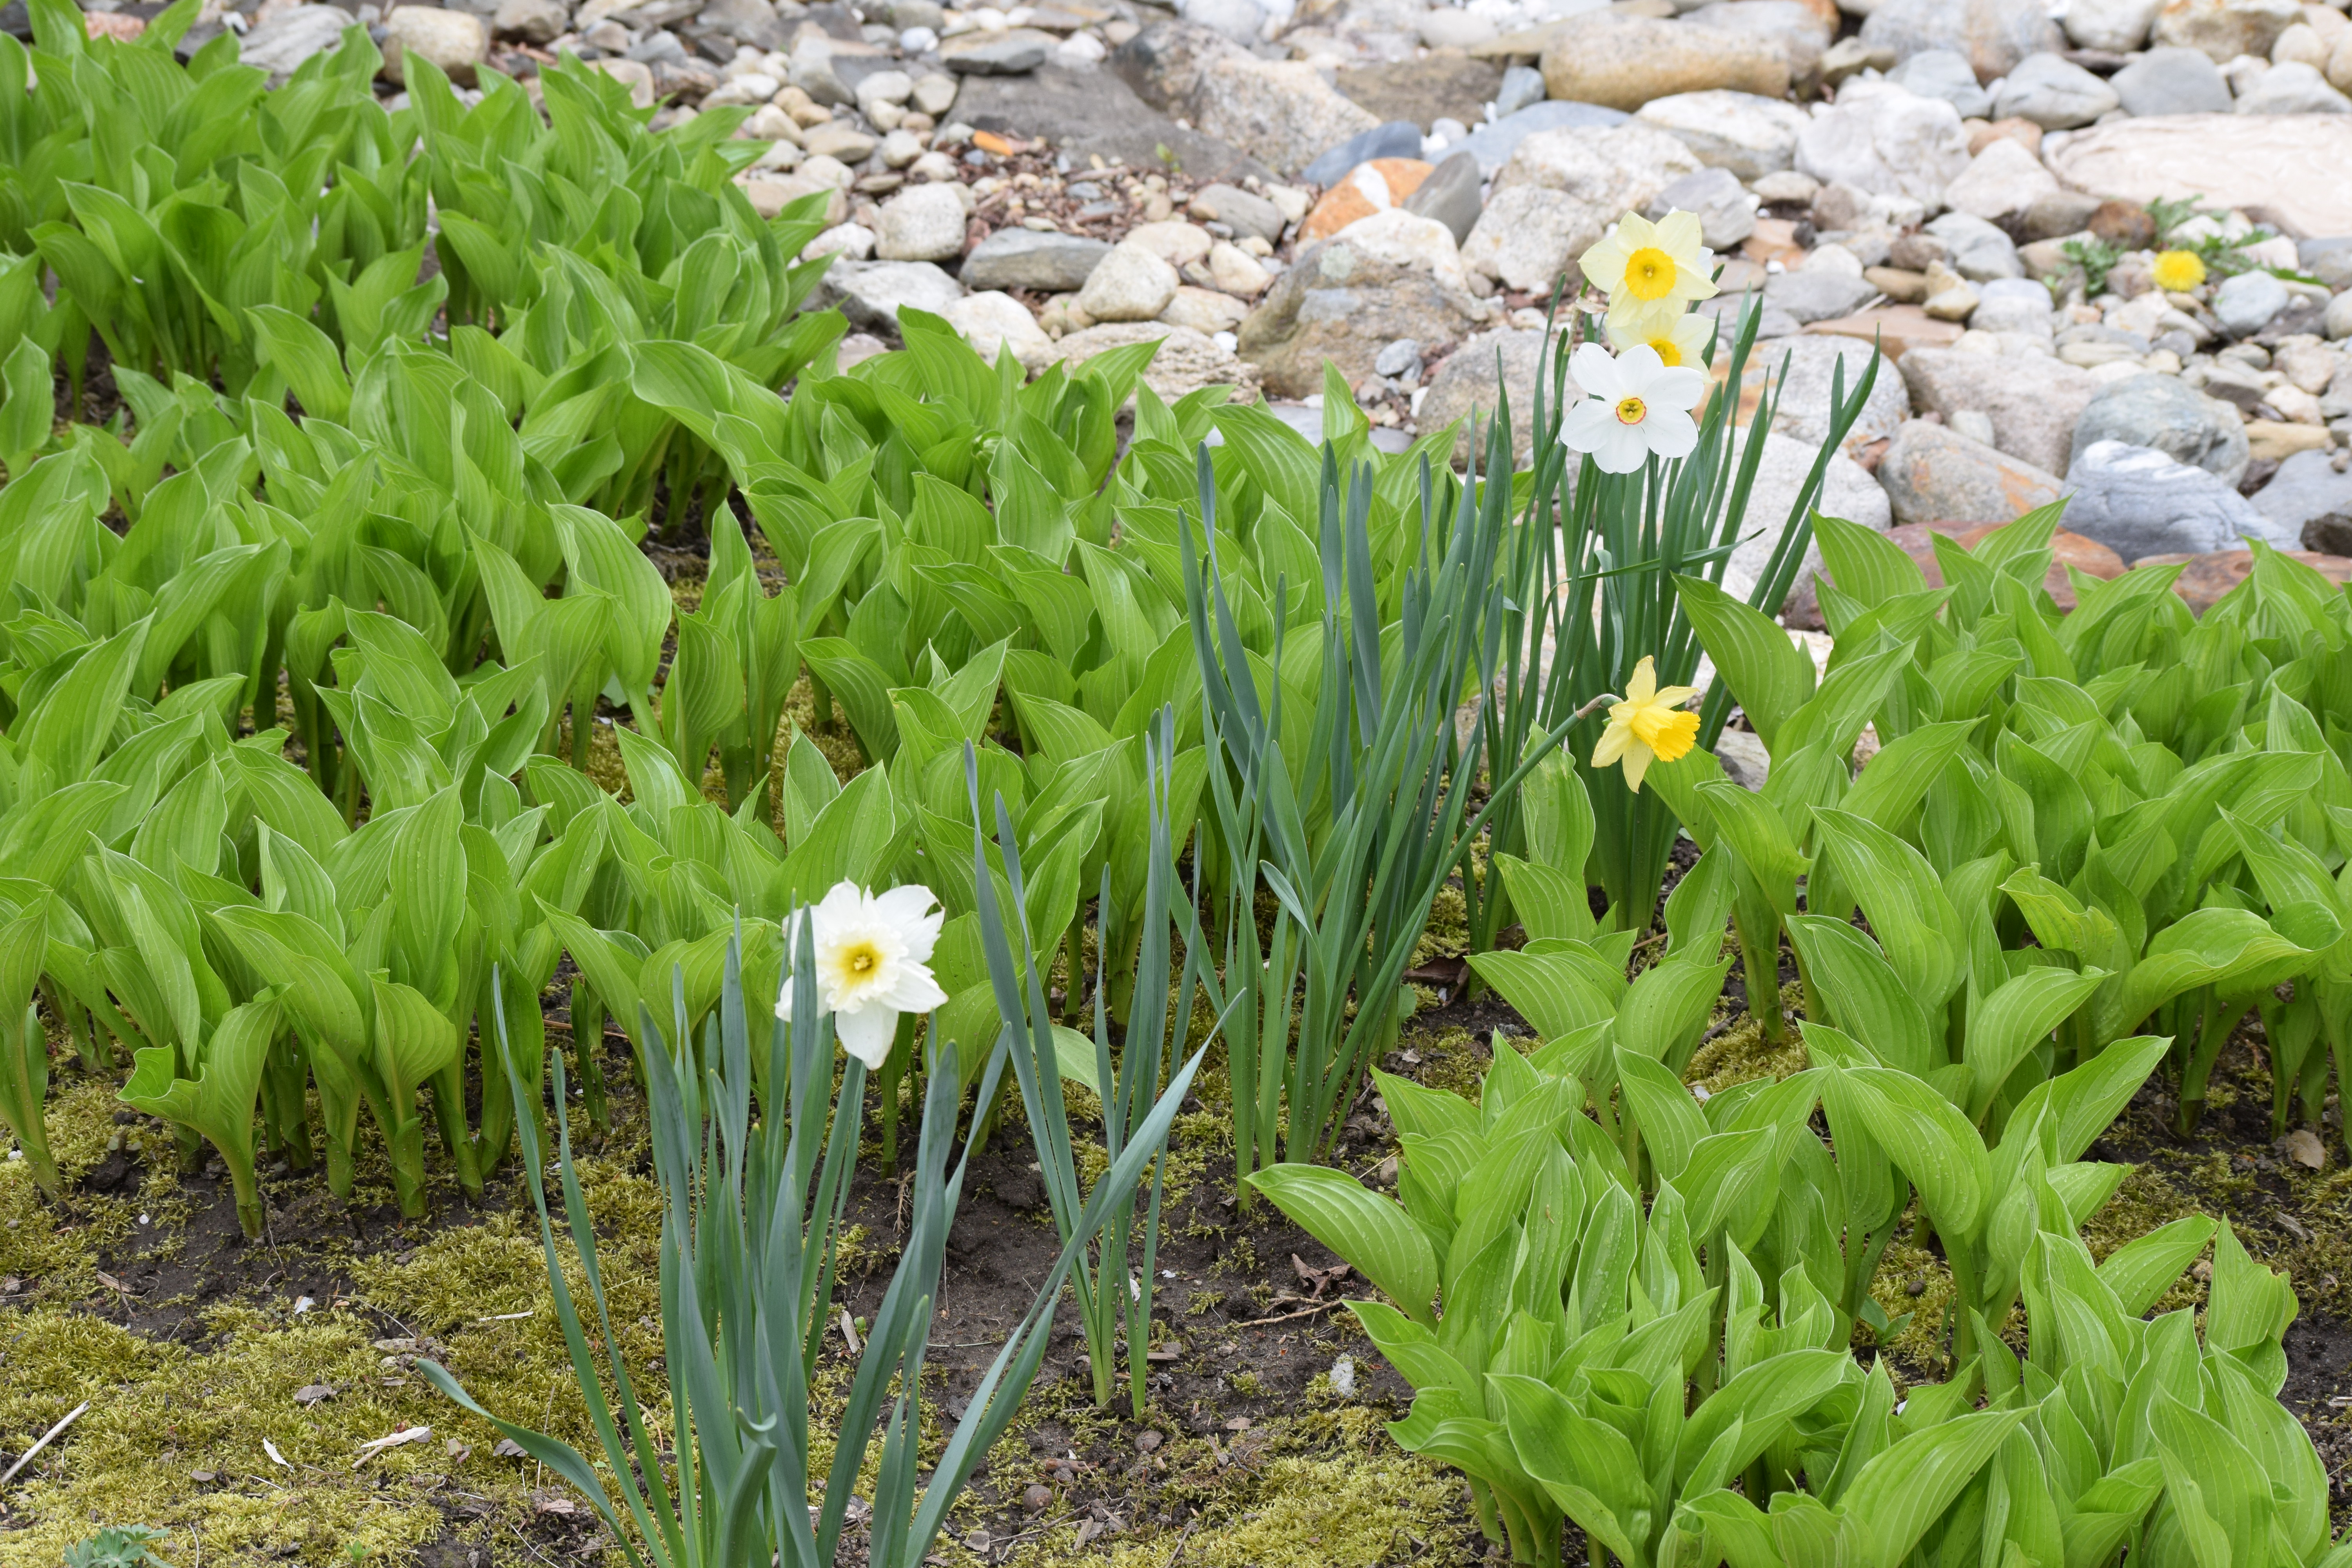
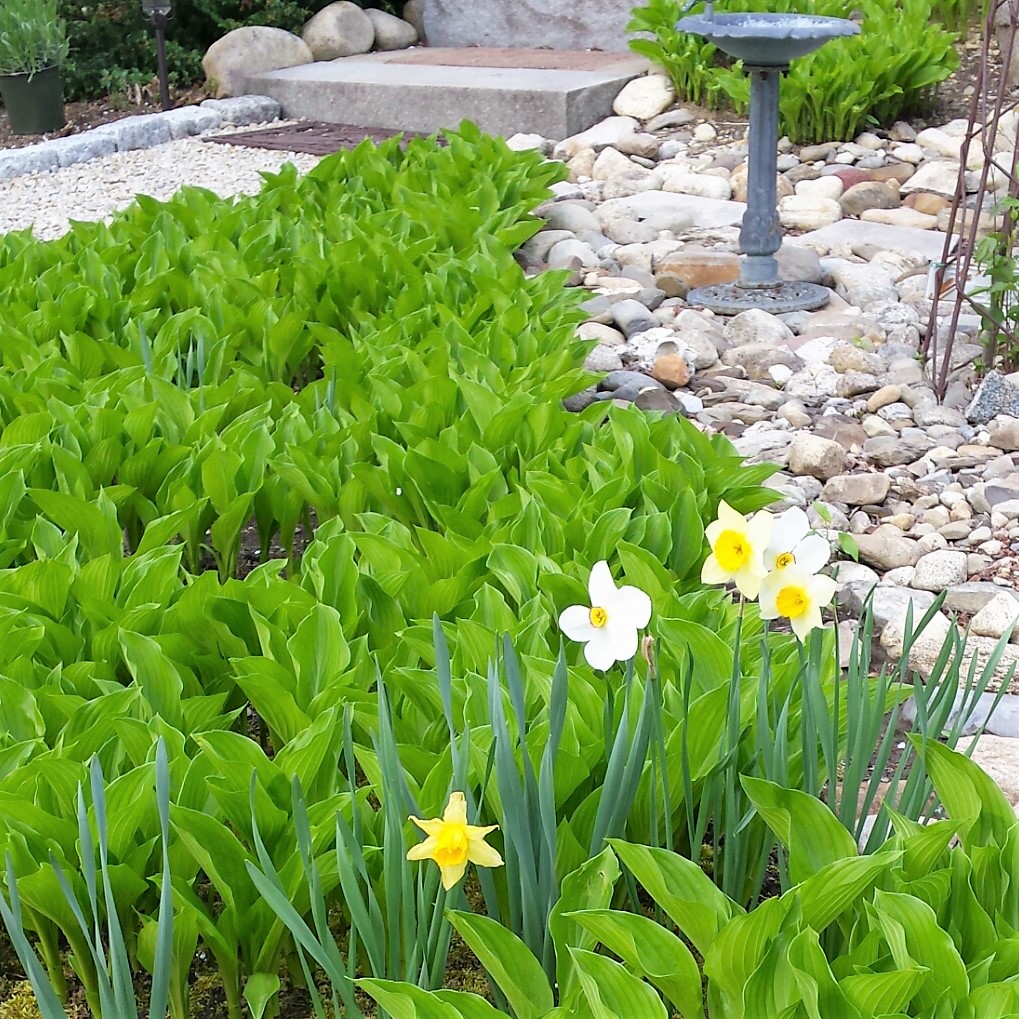
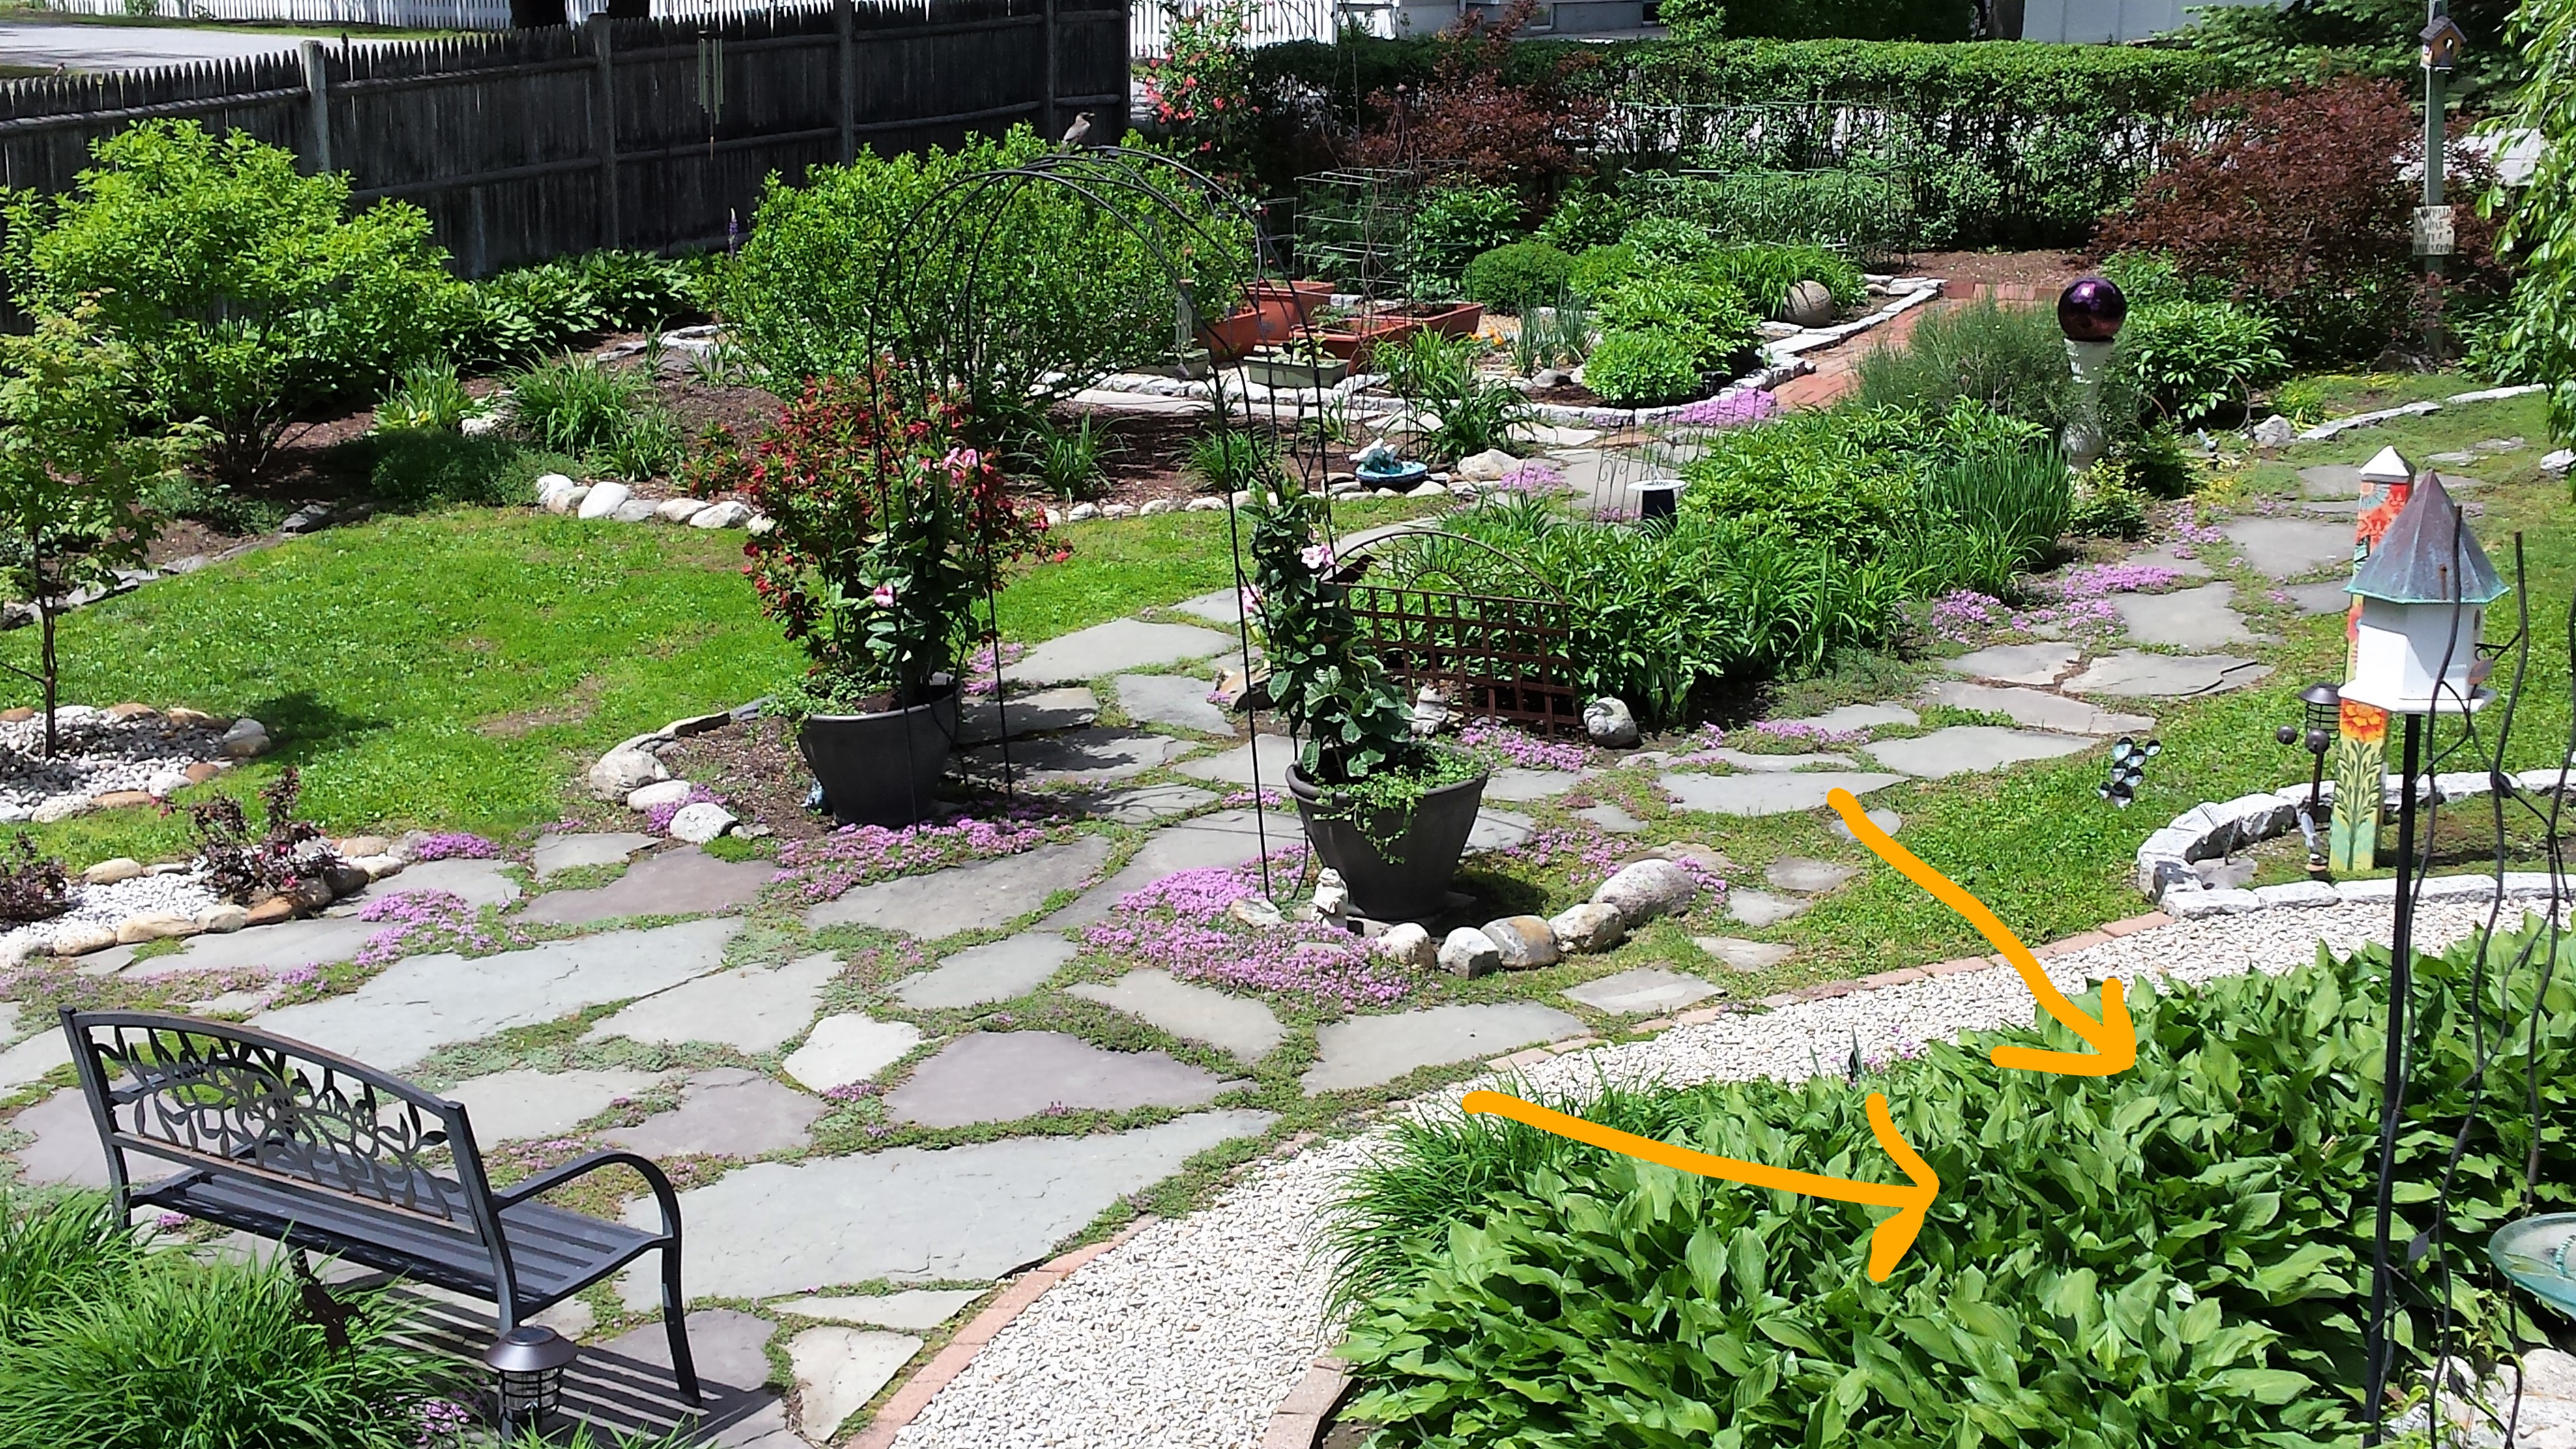
  1. Ditch the insecticides! If you kill the bees (aka: insects), you’re basically killing your overall environment. This was especially realized as we reduced the footprint of lawn in our garden over the past decade. Over the years, instead of replacing lawn that just couldn’t thrive without fertilizer, herbicide, and insecticide products, we filled in ‘bald’ spaces of lawn with white clover. While clover does well, and the cottontail rabbits love it, so instead of planting more, we’ve been adding thyme – the creeping perennial variety to create a beautiful lush lawn. It has a wonderful fragrance and colorful flowers. And best of all, the bees, as well as the birds absolutely love it!
  2. Learn to love your spring dandelions. When you stop using herbicides, you’ll find more dandelions in your spring garden. This is perfect to bring in the bees. It’s the first flower of the spring season and much needed for the nutrition of bees. I have a friend who is an avid gardener, too. Until this past year, Steve has had a natural tendency to pull up the new dandelions. For a few years, when he’d visit our garden, the impulse continued, until I shared that we intentionally keep these bright yellow flowers for the bees. It was a big ‘ah-ha!’ to Steve and now, he points out to me that he also has learned to love the dandelions — because like me, he loves the bees.
  3. Plant native perennials. Get to know your garden zone and find native perennials to plant. A Google search of native perennials and your location will give you a whole list of options. And it’s ok to change things up over time. Changing our lawn from grass to sod and back to grass, then to clover and now thyme has taken almost a decade. We still filled in areas this past autumn and I can’t wait to see how it all takes in for the 2021 gardening season.
  4. Plant colorful annuals. While our garden is mostly perennials, my favorite summer annual flowers are zinnias. They are often overlooked and I don’t understand why. They are bright and colorful. They grow in a variety sizes and thrive in all types of garden conditions but especially LOVE full sun. And they attract the most beautiful pollinators – including bees and butterflies. I’ll never not have zinnias in my garden now. In fact, I save the seed heads from my favorite flowers each autumn to plant year after year. It you’re not a gardener, like I’m not a bee expert, you will surprise yourself with zinnias and become hooked. (I promise!) Check out Renee’s Garden Seeds to get started. I absolutely love their annual seeds – in addition to zinnias, they have special seed mixes especially to attract bees. I tried the Beekeepers Mix and it’s beautiful!
  5. Make your garden hospitable to bees! Once you cover items 1-4, be sure to add water features to your garden. Even a birdbath helps. There are also ways to set up watering stations for bees, with shallow areas of water and rocks. Also, at the end of the gardening season, save some of your leaf pickup and pruning until spring. Give the bees a place to take cover in the winter. Another option is to check with local beekeepers in your area. If your garden is hospitable for bees, you may even be able to ‘rent’ a hive for your garden that is tended to by a professional. (This is something I’ve been thinking about for a few years now.)

I hope you’re a little more inspired now to believe in your bees as we look ahead to 2021. What’s not to love? They keep our gardens, our souls, and even our world alive. It’s time for all of us to make sure we give them a chance — which ultimately gives all of us a chance. Enjoy these additional photos of bees from my 2020 garden.

“The hum of bees is the voice of the garden.”

~Elizabeth Lawrence


2 Comments

Still Picking Weeds? Try ‘Pickling’ Them Instead

It’s been a cool, rainy spring in southern New Hampshire. The perennial garden is lush and green. The annuals, including the tomatoes and zinnias are are showing quick signs of life and the weeds…..well….they are EVERYWHERE!

A few years ago, the mulched paths throughout our gardens were replaced with stone – a combination of pea stone, blue stone, and crushed rock. The goal at the time was to reduce the overall costs and time associated with mulching and weeding. Replacing mulch made from organic matter that breaks down – with various types of stone that lasts forever – added new interest to the landscape and made weed control (a little) easier.

Rock and Stone throughout the garden.
The winding rock and stone paths across the garden.

One of the biggest challenges with these paths is weed prevention. And when that’s neglected, actual weed removal is an even bigger headache. The wet spring resulted in fewer days working in the garden during May and early June, resulting in a sudden explosion of weed seedlings throughout the stone paths. (You can see the growth in the pea stone path between the two garden areas below.)

The beginning of a weed nightmare in the garden path!

Rather than spend hours picking through the stone to remove each tiny weed at the root, only to see them return in a few weeks, I researched some easier options or what I call ‘garden hacks’. In the past, Round-Up was used sparingly – before we knew how bad it is. We’ve also used vinegar, both straight and diluted, as well as boiling water. Truth be told, the vinegar option in the past worked, but weeds always returned.

After a little online research – as well as anecdotal conversations with friends who have tried various techniques to kill weeds, I found a vinegar-based recipe to spray on the weeds that expanded on the previous somewhat success of using vinegar. This recipe includes the use of table salt (1c) and Dawn dish detergent (1tbs) with household vinegar (1gal). The vinegar and sodium kill the weeds by dehydrating the weed, interrupting its internal cell structure. The detergent acts as a surfactant to ensure the vinegar and salt stick to the weeds. An important note here is that this mixture should only be used where you don’t want ANYTHING to grow. The salt, specifically, can wreak havoc with the structure of your soil. This is why I tried this solution to only on the rock pathways.

It WORKS….FAST! I used a watering can (special one set aside for projects like this so I it’s not mistakenly used for other purposes in the garden) and after a few days, went through over 25 gallons of vinegar and 25 cups of salt! The photo here was the first 17 gallons – the Nashua city workers who do our recycle pickup must be wondering what’s going on at my house! I’ve now found generic household vinegar and salt to use to save a little money – but continue to use Dawn.

Within an hour, the weeds – big and small started to disintegrate. Within a day, they were pretty much all together gone. They shriveling up to almost nothing and apparently blew away.

Dandelion – 1 hour after treatment with vinegar, salt, and Dawn.

The majority of the time to complete this weeding project was spent stirring the salt to make sure it dissolved in the vinegar. It’s also important to gently stir in the Dawn at the end to avoid creating suds.

It’s been almost three weeks since I’ve ‘pickled’ the weeds in my garden paths. And so far, none have returned. I believe this is a simple, safe, inexpensive, and fast solution when used in the proper areas of your garden. The only drawback is the entire garden reeks of vinegar and salt for a day or two. (Be forwarded – you may start to crave pickles or salt & vinegar potato chips when you pickle your weeds.)

IMPORTANT NOTE: Of course, nothing is fool-proof. Two years ago, I shared thoughts about weeding the thyme that grows in the blue stone paths in my garden. Since I do want the thyme to grow in this area, the ‘pickling’ solution is not appropriate for this part of the garden. The only way to ensure I don’t have a followup to that earlier weeding sob story is a commitment to due-diligence now to pull the weeds in the thyme path as they pop up. Since I take a daily walk thru the garden, this is simple and effective, especially when I use my handy-dandy CobraHead mini weeder.

“I always think of my sins when I weed.  They grow apace in the same way and are harder still to get rid of.”

~Helena Rutherfurd Ely, A Woman’s Hardy Garden, 1903


4 Comments

9 Affordable Gardening Gift Ideas Your Favorite Gardeners will Love

With the holiday season upon us, sometimes it’s hard to shop for your favorite gardener who can’t (or just simply won’t) articulate what they have on their secret wish list.  And, even when you search online for ideas, the majority of suggested gifts for gardeners are compilations of things that retailers think every gardener will love – based on their need to move inventory.

Look no further, I’ve created a list of nine proven and tested gardening focused gifts – based on my own personal experience as a longtime gardener – to ensure you get at an ‘oooh’ and maybe even an ‘aaah’ when you choose some of them for your favorite gardener – or maybe even yourself.

1. Spear Head Spade (SHFD3) – $52 

“A shovel?” you ask. Let me tell you from my personal experience – Absolutely YES! This is by far my all-time favorite gardening tool – EVER. I came across it a few years ago at the Boston Flower & Garden Show.  Not your average shovel or spade, the Spear Head Spade claims it was “designed to make your toughest digging 80% easier.” That’s a pretty big promise – and  I can attest that it’s absolutely true. This ‘Made in the USA’ tool is light-weight but has a very sturdy construction – the handle and blade never bends, like so many other shovels and spades.

My Spear Head Spade was put to the test this fall in my own garden. Over 25 years ago, about a dozen Japanese Barberry bushes were planted along the perimeter of my front yard, inside the fence. They are beautiful shrubs and their prickly nature tends to keep deer out of the garden. However, now that this shrub is prohibited from being sold since being classified as an invasive species, this summer we decided to remove them all. A dreaded garden chore.

I’ve had my Spear Head Spade for about five years now, and always found it helpful when digging in my root-bound garden, but kept putting off the chore of removing these shrubs. To my surprise, this spade significantly reduced the challenge of this feared gardening project. The sharp edges glided into the soil like a hot knife through butter. Had it not been for a few tap roots that were up to six inches in diameter and needed to be released with a saw, the shrubs would have lifted right out of the ground with just this spade in a matter of minutes.

20150504_104802

While it may be difficult to gift wrap, you can be confident that this present for your favorite gardener will be treasured and they’ll thank you for years to come. Heck, you should even pick one up for yourself. Even if you’re not an avid gardener, this will probably be the last spade or shovel you’ll ever need to buy.

2. CobraHead Mini Weeder & Cultivator – $21.95 

Here’s the other tool I’ve included on my list – and it’s something I’ve already been highly recommending to my own friends for the past year. While some people find the act of weeding to be therapeutic (my mom is one of those people), I find it to be one of the most boring of all gardening chores.

The challenge with weeding is that once you let that task fall by the wayside, you’re in trouble and it takes even longer to rectify your situation.  Shortly after writing my Weeding Thyme story in 2017, I received a package from the CobraHead company asking me to try their new ‘mini’ tool (I’m a member of the Garden Writers Association and love when gardening focused companies share their product information with me – receiving the actual CobraHead Mini tool to try first-hand was an added bonus!)

Cobra

I’d always seen the CobraHead in catalogs but never felt compelled to purchase one. Based on my experience with this tool, that was definitely a mistake. I received mine right after I’d already caught up on my biggest weeding project of the year, so it wasn’t until this spring that I was able put the CobraHead Mini to the test. I absolutely LOVE it and have other friends who have purchased their own who, like me, wish they’d had this tool sooner.

Like the Spear Head Spade, the CobraHead weeder is ‘Made in the USA’ and is extremely durable. It keeps its shape, no bending or breaking, even in the toughest of soil conditions. It’s sharp and has cut my weeding time by more than half.  This gift is easier to wrap and will fit nicely into your favorite gardener’s stocking.

3. Gardenologist Tee Shirt – $24

This product is made in New Hampshire by a very cool company called Talk it Up Tees.  I live in the Granite State, and love that it’s from a local company. But, I especially appreciate this shirt because it communicates everything I love about gardening.

TalkitUpTees

Honestly, it’s too nice to wear while working up a sweat in the garden, but I love putting it on at the end of the day when I relax to enjoy the results of my efforts. My friend Jane gave this shirt to my mom and me last summer – she found them at a lovely little shop down the street called Amelia Rose Florist. As a recipient of this gift, I think of Jane whenever I put it on. And I love that it’s a V-neck design, offers a woman fit and is very soft cotton knit.

4. Boston & Garden Flower Show Tickets – $20 

After the holiday season, as the darkness of winter finally settles in, every gardener looks forward to longer days and the first flowers of spring. While providing longer days are out of your control, you can treat your favorite gardener to an early preview of spring flowers with tickets to this year’s Boston Flower & Garden Show, taking place March 13-17, 2019.

The show features life-sized gardens that are a delight to see just before the calendar transitions to spring. The event also offers an array of lectures and seminars – as well as a gigantic marketplace. (I actually discovered and purchased the Spear Head Spade at this show in 2014.)

According to the show’s website, “This year’s show theme is “The Beauty of Balance” which is a key factor in design decisions, plant and material choices, and in cultivating the right-size garden for our lives and budgets. We explore the harmony we create within our gardens, vases and living spaces.”

bostonflowerandgardenshow-logo

While I try to attend the show every few years, I last blogged about the Boston Flower and Garden Show in March 2014 after attending following a very long hiatus. I look forward to attending and writing about it again in 2019.

If Boston is out of your travel zone, search your area for regional flower and garden shows. Most offer tickets in advance and it’s a wonderful, thoughtful gift. Here’s a list of events across the United States. Another option is to tie your visit to a flower and garden show to a travel excursion.  I know that one of my bucket list shows is to attend the Chelsea Flower Show in London some day. If you have some frequent flier miles to use up soon, that event takes place in 2019 in late May.

5. Gardeners Nail Brush – $14.95

Alfred Austin said, “The glory of gardening: hands in the dirt, head in the sun, heart with nature. To nurture a garden is to feed not just on the body, but the soul.”  This is so true.

But with your hands (and often feet, too!) in the dirt, a good nail brush is a gardener’s best friend. Seriously, this little self-care item is often overlooked until it’s really needed.

nailbrush

For years, I’d been using small plastic brushes in the shower for my hands and feet after a day of heavy gardening, but love this German-made beechwood brush with natural bristles, recently purchased from Vermont Country Store. It’s another one of those items that a gardener may not splurge on for themselves, but it’s a gift that will be appreciated – especially in the early spring after those first few days of venturing out to finally stick those hands deep into the dirt again after a long, cold winter.

6. Gardener’s Hand Recovery – $26

After a scrub down with the Gardener’s Nail Brush from the Vermont Country Store, I treat my overworked hands to Crabtree & Evelyn’s Gardeners Hand Recovery. I first tried another scent of the Hand Recovery almost 20 years ago, thinking it was a lotion. It’s not – it’s a exfoliator and moisturizer filled with shea butter and macadamia nut oils.  During gardening season, use this product a few times a week on clean dry hands.  After a thorough scrubbing, you simply wash the product off your hands for what seems like a miracle result. Almost better than a professional hand treatment at a spa. (I sometimes use it on my feet, too!)

handrecovery

The scent of this product is clean and fresh, so it’s perfect for both women and men. Even better, it’s created without mineral oil, parabens, or lauryl sulfates.  Treat your gardening friends to the gift of hand recovery – it’s easy to wrap or slip into a stocking – and you can make it an even more thoughtful gift by adding a nail brush to go with it.

7. Corinthian Bells Windchimes – $12.99 – $776.98

This is my favorite luxury gift for gardeners. There are several sets of these bells of varying sizes across my garden. The 65″ black bells hang from a tree in the back garden. My mother refers to them as the church bells (the garden is our church). There’s nothing more calming than the soothing sounds of these chimes. Sometimes it’s just a simple plink here and there. On more windy days, the sounds are symphonic.

bells.jpg

Don’t settle for just any chime – a little investment in the quality of QMT Windchimes‘ Corinthian Bells – made in Vermont is worth every penny.  If you’re not shopping for the holidays, keep this gift in mind for house warming gifts.

8. Dirt! Specifically Coast of Maine Organic Products (Gift Certificates!)

If you’ve read my previous posts, you already know that I write a lot about dirt (actually soil). After all, what’s a garden without good soil? I’ve shared my ‘dirt’ experiments where Coast of Maine Organic Products was the undisputed winner. And this past summer, I wrote about this company’s products when they supported a Science Cafe event we put together in Nashua on the Science of Gardening. (I am just a happy customer/fan, and don’t work for the company, so my recommendation here is straight from the heart!) 

20170909_100214

While bags of soil are difficult to wrap as a gift, you can find a local retailer for this product line to ensure that your favorite gardener is ready to start digging come springtime. They have an excellent seed starter mix, and I swear by two other specific products: 1) the Quoddy Lobster Compost (we dressed all of our beds with this blend this past fall to prepare our garden for 2019.) 2. Stonington Blend (I use this for my herbs and lettuce containers and have had constant success throughout the season.) Their fertilizers are excellent too.  Visit my friends at the Nashua Farmer’s Exchange to either pick up a gift certificate for spring time purchases – or go all out and gift wrap your dirt – I dare you!

9. Seeds! Hudson Valley Seed Company – $3.95 for most packages

What’s a garden without seeds? The challenge is to find seeds that match the skill and needs of your gardening recipient. Some seeds, like parsley and rosemary take a long time to get established, which can frustrate a beginning gardener. For gift giving, go that extra step and give seeds that make an impact – and offer something really unique.

Hudson Valley Seed Company

I discovered the Hudson Valley Seed Company at the Boston Flower & Garden Show in 2014. (I’m seeing a theme through this story that the Boston show has introduced me to a lot of my favorite gardening products and solutions.)  And in 2016 was given an interesting variety of these seeds as a Birthday gift.

Recently, I was thrilled to find them at a great little shop in Merrimack, NH – Barn in Bloom. I picked up some varieties of basil seeds last spring. These seeds are packaged as gorgeous works of art. That to me, is a gift within a gift.  Better yet, they have seed selections you won’t find at your typical garden center or big box store.  Check out the new releases for 2019 from the Hudson Valley Seed Company – and impress your art loving gardening gift recipients. (I’ll admit, I save the packages from the seeds I receive, as well as buy, and hang them in my gardening shed simply to keep the beautiful artwork.)

So there you go, nine creative, but practical gifts for your favorite gardeners. While this list may not be as popular as the annual release of Oprah’s favorite gifts, I can assure you that any of these gift ideas will be appreciated by gardeners at any level.

I’d love to know about your favorite all-time gardening gifts. Share your thoughts with a comment.

“Since you get more joy out of giving joy to others, you should put a great deal of thought into the  happiness you are able to give.”   ~Eleanor Roosevelt


4 Comments

3 Simple Things You Must Do to Attract Hummingbirds to Your Garden

While there are so many things I love about time in the garden each summer, the daily ritual we call “Hummingbird Watch” is my favorite. During this 90 minute period, just before the sun sets from late April until early September, the hummingbirds – all ruby-throated in southern NH – can be seen flitting from feeder-to-feeder and flower-to-flower — and sometimes even from gnat-to-gnat — across my garden.

I’ve never met a person who isn’t delighted to have these tiny creatures visit and take up residence in their gardens. But interestingly, even the most savvy nature lovers I know often wonder how to continuously attract hummingbirds to their outdoor sanctuaries.

There’s a lot of information online about techniques, tips, and tricks to draw more hummingbird visitors to your garden or yard. However, I’ve found that some important details are often omitted behind the headlines that offer advice for attracting and keeping hummingbirds nearby. Here are three proven tips I’m sharing from my own experience that will hopefully set you up to start your own Hummingbird Watch Ritual.

1. Keep Your Hummingbird Feeders Clean – ALWAYS!

blog-feeder-male

A male Ruby-Throated Hummingbird visits one of our garden feeders in early spring.

In mid-May, when I ask my neighbors and friends how many hummingbirds they’ve seen since putting up their feeders, they often tell me that they haven’t seen any at all. They sometimes even blame me for keeping them in my garden (which is not a valid argument for their lack of visitors!)

The first questions I ask are, “How often do you change the food, and what are you using in your feeder?”

The response is almost always that the feeder has had ‘food’ in it for weeks, or even months and is never emptied. So, that’s a BIG RED FLAG as to problem number one. The best advice I can provide is to keep your feeders clean – which means emptying them, cleaning them, and refilling them with fresh nectar aka: sugar water at least weekly – twice a week during heatwaves in mid-summer.

If your sugar water is cloudy – that’s a hint that you’re overdue to change the food. Same thing if you see black particles or scum floating in the water. That’s mold and fungus and can poison the hummingbirds that visit your feeder. I’ve found when I clean my feeders (with a few drops of Dawn dish soap) every five to six days, there is less buildup of mold in the feeder.

20180609_100102

If I see any, I use a diluted bleach solution and small brushes to clean my feeders thoroughly. (The other incentive to keeping them clean weekly, is that it’s a lot less work, and sometimes a quick rinse of hot water is all that’s needed.)

2. Create Your Own Sugar Water for Feeders – And Skip the Red Dye

What are you feeding your hummingbirds? Are you buying packaged mixes from the store? Or do you make your own nectar? To save money and provide food with no chemicals, start making your own fresh sugar water with basic white sugar – sucrose. When mixed with water, it most closely resembles the natural nectar that hummingbirds get from flowers. Don’t use honey because it will promote fungal growth. And stay away from raw or organic sugar as it contains a higher amount of iron that can harm your little visitors.

blog-feeder-juevenile

At first glance, this appears to be a female hummingbird. Look closely for the speck of red plumage on the neck. This is juvenile male Ruby-Throated during a late summer feeder visit.

The Audubon Society instructions advise using 1 part sugar (plain, white sugar) to 4 parts water to feed hummingbirds – and no red food dye. Boil the mixture until the sugar dissolves. Then let cool before filling your feeders.

Since I fill several feeders, I use 1 cup sugar to 4 cups water. During early spring, when the hummingbirds first arrive and late summer and as they fuel up for their mid-September trips back to Mexico and Central America, I make the mix just a little sweeter/stronger and cut back on the water by about a half cup. I have a friend who uses a much stronger mix, but have read that this isn’t good because too much sugar can damage the liver of hummingbirds.

If you make extra sugar water, you can refrigerate it for about a week. This will save you time as you fill your feeders weekly – even more so when experiencing heatwaves that will require more frequent food changes.

Finally, I keep my feeders up until the end of September. While most of the hummingbirds who visited all summer leave by September 10, we get stragglers from up north as they join the annual migration. It’s fun and honestly, a little bit rewarding to see an occasional visitor stop by to fuel up on sugar water and nectar from late blooming zinnias through September 30.

3. Plan Your Garden to Attract Hummingbirds – They Love Red & Pink

The gardens at our house are primarily well-established perennial gardens. They’ve always attracted hummingbirds, but after putting a little extra thought into new plantings (all gardeners add new plants to their gardens every year, right?), we always think about what will attract hummingbirds and other pollinators, including bees and butterflies.

While there are three feeders across the garden, I look at them as supplemental to the flowers that are planted to provide a continuous bloom for our enjoyment – and food for the hummingbirds throughout the summer. This not only makes the garden look beautiful throughout the summer, but it’s also one of the best ways to keep hummingbirds coming back to visit. Did you know that hummingbirds eat as much as half of their weight every day – and feed five to six times per hour?

Over the past few years, I’ve learned to pay attention to what flowers and trees the hummingbirds like to visit for their feedings and for resting. One of the resting areas that I know to look up to is the very top of the Weeping Cherry tree in the back garden. When I see one up there, I know that there are at least three more in the nearby flowers.

blog-treetop

Lookout Point at the top of the Weeping Cherry tree. A sign if the hummingbirds are active.

Add These Flowers to Your Garden and Attract More Hummingbirds

The past two summers, I’ve kept my camera with me while in the garden, especially during the daily hummingbird watch ritual I mentioned earlier.

While I’ve caught great shots of these incredible creatures at the feeders, I’ve wanted more ‘natural’ photos of them visiting the flowers in our garden. (I post many of these on my Instagram page, also called Garden with Grace).

Here are some of my favorite new shots of the hummingbirds enjoying the flowers in our gardens over the past year. You may be inspired to add some of these to your own landscape. Keep in mind to plant flowers for your specific zone. We are in zone 5B in Nashua, NH. So you may or may not have success with all of these.

In addition to the photos captured here – other flowers the hummingbirds visit include Purple Siberian Iris and Purple Lilac in the spring. And Zinnias! They love the secret zinnia beds scattered across the back gardens. Zinnias are annual flowers, but I keep the seed heads each autumn to start next year’s garden. If there’s not a butterfly flitting among the zinnias, you can usually find a hummingbird. (I’m hoping to catch that photo next summer! – UPDATE- On September 21, I captured a good photo that includes a zinnia and have added it to the end of this post.)

blog-cardinalflower

Cardinal Flower aka: Lobelia Cardinalis

blog-crocosmia-perch

Lucifer Flower, aka: Sword Flower, aka: Crocosmia. This is new this year and big hit!

blog-crocosmia-Sept

Lucifer Flower, aka: Sword Flower, aka: Crocosmia. This is new this year and big hit!

blog-crocosmia-StFrancis

Here’s another of the Lucifer Flower, with St Francis (Patron Saint of Animals)

blog-fuschia-Aug

One of the few annual flowers – Fuschia. This always attracts the hummingbirds late summer.

blog-honeysuckle-bluesky

My first and all-time favorite action shot of a hummingbird above a trellis of Alabama Crimson Honeysuckle on a clear, cloudless late summer afternoon.

blog-honeysuckle-perch

Alabama Crimson Honeysuckle. Resting on a leaf while enjoying sweet nectar.

blog-hydrangea

Looks closely to see this bird’s tongue sample the new buds of the Endless Summer Hydrangea.

2018-hbird-zinnia

I finally captured a photo of a hummingbird visiting a zinnia in my garden on Sept 21 – well after I assumed they left for the season.

“May my faith always be
at the end of the day
like a hummingbird…returning
to its favorite flower.”
~Sanober Khan, Turquoise Silence

The photos in this post were all taken in my garden in the summers of 2017 and 2018 and belong to the owner of this post. If you’d like to use any of these photos, please request permission via a comment on this post.


3 Comments

Digging Deep into the Science of Gardening

You can have the most artistic ambition and grandest plan for your garden, but the reality is a ‘green thumb’ really doesn’t happen by accident.  While William Kent once said, “All gardening is landscape painting,” a beautiful, bountiful garden filled with annuals, perennials, and vegetables is actually a work of art and science.

The Science Cafe Nashua recently hosted it’s July gathering at the Riverwalk Cafe in Downtown Nashua (New Hampshire) to discuss  why it’s important for gardeners to understand how science impacts their gardening aspirations.  The discussion on “The Art and Science of Gardening” while free to attend, was a ‘sell-out’ with all 80+ seats at the cafe filled with gardeners ranging from novice beginners who participate in local community gardens driven by GrowNashua to expert master gardeners with beautifully designed landscapes that are worthy of Fine Gardening magazine.

While the midsummer topic was compelling, it was the strong lineup of panelists who brought people to the cafe during the midst of a week-long July heatwave. For two-full hours we participated in a Q&A session with gardening experts including:

Gene Harrington, owner of the Nashua Farmers Exchange;

Cameron Bonsey, executive with the Coast of Maine Organics (he traveled from Portland, Maine to join us!);

Isabelle Burke, an expert gardener with the Merrimack Garden Club and beekeeper who represented the Merrimack Valley Beekeepers Association;

Dave McConville, a permaculture designer and educator with GrowNashua;  and

Paul Shea, the executive director of our Great American Downtown who also happens to be a “Master Gardener” certified by the UNH Cooperative Extension.

SciencCafe-FullPanel.JPG

The Art & Science of Gardening Panelists during the July 11, 2018 Science Cafe Nashua. (L-R: Gene Harrington, Cameron Bonsey, Isabelle Burke, Dave McConville, Paul Shea)

The lively discussion covered  a full range of gardening topics, including how to control blight (specifically in tomatoes and peppers) to why we see so many rabbits in the Nashua area, and what’s the best way to ‘feed’ soil.

Here are a few of my big ‘ah-has’ from the panelists who did an excellent job at explaining how science impacts gardening. (If you’re reading this blog after attending this Science Cafe Nashua session, feel free to share what you learned with a comment.)

Smokers – You can attract blight! Nightshade plants like tomatoes, peppers, and eggplant are in the same plant family that include tobacco. Paul Shea explained that nightshades are very susceptible to blight – it’s a big issue and can wipe out entire tobacco farms.

With the smaller scale of a backyard vegetable garden, blight is typically spread when leaves touch contaminated soil. Helpful hints to avoid blight included keeping plant leaves trimmed well above the soil line and watering at the bottom of the plant to drive moisture directly into the soil versus via leaves.

Here’s what really surprised me. Gardeners who smoke can be more prone to finding blight on their plants – the two reasons are that some gardeners leave cigarette butts (remember tobacco attracts blight) in their gardens and the nicotine from tobacco sticks to fingers and spreads to plants when touching, pruning, and picking. This nicotine residue of tobacco attracts blight.  So, gardeners who smoke now have another reason to stop their habit if they want a bountiful harvest.

Bees don’t like the red flowers.  A question was asked why bees haven’t returned to one participant’s garden this year.  After some discussion with Isabelle Burke, we learned that the person seeing fewer bees this year changed their garden color scheme and has almost all red flowering plants and very few purple and yellow flowers, which are  favorites of bees.  This surprised me for a few reasons – since pollinators include hummingbirds, and they like red, I just assumed that all pollinators, including bees,  were attracted to that color.  I also didn’t realize bees are drawn to color. I thought they were only attracted to the scent of flowers.

Nashua is being overrun by rabbits. Gene Harrington told us that rabbit populations have an 11 year cycle and our region appears to be in year seven or eight of that cycle. So we should be seeing fewer bunnies in coming years. He shared that he’s heard over the past few years from more customers who are seeing  rabbits and, of course, they reach out to Gene to find solutions to their rabbit problems. Apparently, the best way to control rabbit damage is to put up fencing/barriers around the plants that they find delicious to eat. Another option is to plant things rabbits don’t find so delicious. In my case, the rabbits in my neighborhood love the clover that I’ve been planting as an alternative to grass, so I will just keep buying clover seed to replace it. (But I will confess, I actually enjoy seeing bunnies hop through the garden and just hope that the experience of another Science Cafe participant doesn’t happen while I’m watching – his garden bunny became lunch for a red-tailed hawk – which are also prevalent in our region. I guess everyone needs to eat.)

Soil lives and breathes – we need to treat it well. Cameron Bonsey talked a lot about soil. He likened the work of creating soil blends at Coast of Maine to the craft brewery movement in New Hampshire. He explained that their employees experiment with different mixes for different purposes. I specifically asked him about their Stonington Blend that I blogged about late last year. He explained that soil is all about biology and something things plants respond differently to different mixes of nitrogen, castings, etc. He also talked about the importance of mulch and how it feeds soil. Cameron quipped that “all the organic matter under the mulch is eating and greeting – there’s a great party going on under there.” This is why it’s better to mulch with a compost-based product and not cheap wood chips that take forever to break down and don’t provide nutrients back into soil. (Hearing this made me feel good as we stopped spreading bark chips in our garden because of this and started to mulch with compost instead.)

GMOs are not a natural evolution.  There was a question about the scientific aspect versus personal feelings on the surge of GMOs (genetically modified organisms). This seemed to be a sensitive topic to both the person asking the question, as well to the panelists asked for their input. Dave McConville, the panel’s permaculture expert shared that GMOs are not a natural evolution, while not speaking for or against them. I urge you to learn more about permaculture at Dave’s website – here’s a teaser, “Although permaculture is first and foremost a design process, it is also a philosophy, a life style and a framework for making decisions. Permaculture gives us a toolkit with a set of ethics and principles, design processes and proven strategies to help us design a better culture.”

Ultimately, I learned that true gardeners – no matter how long we’ve been digging this hobby –  are always eager to learn from one another and to share our own experiences, including the successes and failures.  What worked this year, might not work next year – and there’s often a cause that someone learned before us. For example the gardener who wants to see more bees left the Science Cafe with the the information not to plant all red flowers next year and perhaps add a little more lavender – a favorite of bees.

Speaking of lavender, here are a few more photos from the July 2018 Science Cafe Nashua at the Riverwalk Cafe. Let’s start with the top two photos that include the fabulous “Gardener’s Gimlet” made with local lavender syrup that was offered as Riverwalk’s special craft cocktail of the evening in honor of the Science Cafe event (the woman in the top right photo with the gimlet is Jane Ruddock, co-owner of Riverwalk and quite the expert gardener herself). The other photos are of the full house of gardeners asking questions and sharing ideas and experiences.


“There are no gardening mistakes, only experiments.” 

~Janet Kilburn Phillips


Leave a comment

Dig, Shake, Stir: From Garden to Bar

One of my favorite things about gardening is to find creative uses for harvested items, especially the herbs. Over the years, I’ve dried herbs to create interesting crafts with everlasting flowers such as lavender.  However, a favorite way to save and savor some favorites from the garden involve cocktail infusions.

When I have an abundance of  hot peppers at the end of each summer, I buy a bottle of plain vodka. Something like Smirnoff works well (though I do have a friend who chastises me, insisting I should only use top shelf spirits – – let’s just say that we agree to disagree!). I toss in a few spicy peppers that have been partially cut to the new bottle of  vodka and within a week, it becomes a spicy ingredient for a fantastic Bloody Mary! And as the Pepper Vodka ages, it gets even hotter — so I simply top the bottle off from time to time with more plain vodka. It’s seems like an endless bottle by mid winter. By the next summer, I’m really to start all over again.

In years past, my neighbor usually had so many peaches and plums that he resorted to begging his friends to take them from him – or he secretly delivered them to our homes, whether we wanted them or not! With his harvests, I’ve infused the peaches and plums in brandy.

Other experiments included pears infused in brandy and rhubarb infused in vodka. (Those were never made again, but were worth trying. In the end, it was a waste of good pears and rhubarb that could have been better used in a baked item where they would be enjoyed more.)

20171213_223534

This year, I tried two new infusions.  Blackberry Brandy and Lemongrass Vodka.

My friend Bobbi lives at the NH seacoast and is a fellow gardener. I love that her garden has a blackberry and blueberry patch, along with some pear and apple trees (and a pony named Sachi!)  At the end of last summer, I paid her a visit and returned home with armfuls of peaches, pears, blueberries, and blackberries. The peaches, pears and blueberries were saved for eating. But, the blackberries were picked with the intent to make a batch of Blackberry Brandy for the 2017 holiday season.

Blackberry Brandy is very easy to prepare. I simply took a large (sterilized) glass jar, added the blackberries (about 1.5 c) and a few tablespoons sugar (since the berries were more tart than sweet this year), lightly muddled the ingredients and then poured a bottle of E&J Brandy over the mixture. I let it sit in my cool, dark basement for 8 weeks, and stirred the dark, thick contents of the bottle weekly. Then I strained it through cheesecloth and bottled it. I’m pleased with the results, but will add more blackberries if I try this again next year.

20171225_122430

The surprise creation of the summer was the Lemongrass Vodka. I’ve grown lemongrass in the garden on and off for the past 20 years. Lemongrass plants are sometimes hard to find, so I simply get a stalk of lemongrass from the grocery store in the spring, put it in water, let it root and plant it in the garden in early summer (sometimes in a container, sometimes in the ground.) It makes a beautiful filler plant and sparks good conversation when friends wander through the garden and realize that it’s very fragrant.

I browsed online for ways to create an infusion and all suggested cutting up the inner parts of the lemongrass stalk – some suggested chopping it in a food processor, but I just hand cut it. The stalks on my lemongrass were cut a few weeks before I did this project, which make them smaller, drier, and less pliable.  You can see in the photo on the left, the lemon grass just sitting in the jar of freshly poured vodka.  Within two weeks, the spirit took on a beautiful golden hue.

My Lemongrass Vodka has an herbaceous fragrance and taste with just a light citrus background note. I’ve tried a few cocktails with the infusion, including using the spirit in a straight up dry martini with hint of vermouth. I’ve also tried it with a bit of Lillet instead of vermouth. Both options were good. Most recently, I mixed equal parts of Sake and Lemongrass Vodka and served it very cold.  That was also nice — and a little lighter as far as the hit of alcohol from a straight vodka cocktail.

20171207_161255

I ended up with enough Lemongrass Vodka to fill two small bottles – one for my bar and one for a friend who appreciates unique cocktails as much as I do. He and his wife are on a kick now making a lot of Asian cuisine, including Ramen dishes. I’m looking forward to hear how they create an Lemongrass cocktail to pair well with their newfound culinary experiments!

As I look ahead to planning my 2018 garden in the coming months, I hope to find new items to grow to bring to the bar. Perhaps this will even be the year to create an official Cocktail Garden! (Afterall, it would be an ideal setting for the perfect party!)


4 Comments

Good Gardeners Know the Best Dirt

One of the first signs of spring in my world is always the fragrance of  newly opened bags of potting soil for seed starting and transplanting. Fellow gardeners know — fresh dirt just smells incredible! It’s a heavenly spring fragrance, especially after a long New England winter.

I have about a dozen large pots for annuals, including flowers, herbs, and vegetables around my garden that I fill with fresh potting soil late each spring – it’s about a $100 investment………….for dirt!

This year, I used different soil mixes in different pots for different plantings. I didn’t intend to conduct an experiment. There was some left over Doctor Earth soil in my potting shed that I used in some of my tomato planters. Then I found some Organic Miracle Grow Moisture Control with coir potting soil at Costco (huge bags – I think 15 qts for $9.99 each.) I used this in my five coleus planters and one of my herb planters. And finally, I got some Coast of Maine potting soil from the Nashua Farmer’s Exchange for my other large herb planter. Coast of Maine products have long been a favorite product in my garden – especially their awesome Lobster Compost.

It’s important that no matter how experienced we are, good gardeners always seek experts to help us to grow our skills and knowledge. Gene and Judy, the owners of the Nashua Farmer’s Exchange, are the experts I count on for good advice.  They have been ‘trusted advisors’ to both my mom and me for many years when it comes to trying new things and finding solutions to garden challenges.

This year, Judy recommended the Stonington Blend  potting soil from Coast of Maine when I stopped in to get the dirt on the best dirt for my large herb containers. Knowing the great quality of the Coast of Maine products, I took Judy’s advice. While the product is a little more expensive than I typically purchase, it was on sale and worth a try.  As I paid for my purchase, Judy whispered to me that the Stonington Blend has a great reputation among medicinal marijuana growers. I found that interesting and kind of funny since I was purchasing POTting soil.

20170909_100214

Stonington Blend by Coast of Maine – A New Garden Favorite!

Not realizing that I’d need A LOT of soil for my herb planters, I bought only enough Stonington Blend for one container (which wasn’t an issue – or so I thought! – since I bought those huge bags of the organic Miracle Grow mix from Costco). So, each herb planter used different soil – which set up my unintended gardening experiment this summer.

Seeing is believing!

First, I will share that both planters had the exact same conditions and were set about 10 feet away from each other, with the same amount of sun. The only difference is that one had the Miracle Grow Soil and the other had the Stonington Blend.  The Sweet Basil in both containers is the true testament to the difference – both came from the same batch of seedlings, started at the same time.

20170902_102608

September 2, 2017 – Miracle Grow – Organic with Coir Moisture Control (#1)

20170902_102538

September 2, 2017 – Stonington Potting Mix – Coast of Maine (#2)

Both of these containers were planted during Memorial Day Weekend of 2017.  And clippings from both containers were taken all summer – however, the quality of the herbs in the Miracle Grow was just terrible this year. I actually took more cuttings from the Stonington Blend container (#2) because it was so much further ahead all summer. Initially, I started the Thai Basil – on the far left of container #2 – in the Miracle Grow container. It didn’t do well, so, I transplanted it to the Stonington Blend container in early August – within three weeks, it quadrupled in size – that was my confirmation that the soil was the big difference between the two containers. (I harvested the Thai Basil last week to make Spicy Tofu Basil for dinner last week. It was so good, I ended up making it twice! That herb is now top of the list to plant again in 2018!)

Here’s the comparison on the day that I harvested Sweet Basil on September 9, 2017.

20170902_112713

Both bunches of basil were started together and harvested at the same time. The big, bright bunch on the left was grown in the Stonington Blend. The lighter, smaller leaves were grown in Miracle Grow Organic Moisture Control Mix. Same number of plants in each container.

I visited the Nashua Farmer’s Exchange in mid September to share the results of my unintended experiment with Gene. He gave me a lot of background on the movement of soil producers around the country to create top quality potting mixes for the medicinal marijuana market. From what I gather, the product I used from Coast of Maine is one of, if not the top, potting soil available for this purpose today. For my own use, I’m just awestruck with the results we saw for my herb containers.

20170909_100205.jpg

My Garden Advisor, Gene, owner of the Nashua Farmer’s Exchange.

Container #2 with the Stonington Blend is still on my back patio – and is absolutely flourishing! The flat-leaf parsley and mints that looked terrible just one month ago in the Miracle Grow container were transplanted to the Stonington Blend – that I mixed up well – on September 2.  Here’s how that planter looked one month later on October 1, 2017 (Before I harvested the Thai Basil):20171001_135813
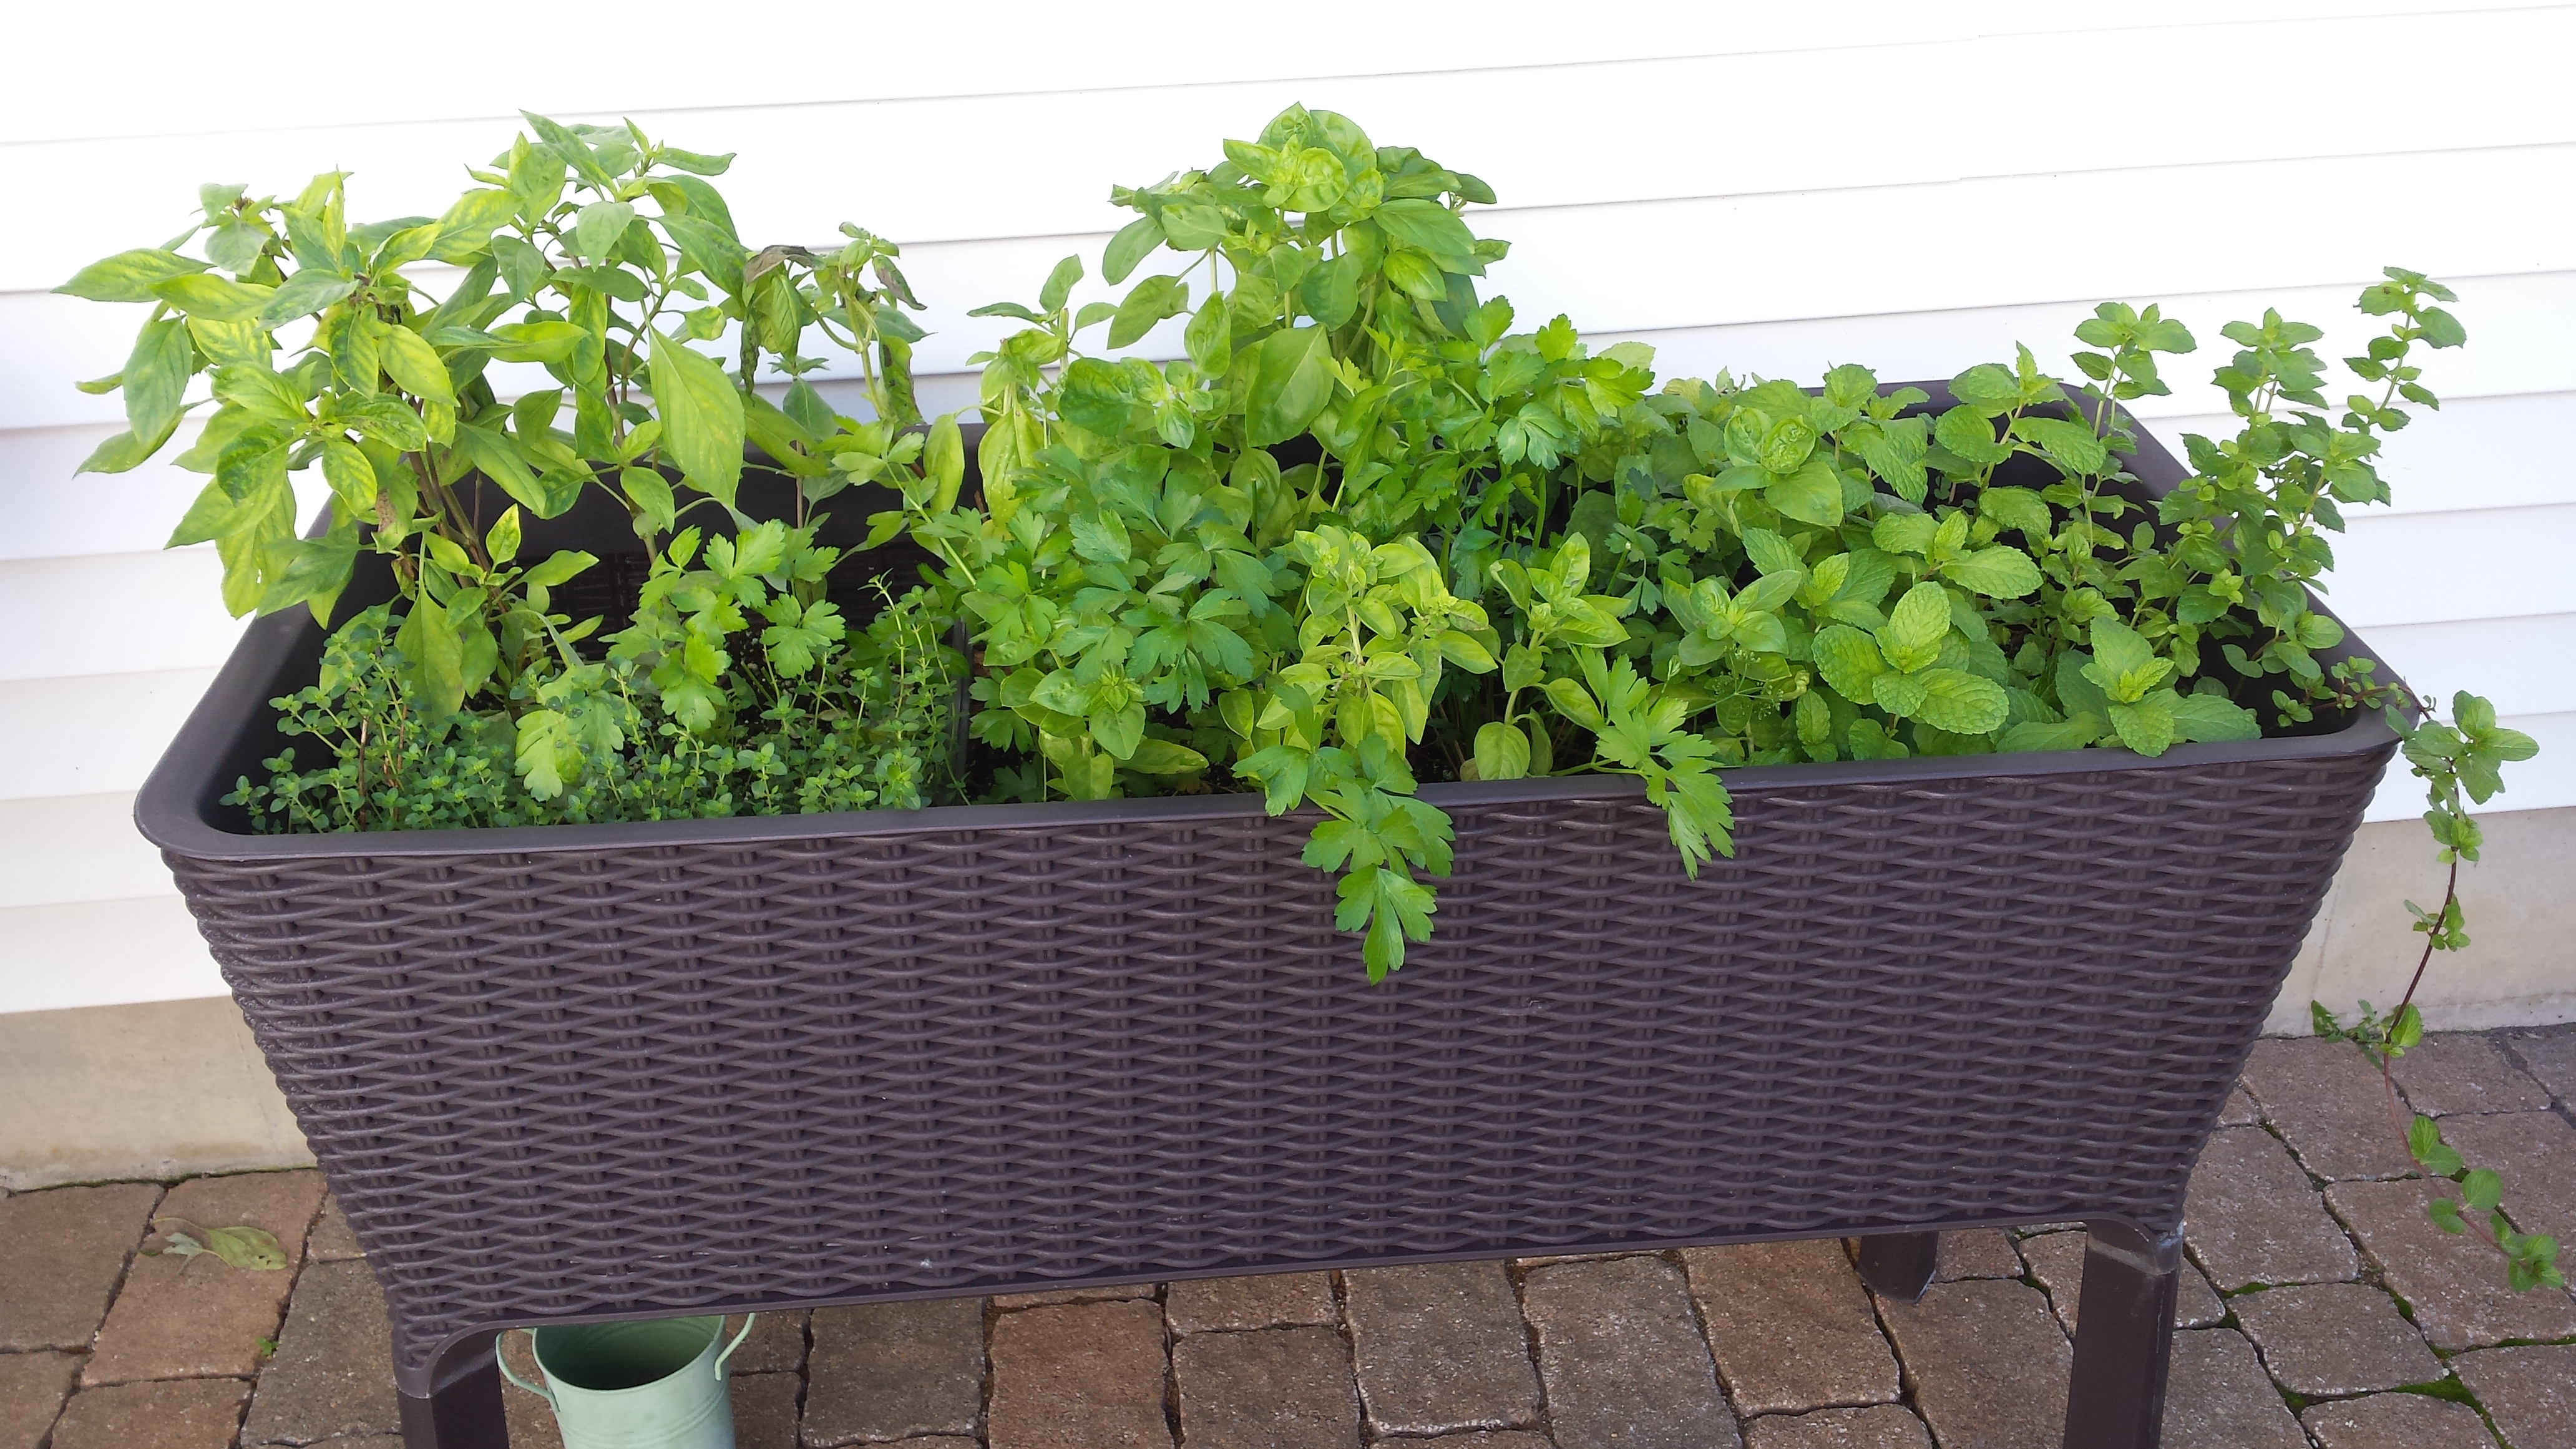
In the past, this was a week when remaining herbs would be removed and containers cleaned and put away until spring. However, with absolutely no frost or freezes expected in southern New Hampshire for at least two more weeks, these are staying put so I can enjoy the parsley and mint through October.  Halloween Mojitos, anyone?

“There are no gardening mistakes, only experiments.” ~Janet Kilburn Phillips


Leave a comment

Garden Hack #3: Hosta Hides Fading Daffodils

The Garden Hack Series continues!

The first two Hack’s led to so many wonderful conversations among friends. Especially popular is the Wine Cork Mulch hack! Now, whenever friends open a bottle of wine, they tell me they are ‘making mulch’ for my garden! I still need a few more corks for one project, but with the help of so many ‘mulch makers’ in my life, it should be finished soon!

With summer on our doorstep (we’re actually on day 2 of a 3-day heatwave in New England right now), I look around the garden and still see some fading foliage of the daffodils from early spring. In order to ‘charge’ the bulb for next year’s blooms, it’s necessary to keep the daffodil foliage after cutting the spent flowers. As the foliage starts to brown and wither away, it’s not the most attractive sight — but I’ve been using a solution that I read about a few years ago, and it works quite well!

Garden Hack #3: Hosta Hides Fading Daffodil Foliage

In the fall, as the hosta falls apart after the first heavy freeze in New Hampshire, I’m usually preparing all the garden beds for their winter rest. By this time, gardening feels tiring – almost exhausting. But there’s always the final big push to plant spring bulbs. I just keep reminding myself that the extra effort to plant some tulips and daffodils will be rewarding come spring.

I can’t remember where I first read about this idea, but it’s one of my favorite Garden Hacks (after the Wine Cork Mulch!) When daffodils are planted among the hosta in late fall, you’ll save some time cutting back the withering foliage come June. The newly emerged hosta grows at a rate to completely camouflage the brown daffodil foliage, but doesn’t detract from the spring blooms. If anything, it enhances them, but bringing more color and depth to the the bare ground. I liken this to the work that florists do when they ‘green the vase’ before creating a flower arrangement.

This photo is from mid April of this year, just as the daffodils started to bloom. I love how the newly emerged hosta gives a bright green look of life to that entire garden bed.DSC_1053

The wonderful thing about this hack is the daffodils bloom for several weeks and just as they start to fade, the hosta really takes off to hide the fading flowers.Daffodils-Hosta

By early June, the hosta reaches it’s full size for the season, completely covering the daffodil foliage that is working hard to charge the bulbs for next year’s flowers.Hosta-Daffs

Here’s a broader view of the garden from last week. You can see on the right, the arrows point to the section of the garden where the hosta is doing its magic trick of making the daffodils disappear!Garden Aerial_LI

“Gardening is learning, learning, learning.

 That’s the fun … You’re always learning.”

~Helen Mirren


3 Comments

Garden Hack #2: Wine Cork Mulch

For many, many years, my friends and I saved wine corks – always thinking of all the crafts we would create with them, including wreaths, trivets, tree ornaments. Those crafty days never  really took shape (other than one or two wreaths), even though we always had the best of intentions.

After collecting hundreds (if not thousands!) of wine corks for nearly two decades, it was time to do something or to pass the corks on to someone who would. At the same time, a young paper bark maple tree was planted in the backyard. It needed mulch, but there’s an effort underway in my garden to cut back on bark mulch because it zaps nutrients from plants.

Hack #2: Wine Cork Mulch!

corkmulch-paperbarkmaple

Suddenly, the idea of Wine Cork Mulch became a reality and good use for more than 25lbs of corks! I just place the corks where I’d normally put bark mulch. It worked out perfectly for the Paperbark Maple planted a few years ago, adding whimsy to a new garden focal point. After nearly three years, the natural corks weathered to a silver-grey, similar to how teak changes color over time. Yes, there are even some plastic corks mixed in – adding tiny splashes of yellow, blue, and dark purple.  Occasionally, on a very windy or rainy day, a few corks may blow or bounce out of the bed, the same happens to bark mulch.

The success of this mulching project resulted in the continued collection of corks to mulch another bed across the garden.

CorkMulch-2017 Before

This spring, we started to mulch the bed that leads to the secret zinnia garden behind the garage. Surely, this big bucket of corks would fill the space completely — or so we thought!

CorkMulch-2ndBed.jpg

We were close. But definitely needed more corks to complete this project. If there’s one thing I’ve learned over the past few years is that it’s okay to ask for help. Friends love to help other friends, especially for interesting projects. When I realized more corks would be needed, I simply put out a call to my friends via social media on a Sunday afternoon to bring corks when they visit over the summer.

Within hours, my good friend and fellow gardener, Terri (aka: @TerriinRed on Twitter) stopped by, not with corks, but with unopened bottles of wine that included corks!  A few days later, Liz came over after one of our Friday morning walks with a huge bag full of corks – well over 100 of them! (Liz was featured in one of my earlier Garden with Grace stories when we spent an evening in 2014 Gardening at the Gardener Museum in Boston.) 

The cork mulch has definitely become a fun conversation among my friends in recent weeks, especially as more people drop by to contribute to what I call a ‘worthy cause!’ Most recently, Cathy dropped by to catch up after her vacation to Italy. She brought corks (and a few rocks from Tuscany – for my garden!)

Rosemarie brought over A LOT of corks a few days after Cathy. Like the start of this story, she also saved corks for years for craft projects. However, she did make some good attempts and many of the corks donated by Rosemarie have drill holes! (I love my friends!)

As you can see, I put Cathy and Rosemarie to work to help with the actual garden mulching. (Another benefit of cork mulch over bark mulch is that it’s not a dirty or buggy project!)  Of course, both of these wonderful women were rewarded with a glass of wine!

I’m constantly finding corks in my pockets and purse now! After a visit to other friends’ homes for gatherings like Mother’s Day or an afternoon lunch, instead of bringing home a ‘doggy-bags’ with leftovers, I simply keep the corks, knowing one cork here and another there will add up fast.

A successful cork finding mission took place this week.  During a stop for a drink at MTs Local Kitchen & Wine Bar in Downtown Nashua, a conversation was struck up with the bartender about my Wine Cork Mulching project.CorkMulch-MTs

I shared some of my photos and asked if MT’s kept their corks or just tossed them away. By the time I was ready to leave, I was offered a bag with 48 corks! All are now in my garden. My one regret is not counting ALL of the corks before putting them into the garden beds. (That knowledge would have sparked some interesting conversation when entertaining in the garden — of course with more wine to keep the cork beds full!)

It’s going to take a few more weeks to fill in all the gaps for the latest project, so I’ll keep on my mission to find more corks. And, if you happen to visit MT’s Local in Nashua, the cork from your glass or bottle of wine enjoyed with your dinner just may end up in my garden one day!

I think cork collecting may now be considered an ongoing adjunct hobby connected to a gardening obsession. I’ve already found a new bed to mulch with wine corks. I’m thinking the one with the Wine & Roses Weigela and Summer Wine Ninebark would be ideal!


Leave a comment

Garden Hack #1: Screen Out Seedling Problems

Sometimes, we all need ideas, tips, and tricks to make our work in the garden easier. Over the the past five years, I’ve tried and tested several “Garden Hacks” and want to share the ones that truly work so others may use them too.

My first Hack involves recycling and upcycling. Honestly, there is no better place to engage these practices than in the garden!

Garden Hack #1: Screen Out Seedling Problems

This is my favorite Garden Hack because it was published in Fine Gardening magazine’s February 2016 issue. (There’s nothing more rewarding than your favorite gardening publication validating your tip – in print!) 

FG-TIP-Cover

The tradition continues this growing season. Despite a cold, rainy month, my future salad (Black Seeded Simpson lettuce) is thriving in its screened setting.

Lettuce hack

Once the seedlings get a little bigger, I’ll remove the screen for a few hours each day, but will cover it up at night to keep out the visiting nocturnal critters. We’re hoping for a first cutting for salad in early June.

Do you have a favorite Garden Hack? Share it with a comment!