It’s been a cool, rainy spring in southern New Hampshire. The perennial garden is lush and green. The annuals, including the tomatoes and zinnias are are showing quick signs of life and the weeds…..well….they are EVERYWHERE!
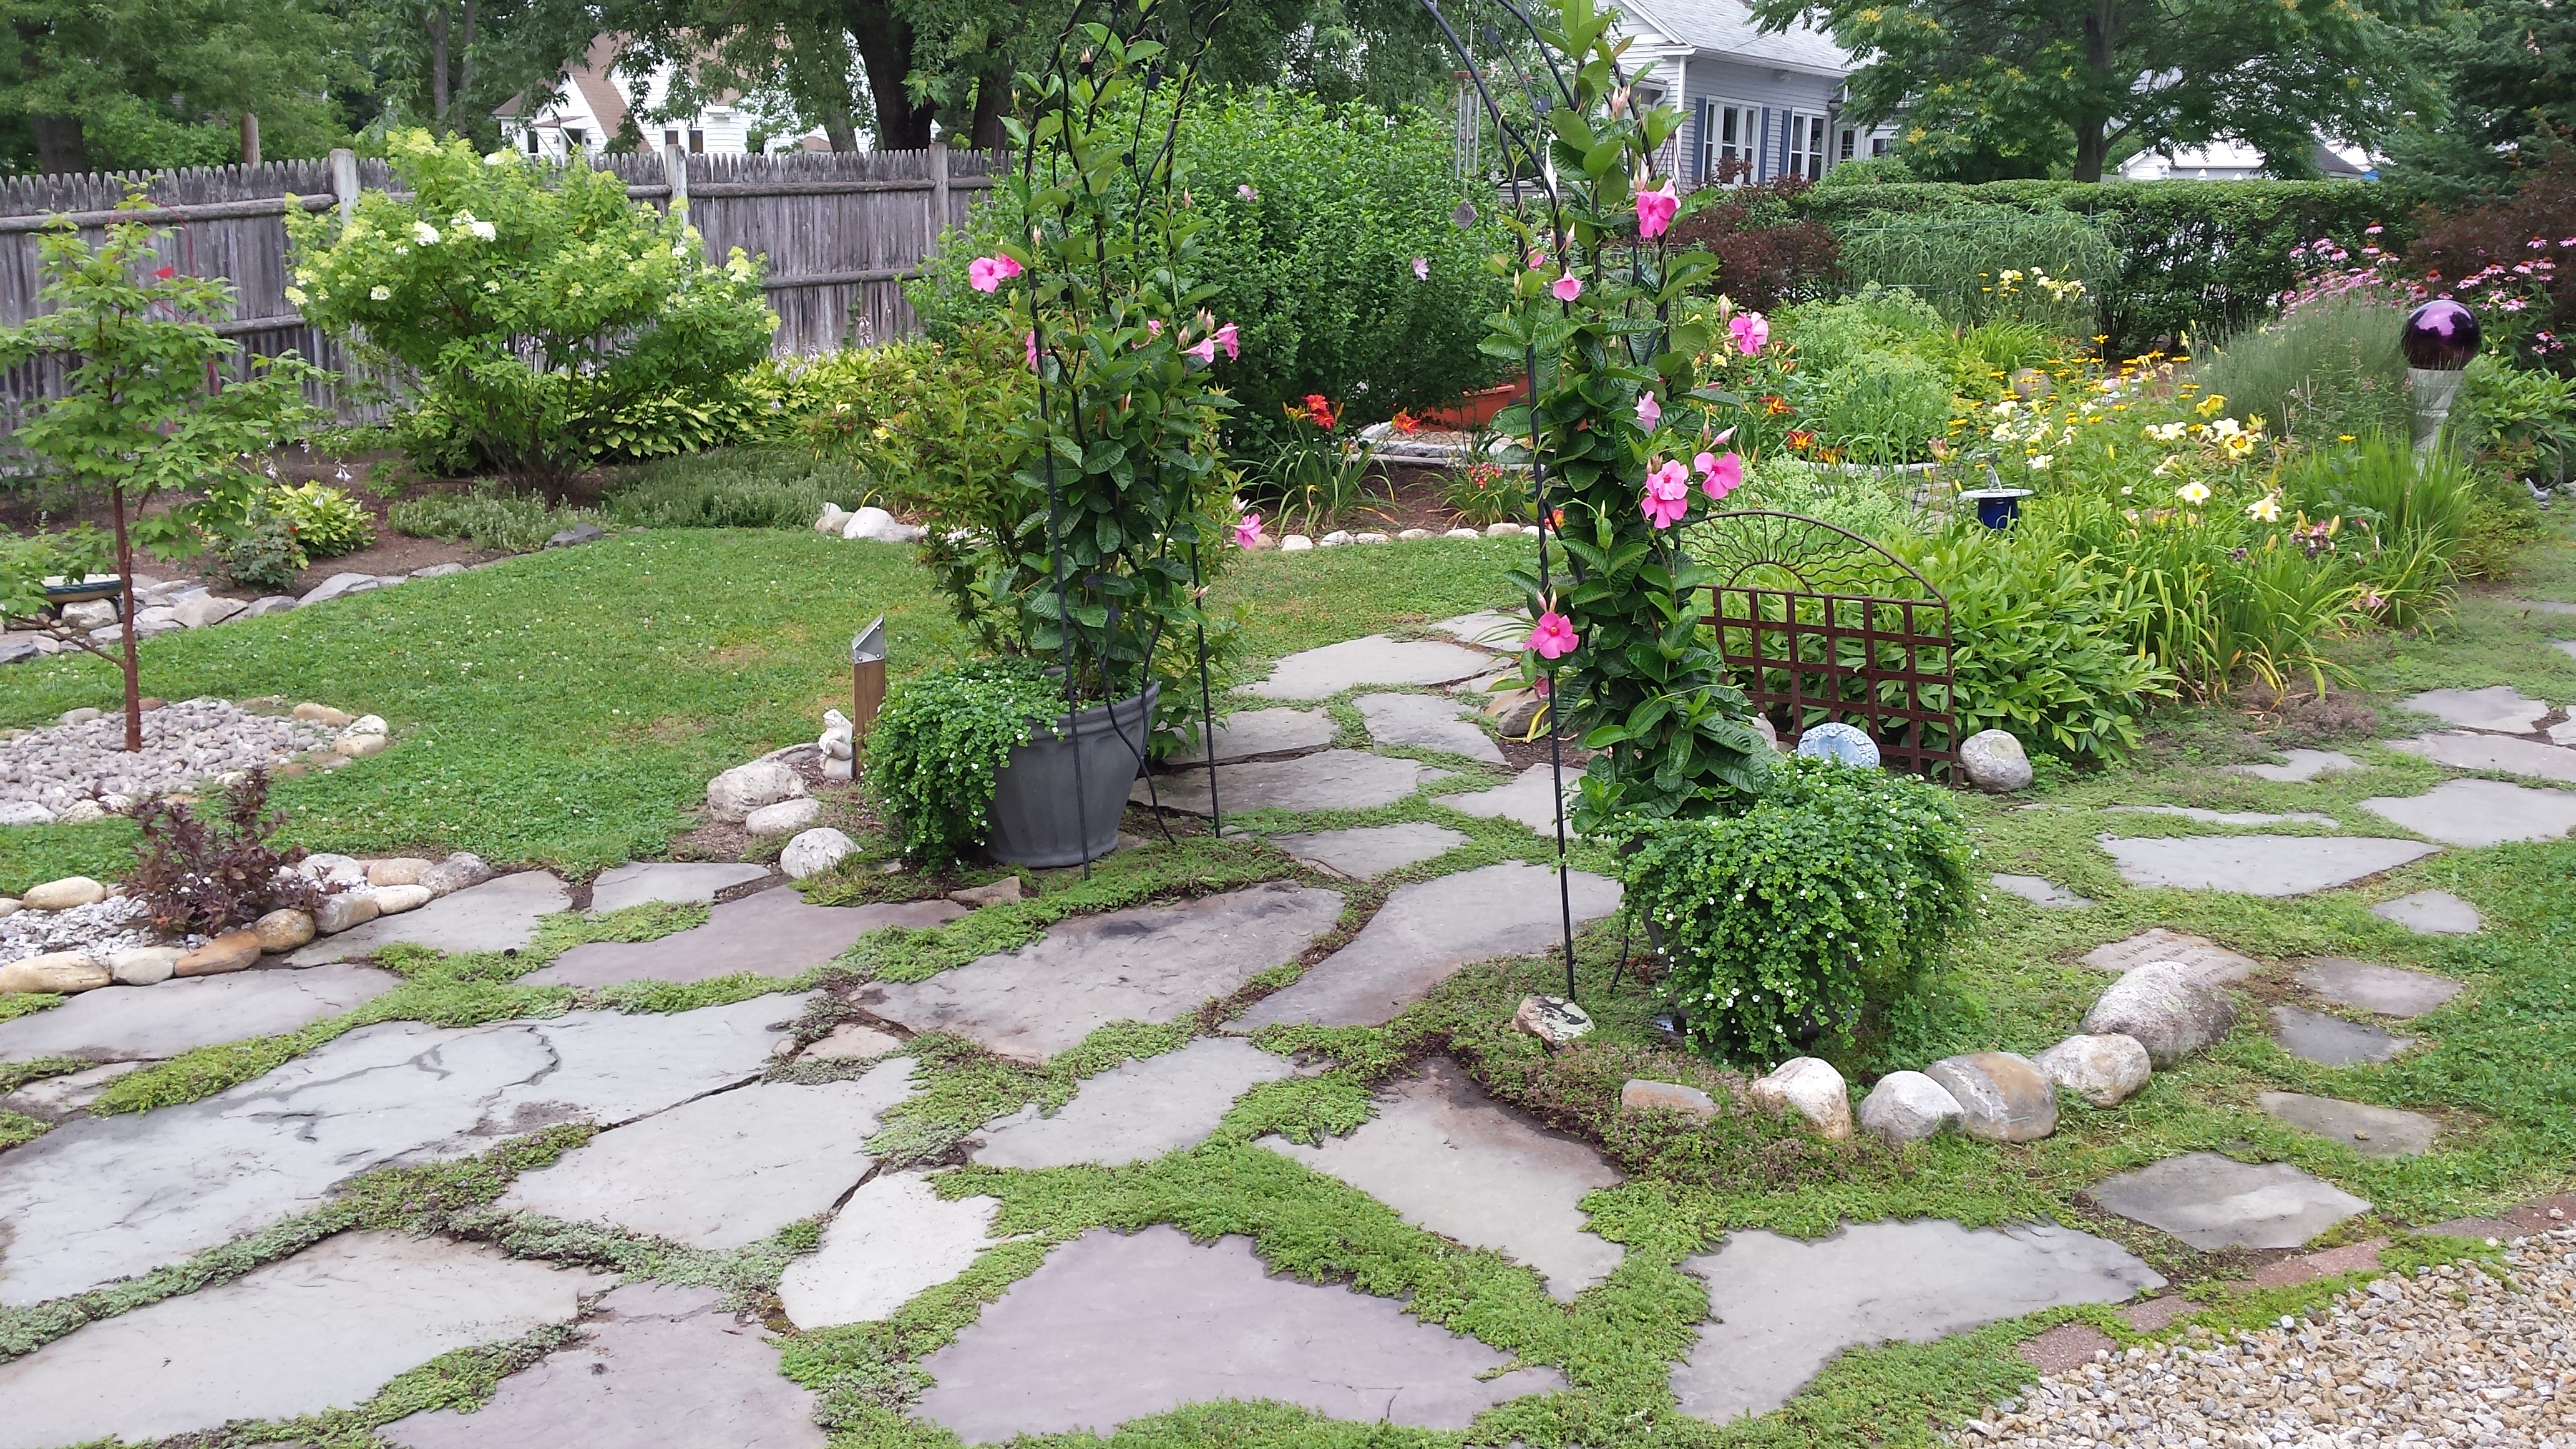
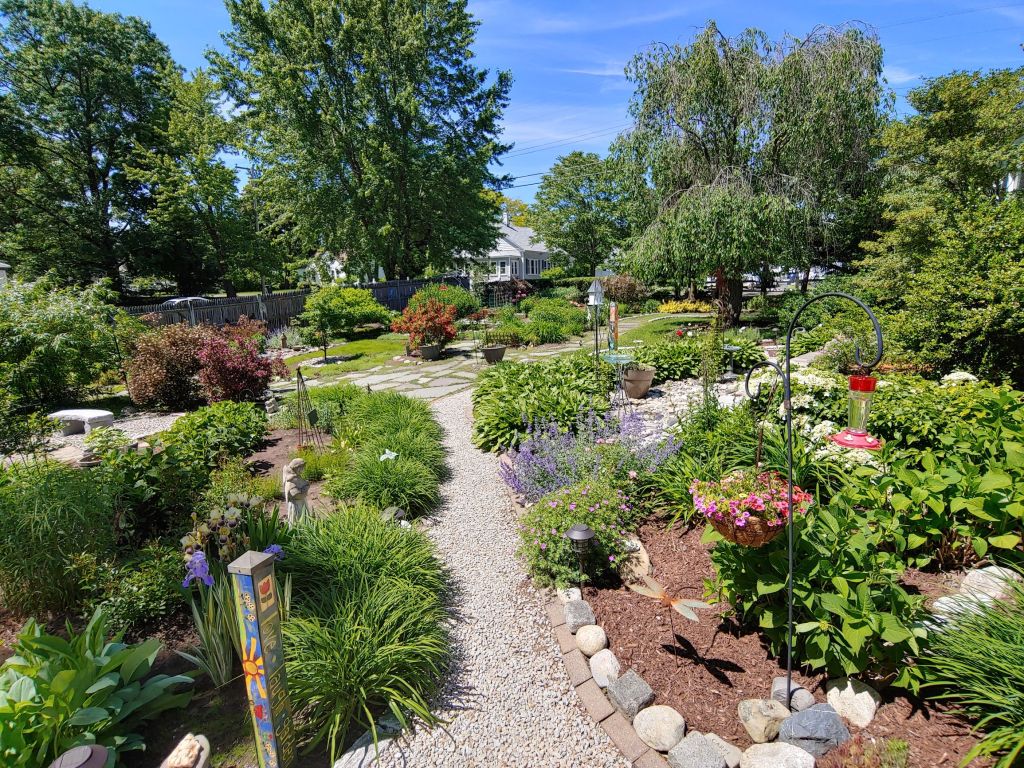
A few years ago, the mulched paths throughout our gardens were replaced with stone – a combination of pea stone, blue stone, and crushed rock. The goal at the time was to reduce the overall costs and time associated with mulching and weeding. Replacing mulch made from organic matter that breaks down – with various types of stone that lasts forever – added new interest to the landscape and made weed control (a little) easier.
The winding rock and stone paths across the garden.
One of the biggest challenges with these paths is weed prevention. And when that’s neglected, actual weed removal is an even bigger headache. The wet spring resulted in fewer days working in the garden during May and early June, resulting in a sudden explosion of weed seedlings throughout the stone paths. (You can see the growth in the pea stone path between the two garden areas below.)
The beginning of a weed nightmare in the garden path!
Rather than spend hours picking through the stone to remove each tiny weed at the root, only to see them return in a few weeks, I researched some easier options or what I call ‘garden hacks’. In the past, Round-Up was used sparingly – before we knew how bad it is. We’ve also used vinegar, both straight and diluted, as well as boiling water. Truth be told, the vinegar option in the past worked, but weeds always returned.
After a little online research – as well as anecdotal conversations with friends who have tried various techniques to kill weeds, I found a vinegar-based recipe to spray on the weeds that expanded on the previous somewhat success of using vinegar. This recipe includes the use of table salt (1c) and Dawn dish detergent (1tbs) with household vinegar (1gal). The vinegar and sodium kill the weeds by dehydrating the weed, interrupting its internal cell structure. The detergent acts as a surfactant to ensure the vinegar and salt stick to the weeds. An important note here is that this mixture should only be used where you don’t want ANYTHING to grow. The salt, specifically, can wreak havoc with the structure of your soil. This is why I tried this solution to only on the rock pathways.
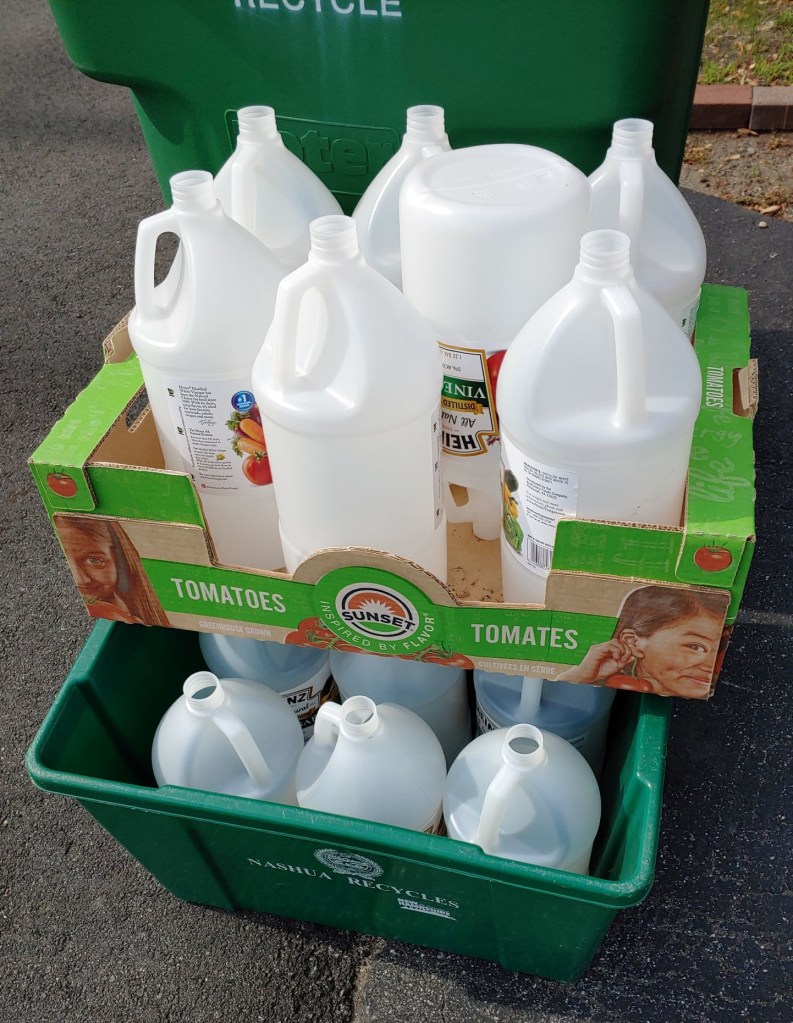
It WORKS….FAST! I used a watering can (special one set aside for projects like this so I it’s not mistakenly used for other purposes in the garden) and after a few days, went through over 25 gallons of vinegar and 25 cups of salt! The photo here was the first 17 gallons – the Nashua city workers who do our recycle pickup must be wondering what’s going on at my house! I’ve now found generic household vinegar and salt to use to save a little money – but continue to use Dawn.
Within an hour, the weeds – big and small started to disintegrate. Within a day, they were pretty much all together gone. They shriveling up to almost nothing and apparently blew away.
Dandelion – 1 hour after treatment with vinegar, salt, and Dawn.
The majority of the time to complete this weeding project was spent stirring the salt to make sure it dissolved in the vinegar. It’s also important to gently stir in the Dawn at the end to avoid creating suds.
It’s been almost three weeks since I’ve ‘pickled’ the weeds in my garden paths. And so far, none have returned. I believe this is a simple, safe, inexpensive, and fast solution when used in the proper areas of your garden. The only drawback is the entire garden reeks of vinegar and salt for a day or two. (Be forwarded – you may start to crave pickles or salt & vinegar potato chips when you pickle your weeds.)
IMPORTANT NOTE: Of course, nothing is fool-proof. Two years ago, I shared thoughts about weeding the thyme that grows in the blue stone paths in my garden. Since I do want the thyme to grow in this area, the ‘pickling’ solution is not appropriate for this part of the garden. The only way to ensure I don’t have a followup to that earlier weeding sob story is a commitment to due-diligence now to pull the weeds in the thyme path as they pop up. Since I take a daily walk thru the garden, this is simple and effective, especially when I use my handy-dandy CobraHead mini weeder.
“I always think of my sins when I weed. They grow apace in the same way and are harder still to get rid of.”
~Helena Rutherfurd Ely, A Woman’s Hardy Garden, 1903
Last July, I shared an overview of a program I created for the Science Cafe Nashua. It’s was on the Science of Gardening. Typically, the group skips its discussion in July and August, but we thought we’d try to attract an audience with a unique topic. We were shocked when the event ‘sold out’ during a hot July holiday week. And everyone enjoyed a two hour Q&A with experts who talked about things ranging from soil health, to how bad habits like smoking can attract blight, as well as how to handle various garden pests – even the cute, fuzzy ones. (Honestly, I think he special cocktail for the evening was also a draw – the Garden Gimlet made with fresh lavender from local gardens.)
As a result of the success of last year’s gardening topic, we hosted an additional gardening discussion this spring to get local gardeners – of all levels – excited for the 2019 planting season. We brought back two of our speakers from last year – Gene Harrington from the Nashua Farmer’s Exchange and Cameron Bonsey from Coast of Maine Organics. And were delighted to have Jonathan Ebba with the University of NH Cooperative Extension-Hillsborough County join us, too.
We discussed the value of understanding that many gardeners in New England start their plants too late. One of the big things I learned while preparing for the session is that there are some crops that need to be planted as early as March in NH to ensure a successful harvest — this is all based on the extended amount of daylight as we move from spring to the summer solstice in June. I wrote about this in an introductory gardening article in the local paper if you want to learn more.
Thanks to the generous donors at our April event, the Science Cafe Nashua produced a video of this gardening session that I’m pleased to share with you. Feel free to skip to the sections you want to hear via the index. You’ll find topics that include information for all types of gardeners from beginner to master levels. Let us know how you like the video and feel free to share it – or this blog post – with your gardening family and friends.
While there are so many things I love about time in the garden each summer, the daily ritual we call “Hummingbird Watch” is my favorite. During this 90 minute period, just before the sun sets from late April until early September, the hummingbirds – all ruby-throated in southern NH – can be seen flitting from feeder-to-feeder and flower-to-flower — and sometimes even from gnat-to-gnat — across my garden.
I’ve never met a person who isn’t delighted to have these tiny creatures visit and take up residence in their gardens. But interestingly, even the most savvy nature lovers I know often wonder how to continuously attract hummingbirds to their outdoor sanctuaries.
There’s a lot of information online about techniques, tips, and tricks to draw more hummingbird visitors to your garden or yard. However, I’ve found that some important details are often omitted behind the headlines that offer advice for attracting and keeping hummingbirds nearby. Here are three proven tips I’m sharing from my own experience that will hopefully set you up to start your own Hummingbird Watch Ritual.
1. Keep Your Hummingbird Feeders Clean – ALWAYS!
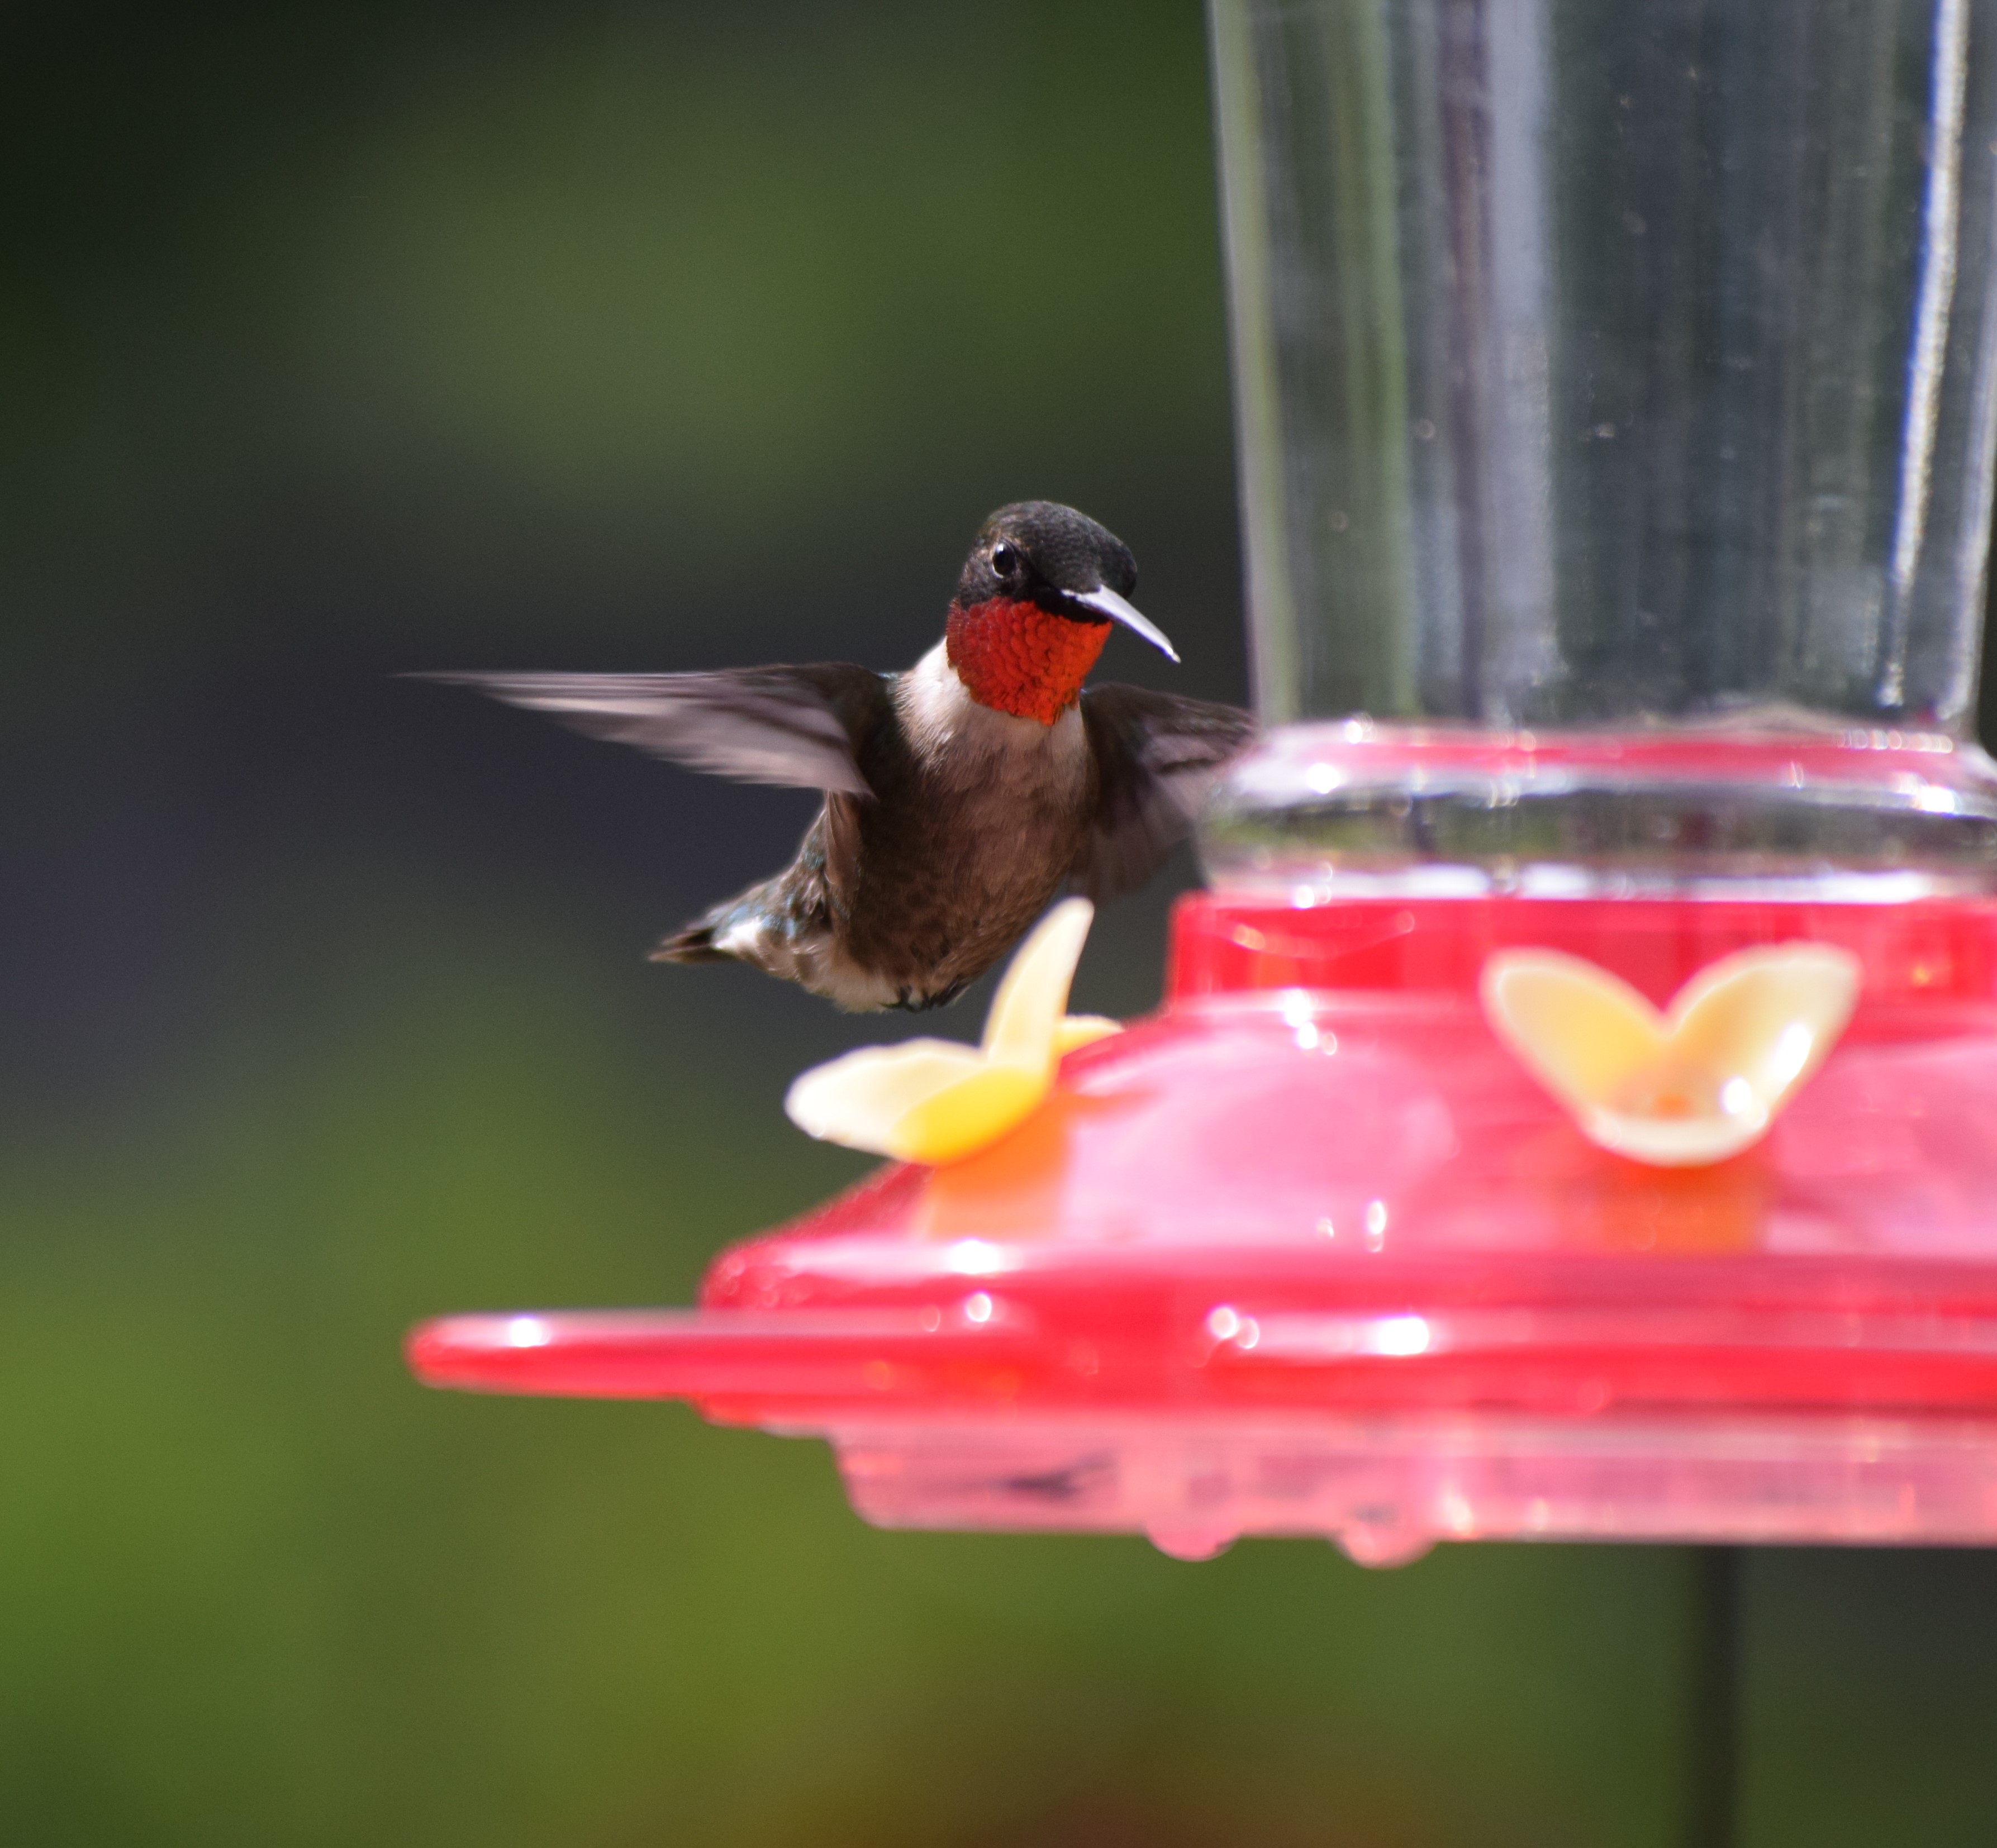
A male Ruby-Throated Hummingbird visits one of our garden feeders in early spring.
In mid-May, when I ask my neighbors and friends how many hummingbirds they’ve seen since putting up their feeders, they often tell me that they haven’t seen any at all. They sometimes even blame me for keeping them in my garden (which is not a valid argument for their lack of visitors!)
The first questions I ask are, “How often do you change the food, and what are you using in your feeder?”
The response is almost always that the feeder has had ‘food’ in it for weeks, or even months and is never emptied. So, that’s a BIG RED FLAG as to problem number one. The best advice I can provide is to keep your feeders clean – which means emptying them, cleaning them, and refilling them with fresh nectar aka: sugar water at least weekly – twice a week during heatwaves in mid-summer.
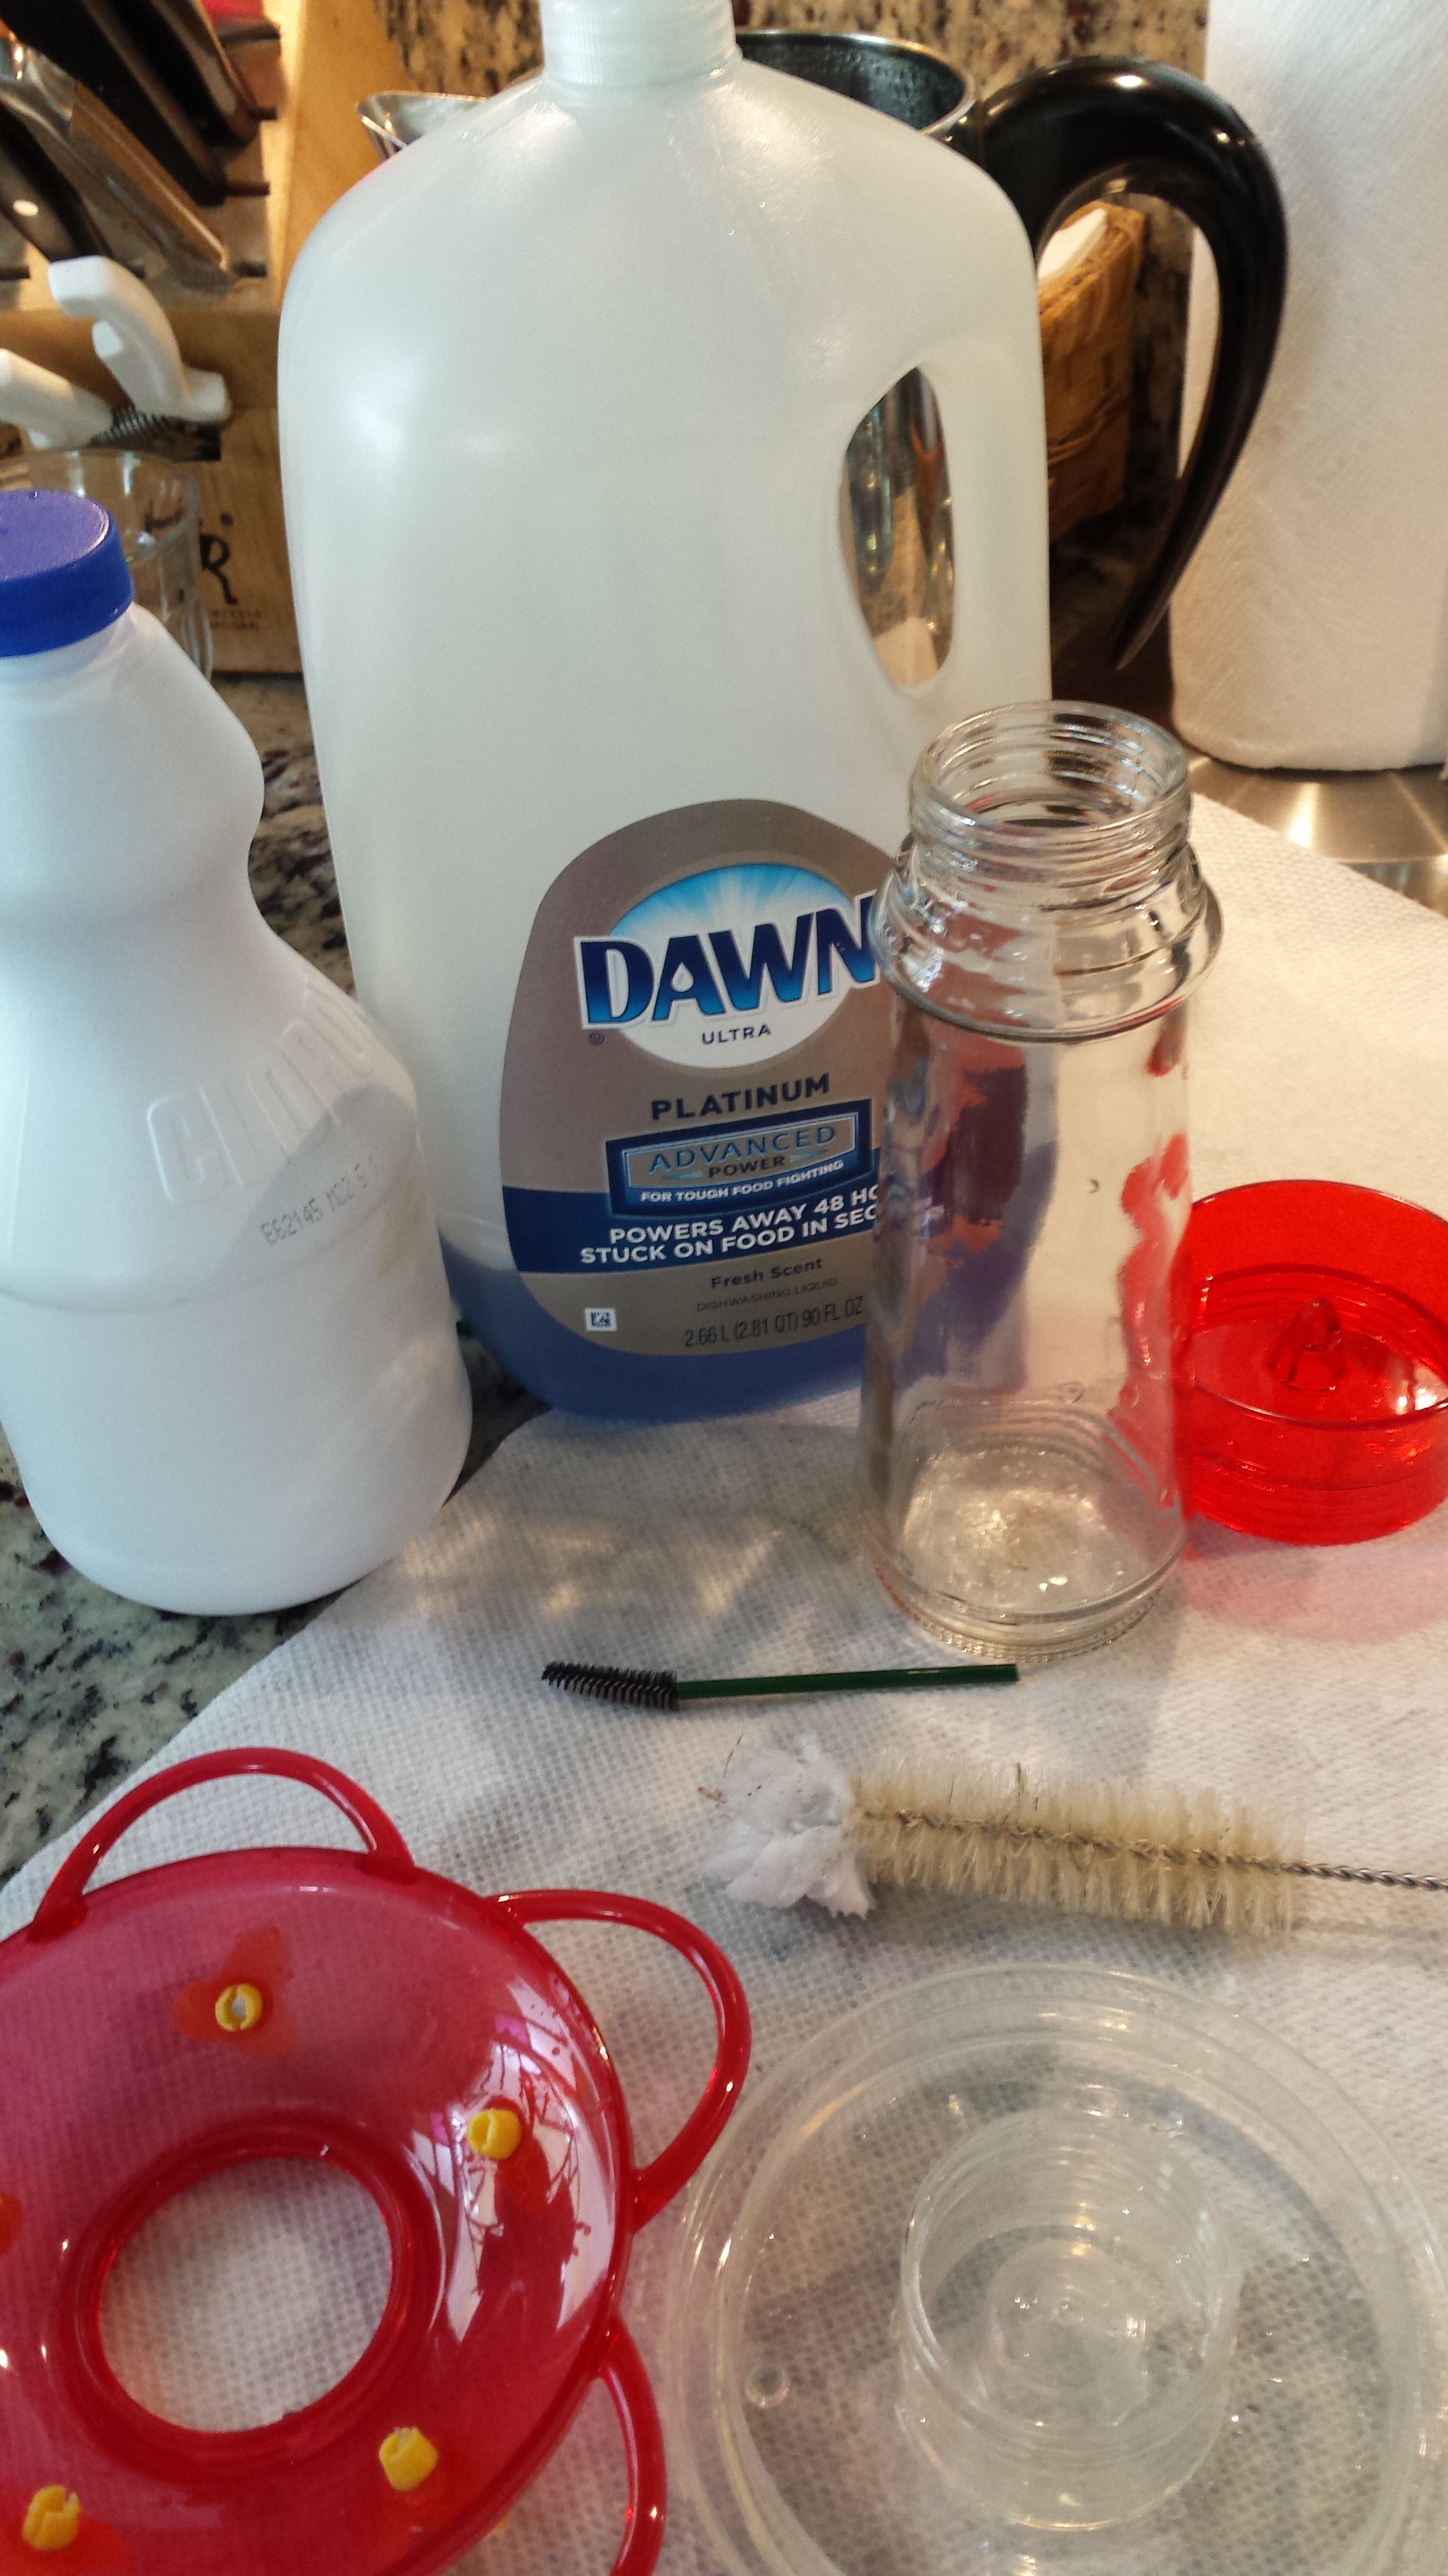
If your sugar water is cloudy – that’s a hint that you’re overdue to change the food. Same thing if you see black particles or scum floating in the water. That’s mold and fungus and can poison the hummingbirds that visit your feeder. I’ve found when I clean my feeders (with a few drops of Dawn dish soap) every five to six days, there is less buildup of mold in the feeder.
If I see any, I use a diluted bleach solution and small brushes to clean my feeders thoroughly. (The other incentive to keeping them clean weekly, is that it’s a lot less work, and sometimes a quick rinse of hot water is all that’s needed.)
2. Create Your Own Sugar Water for Feeders – And Skip the Red Dye
What are you feeding your hummingbirds? Are you buying packaged mixes from the store? Or do you make your own nectar? To save money and provide food with no chemicals, start making your own fresh sugar water with basic white sugar – sucrose. When mixed with water, it most closely resembles the natural nectar that hummingbirds get from flowers. Don’t use honey because it will promote fungal growth. And stay away from raw or organic sugar as it contains a higher amount of iron that can harm your little visitors.
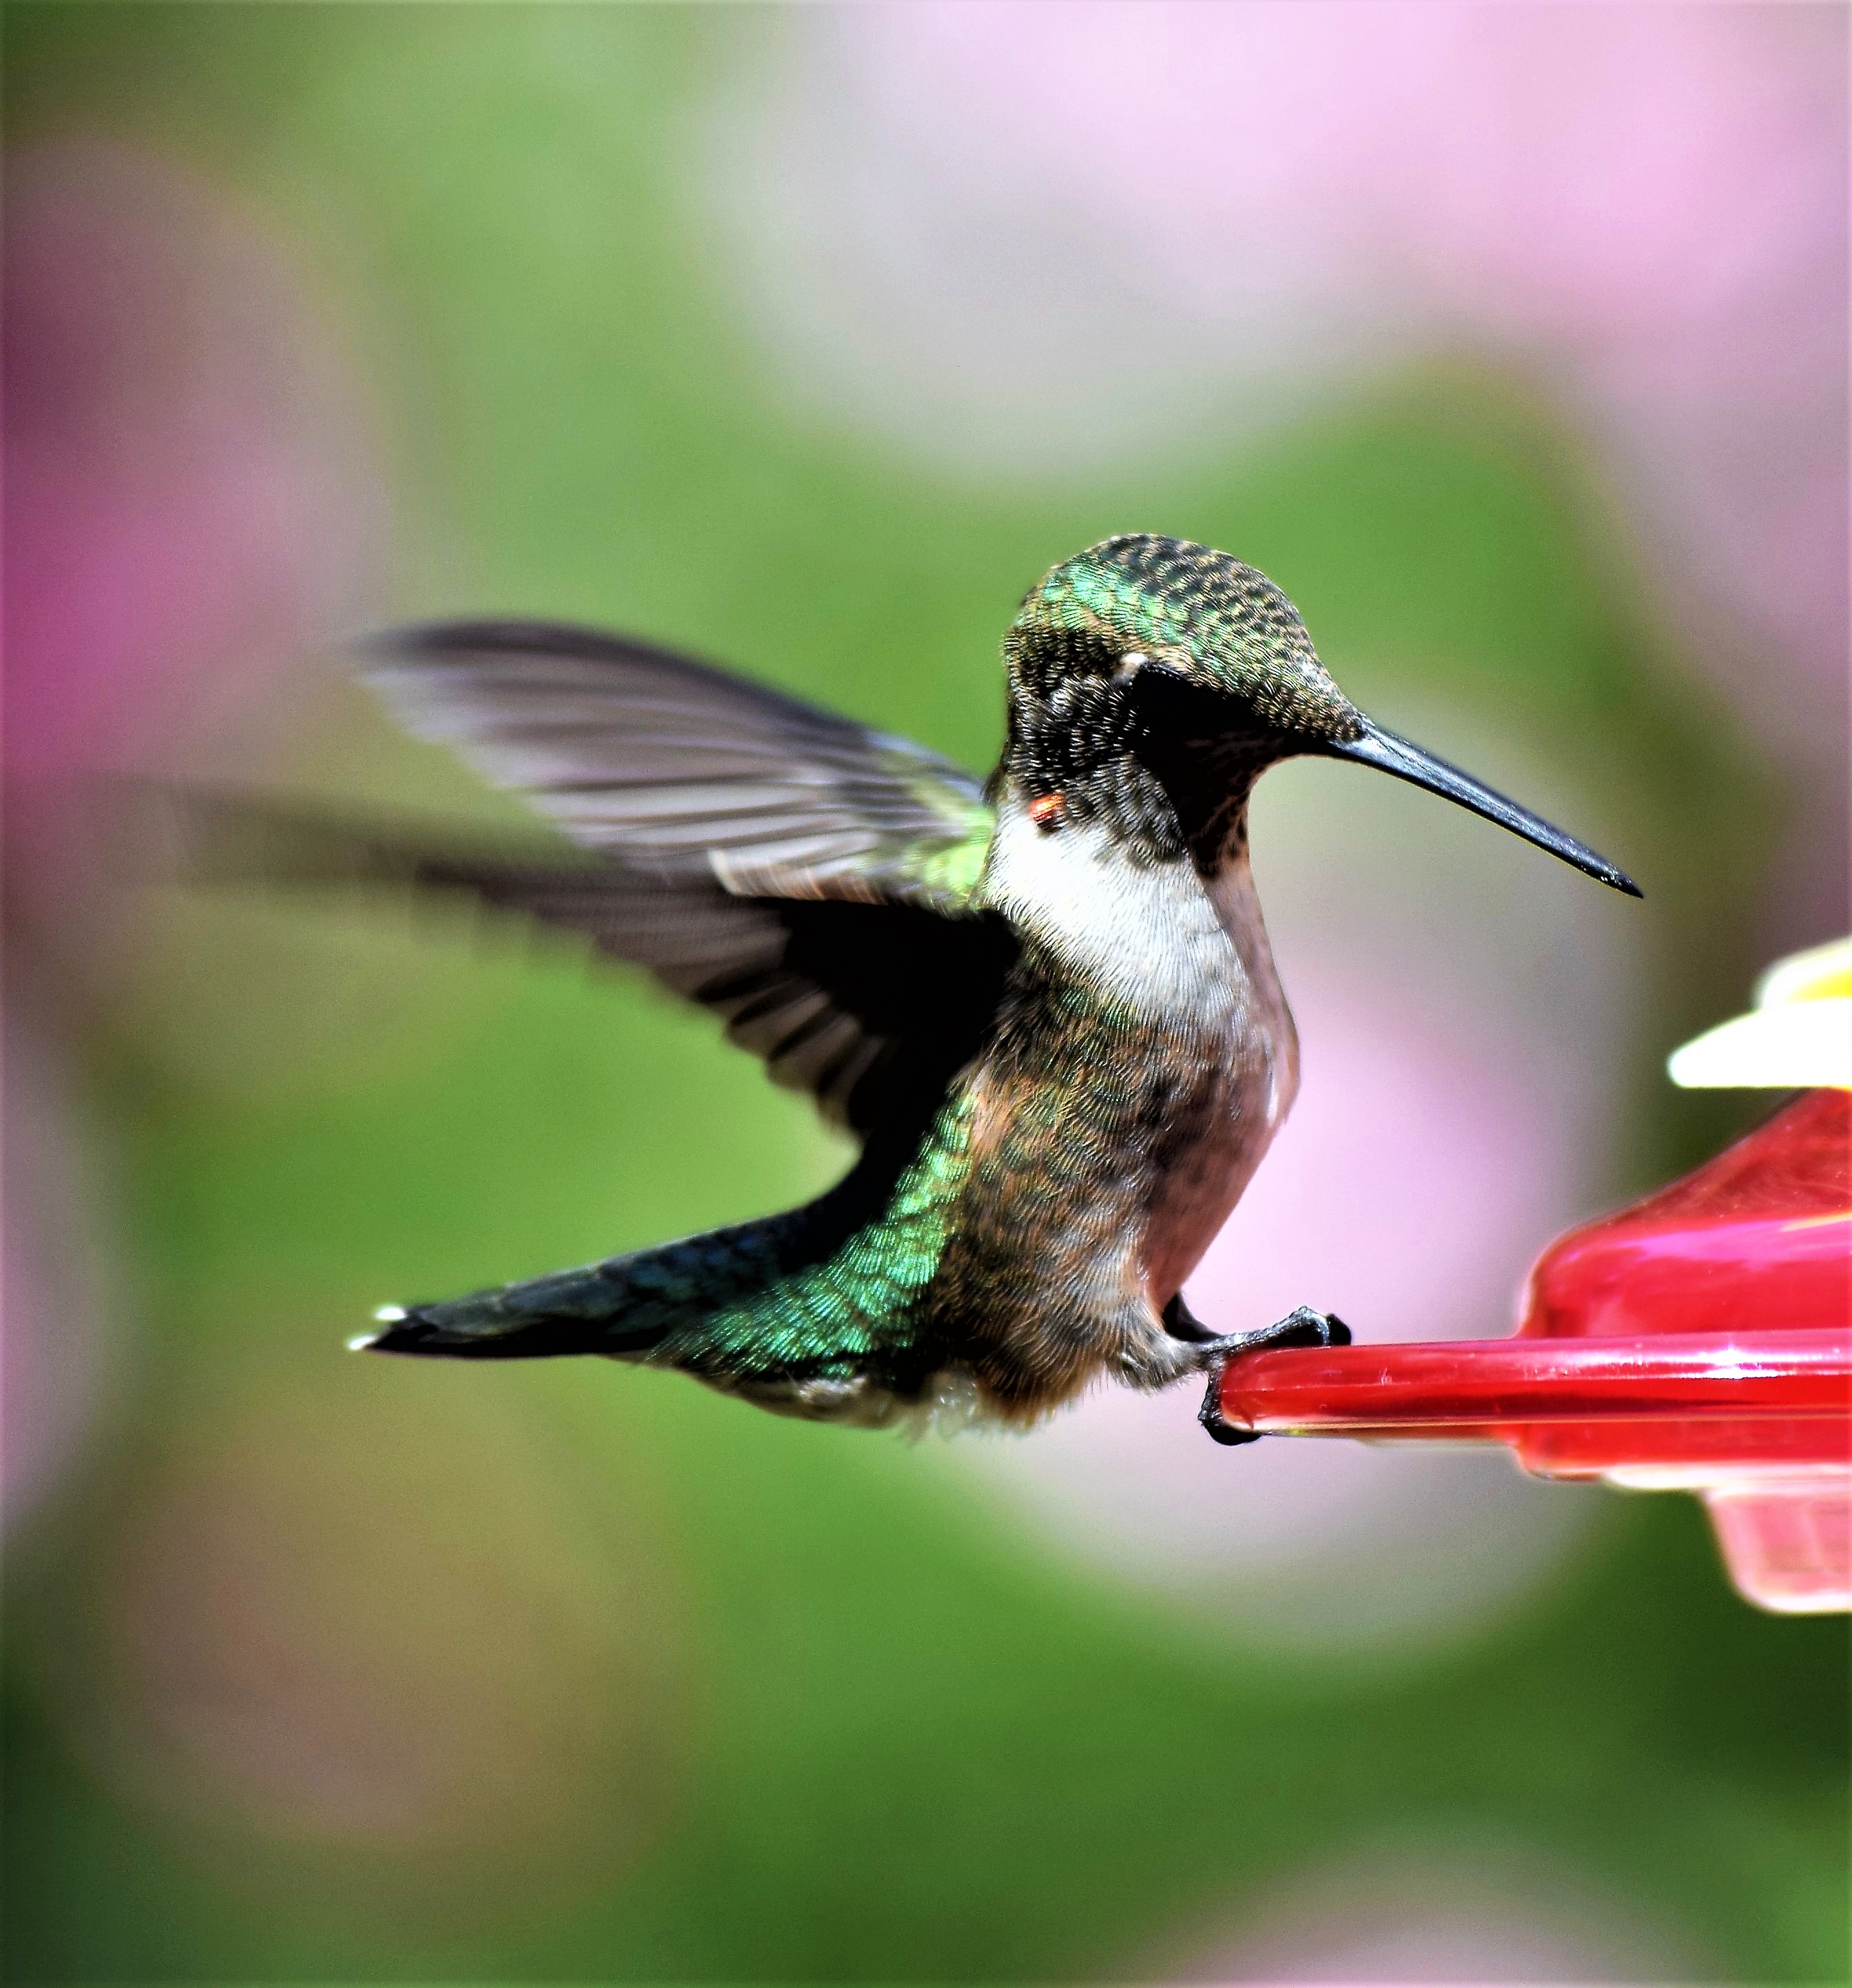
At first glance, this appears to be a female hummingbird. Look closely for the speck of red plumage on the neck. This is juvenile male Ruby-Throated during a late summer feeder visit.
The Audubon Society instructions advise using 1 part sugar (plain, white sugar) to 4 parts water to feed hummingbirds – and no red food dye. Boil the mixture until the sugar dissolves. Then let cool before filling your feeders.
Since I fill several feeders, I use 1 cup sugar to 4 cups water. During early spring, when the hummingbirds first arrive and late summer and as they fuel up for their mid-September trips back to Mexico and Central America, I make the mix just a little sweeter/stronger and cut back on the water by about a half cup. I have a friend who uses a much stronger mix, but have read that this isn’t good because too much sugar can damage the liver of hummingbirds.
If you make extra sugar water, you can refrigerate it for about a week. This will save you time as you fill your feeders weekly – even more so when experiencing heatwaves that will require more frequent food changes.
Finally, I keep my feeders up until the end of September. While most of the hummingbirds who visited all summer leave by September 10, we get stragglers from up north as they join the annual migration. It’s fun and honestly, a little bit rewarding to see an occasional visitor stop by to fuel up on sugar water and nectar from late blooming zinnias through September 30.
3. Plan Your Garden to Attract Hummingbirds – They Love Red & Pink
The gardens at our house are primarily well-established perennial gardens. They’ve always attracted hummingbirds, but after putting a little extra thought into new plantings (all gardeners add new plants to their gardens every year, right?), we always think about what will attract hummingbirds and other pollinators, including bees and butterflies.
While there are three feeders across the garden, I look at them as supplemental to the flowers that are planted to provide a continuous bloom for our enjoyment – and food for the hummingbirds throughout the summer. This not only makes the garden look beautiful throughout the summer, but it’s also one of the best ways to keep hummingbirds coming back to visit. Did you know that hummingbirds eat as much as half of their weight every day – and feed five to six times per hour?
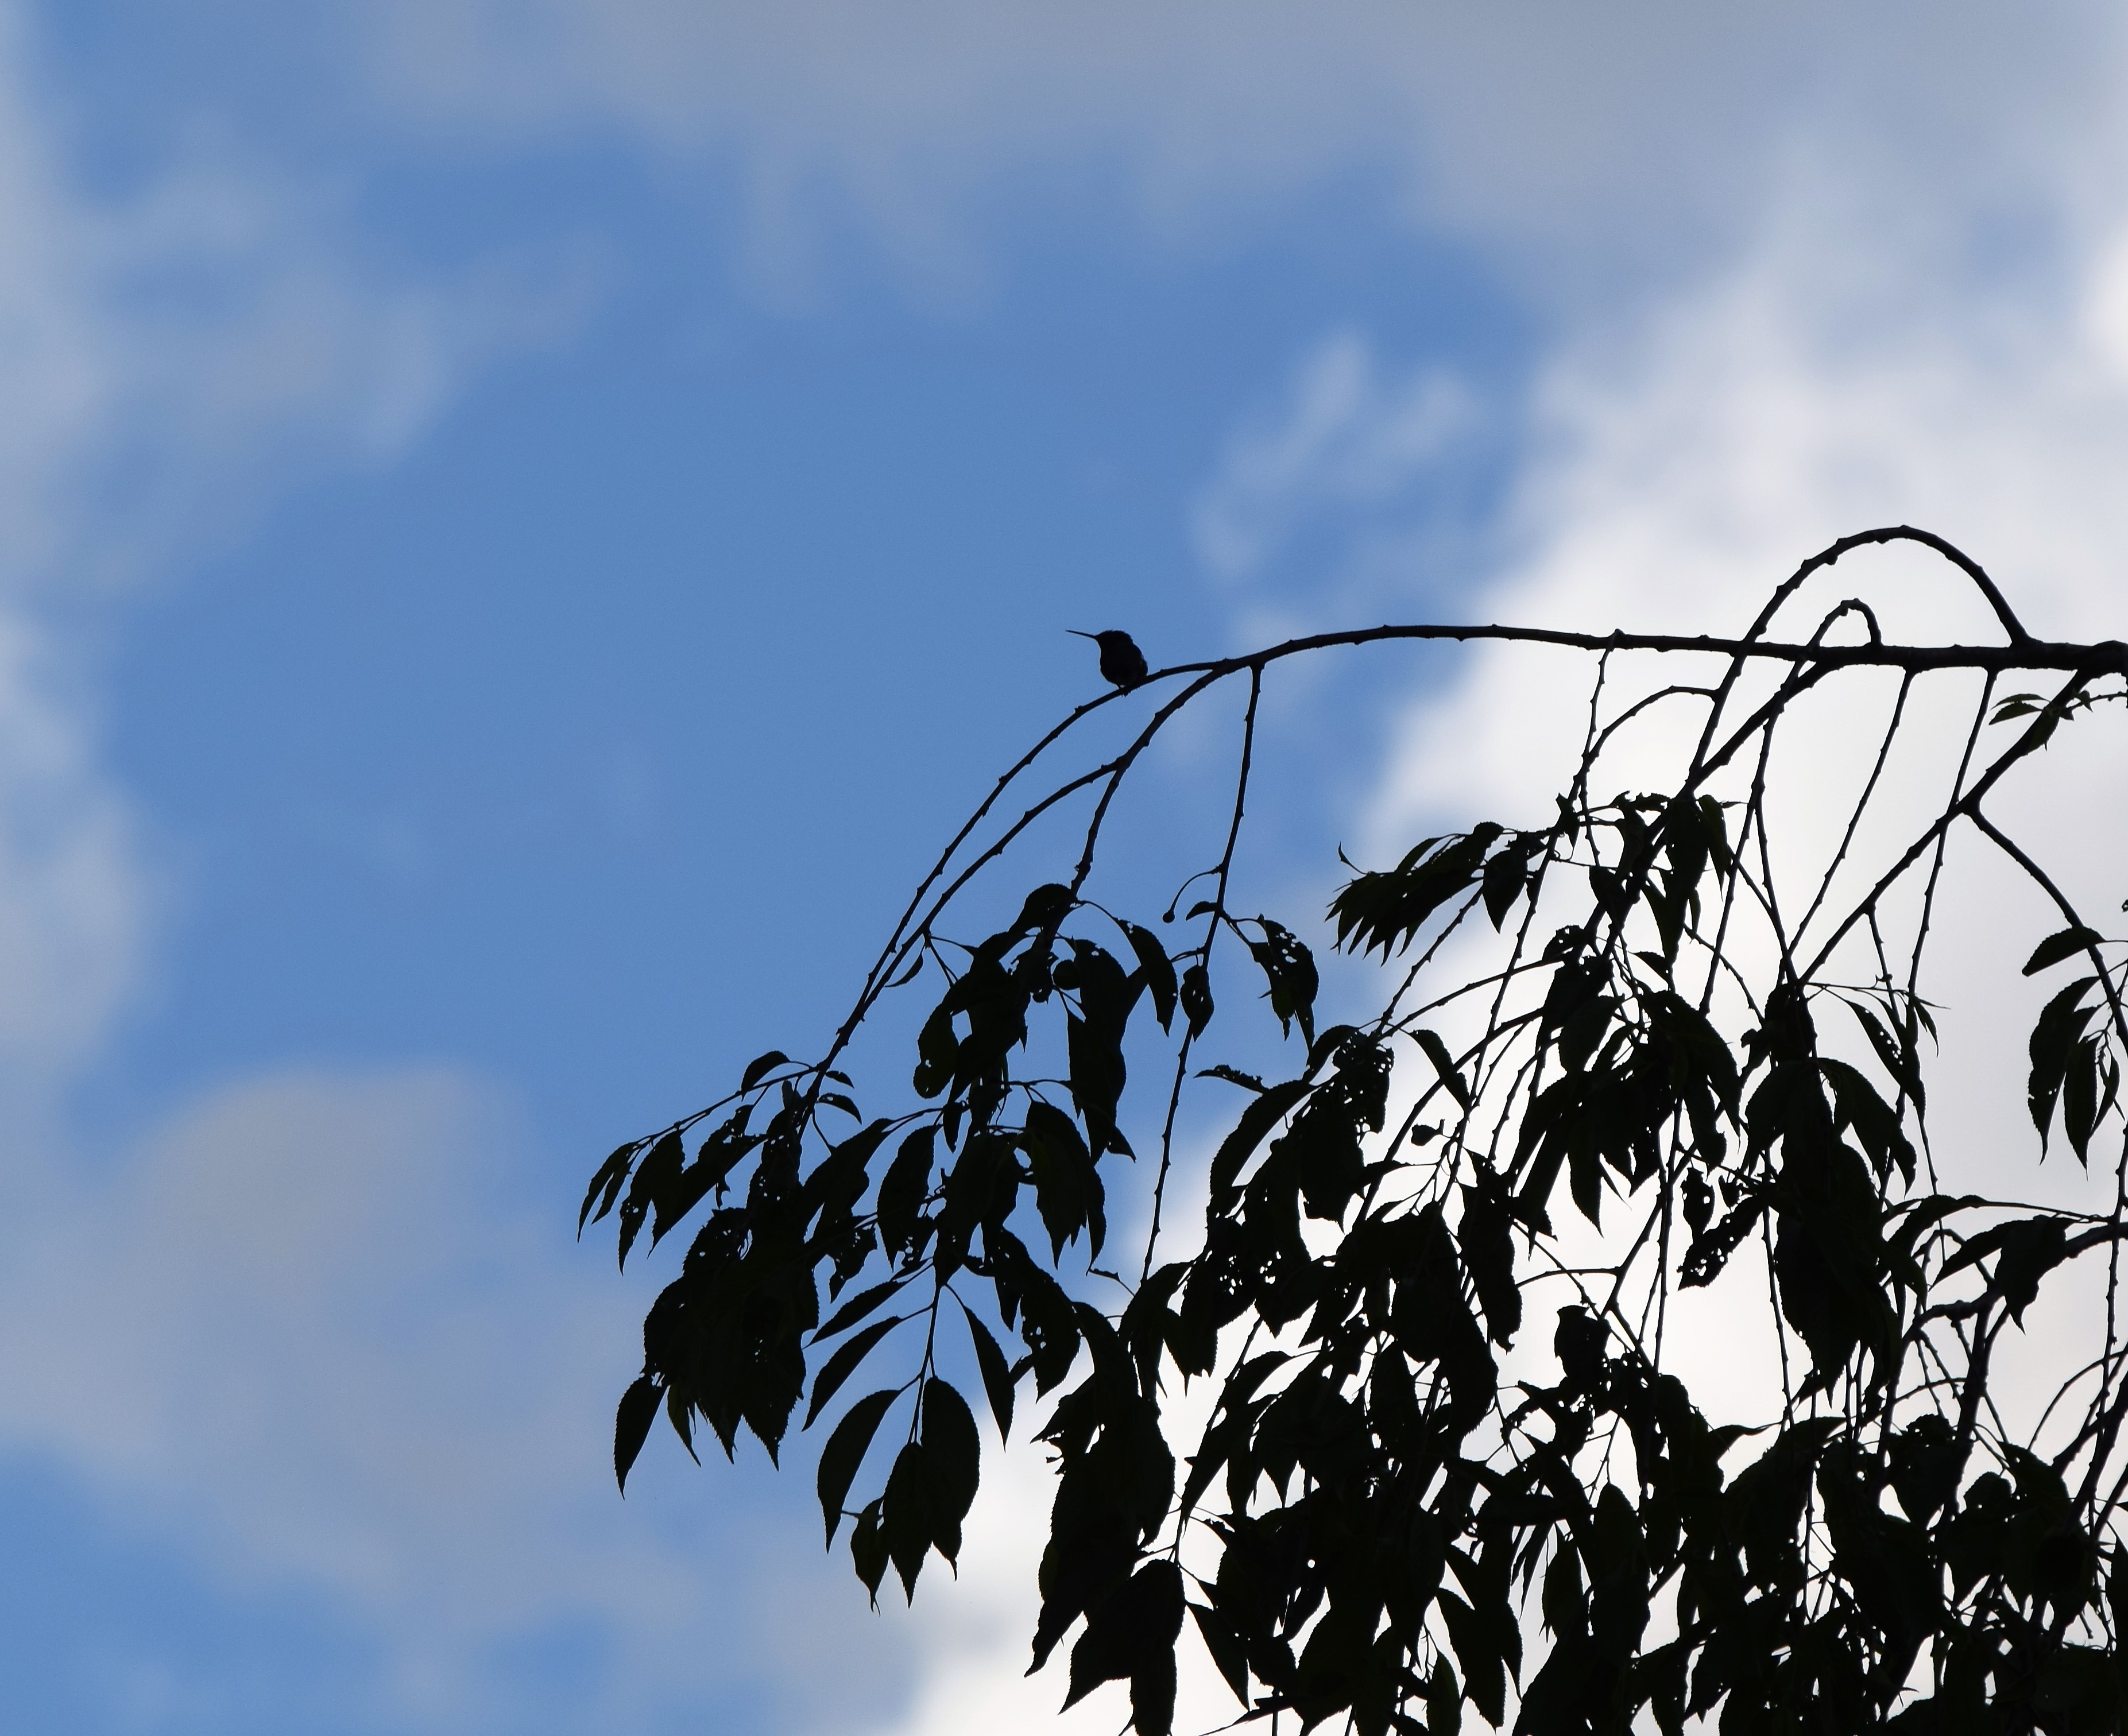
Over the past few years, I’ve learned to pay attention to what flowers and trees the hummingbirds like to visit for their feedings and for resting. One of the resting areas that I know to look up to is the very top of the Weeping Cherry tree in the back garden. When I see one up there, I know that there are at least three more in the nearby flowers.
Lookout Point at the top of the Weeping Cherry tree. A sign if the hummingbirds are active.
Add These Flowers to Your Garden and Attract More Hummingbirds
The past two summers, I’ve kept my camera with me while in the garden, especially during the daily hummingbird watch ritual I mentioned earlier.
While I’ve caught great shots of these incredible creatures at the feeders, I’ve wanted more ‘natural’ photos of them visiting the flowers in our garden. (I post many of these on my Instagram page, also called Garden with Grace).
Here are some of my favorite new shots of the hummingbirds enjoying the flowers in our gardens over the past year. You may be inspired to add some of these to your own landscape. Keep in mind to plant flowers for your specific zone. We are in zone 5B in Nashua, NH. So you may or may not have success with all of these.
In addition to the photos captured here – other flowers the hummingbirds visit include Purple Siberian Iris and Purple Lilac in the spring. And Zinnias! They love the secret zinnia beds scattered across the back gardens. Zinnias are annual flowers, but I keep the seed heads each autumn to start next year’s garden. If there’s not a butterfly flitting among the zinnias, you can usually find a hummingbird. (I’m hoping to catch that photo next summer! – UPDATE- On September 21, I captured a good photo that includes a zinnia and have added it to the end of this post.)
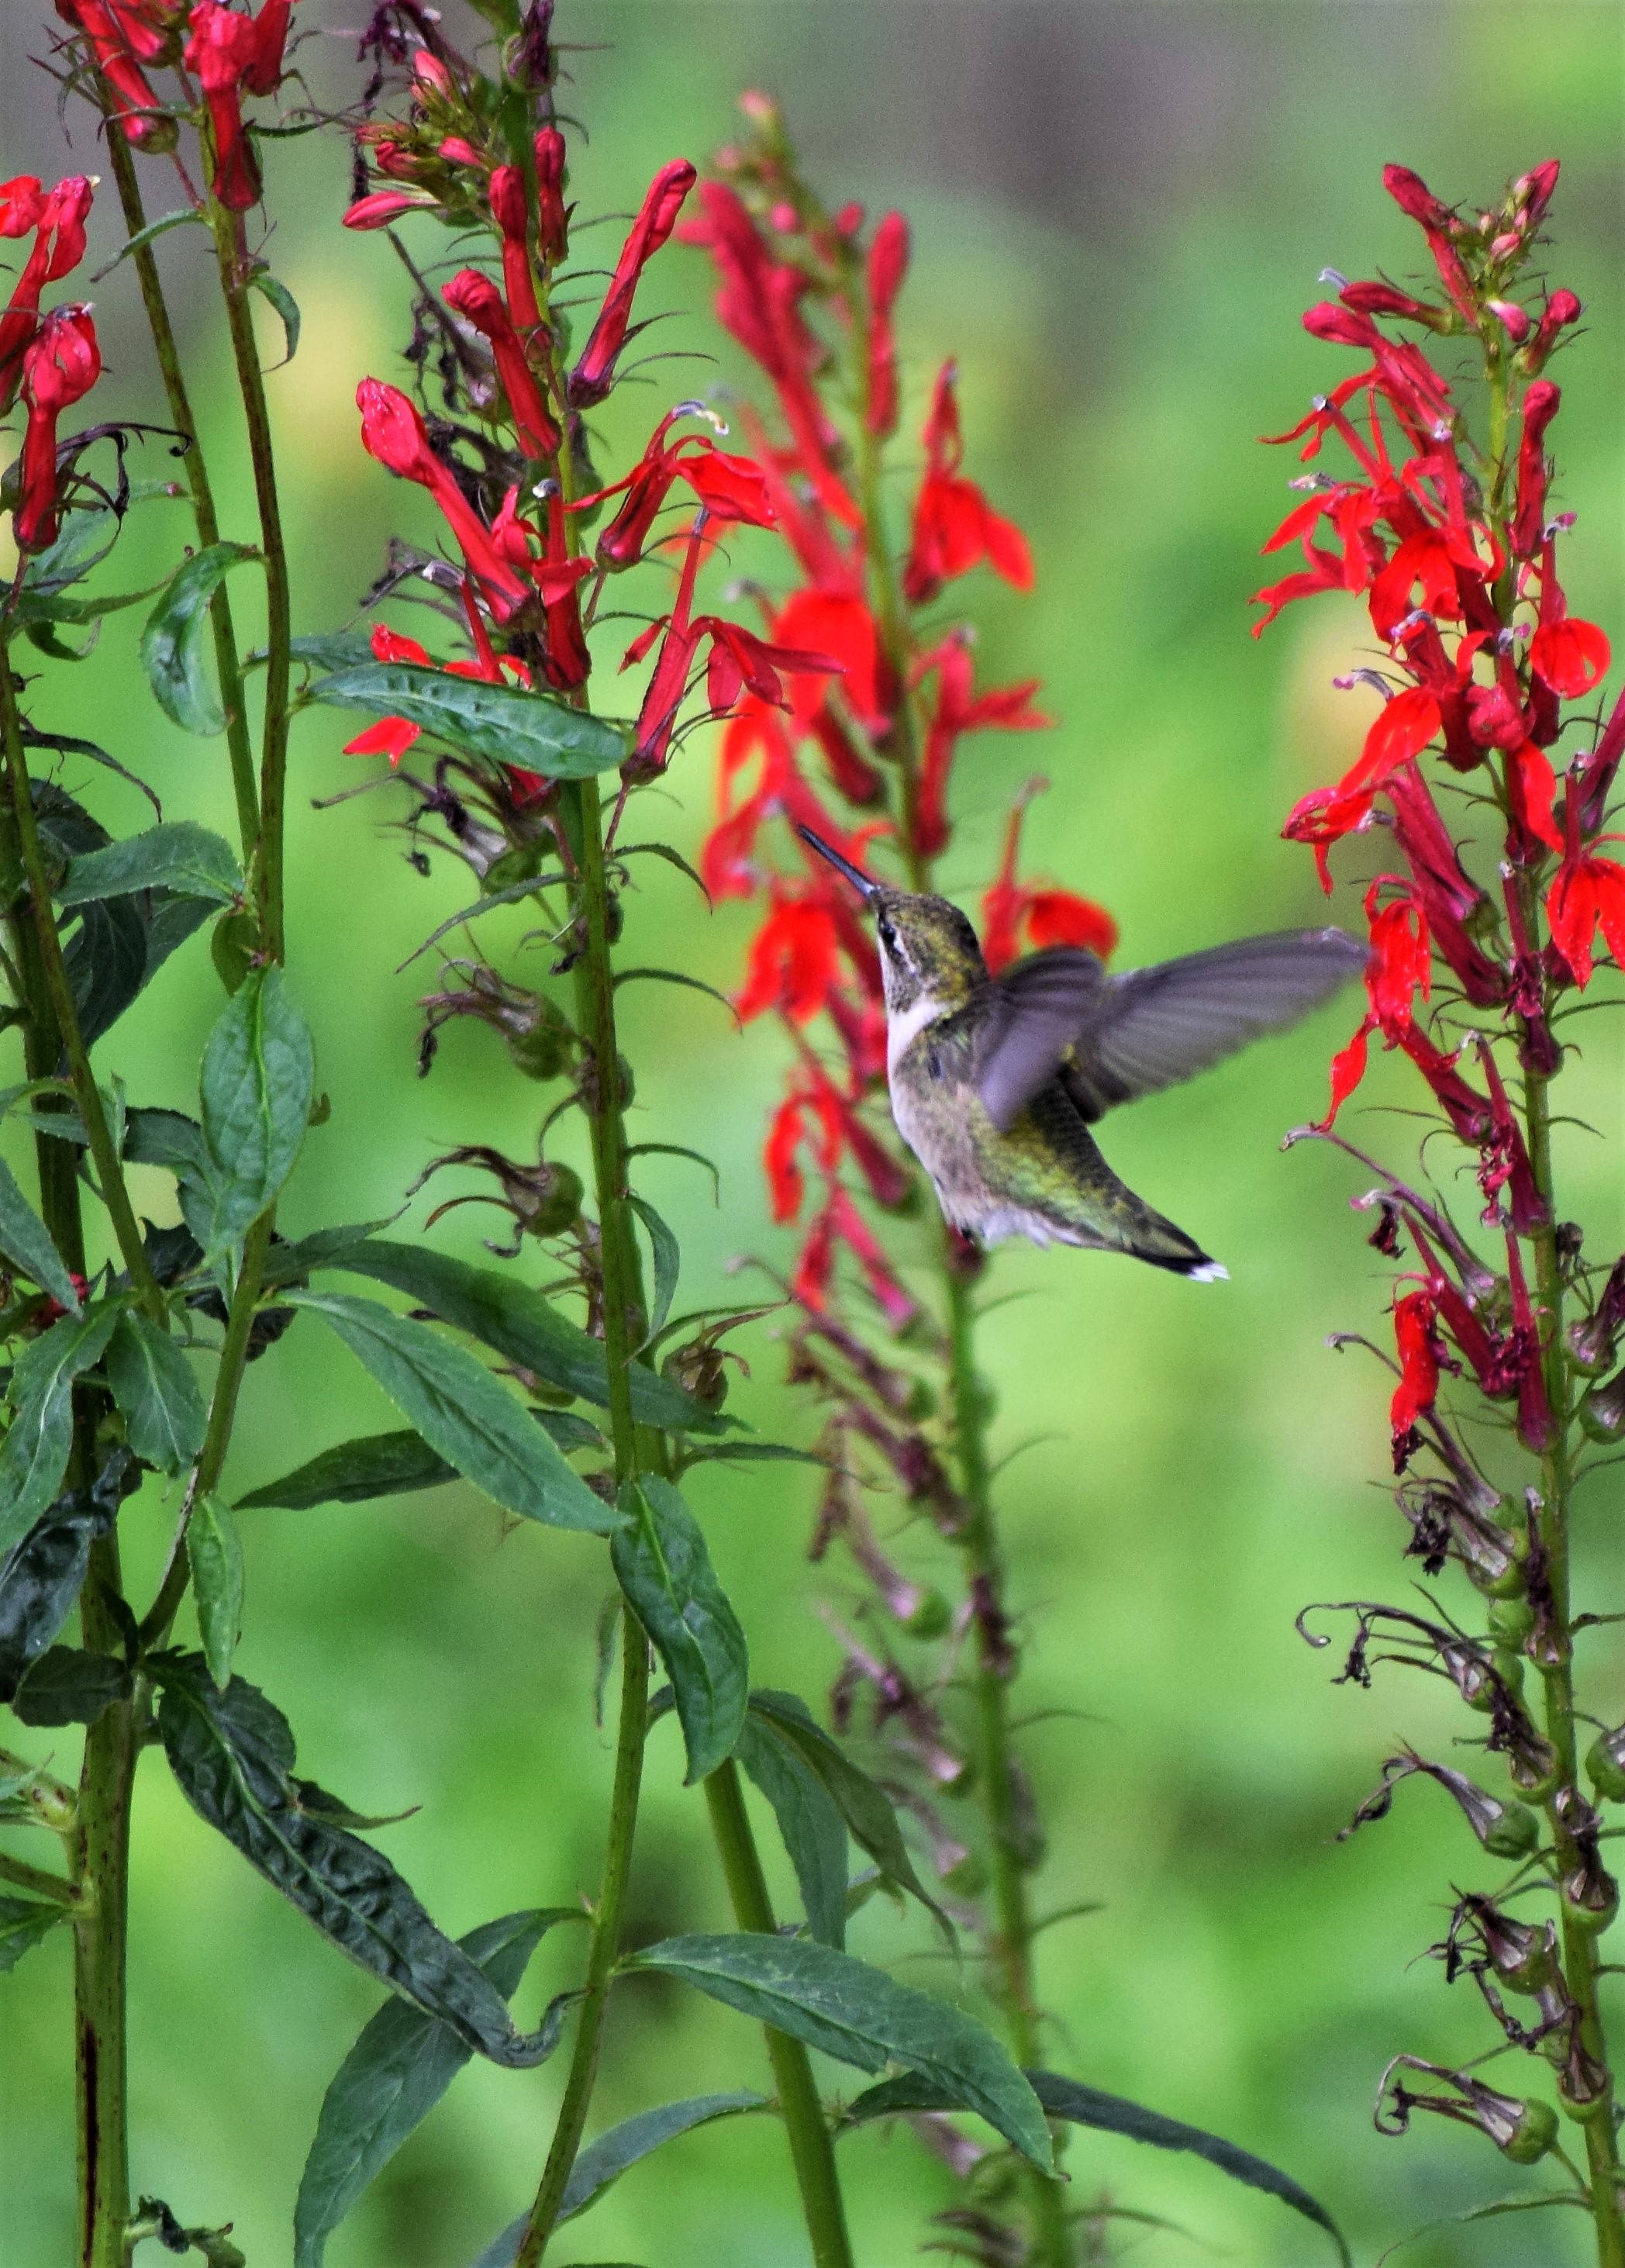
Cardinal Flower aka: Lobelia Cardinalis
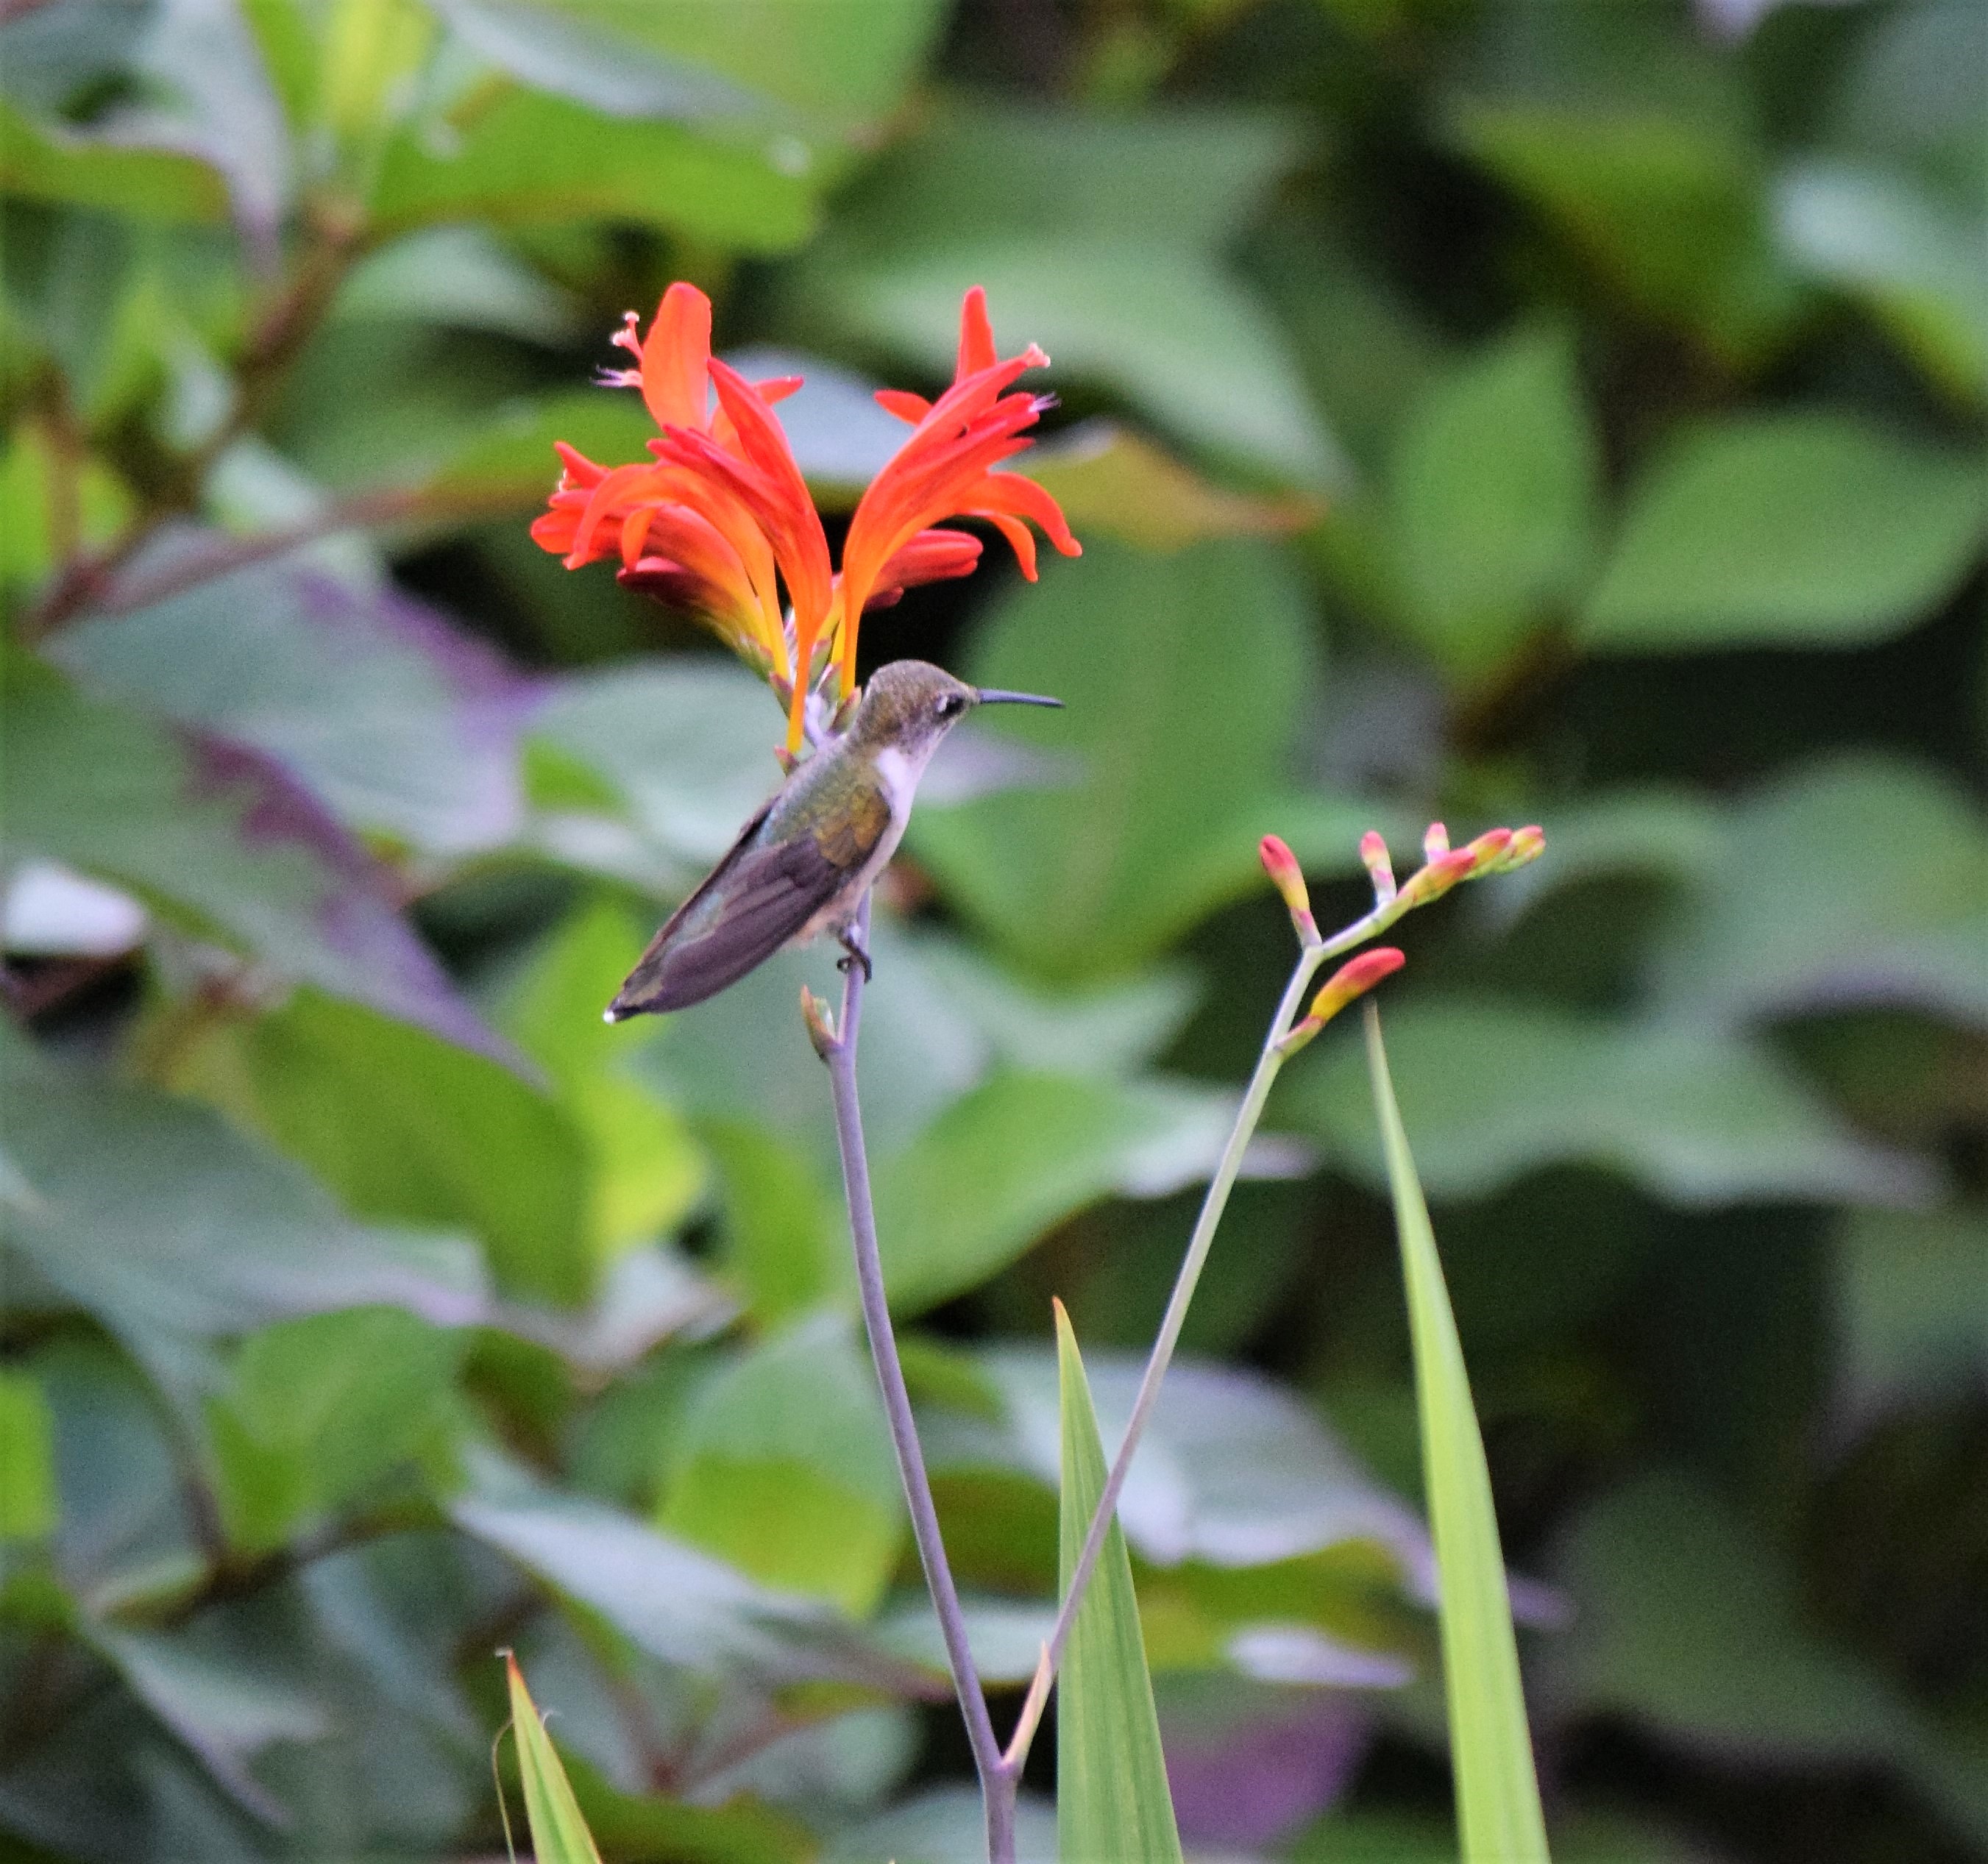
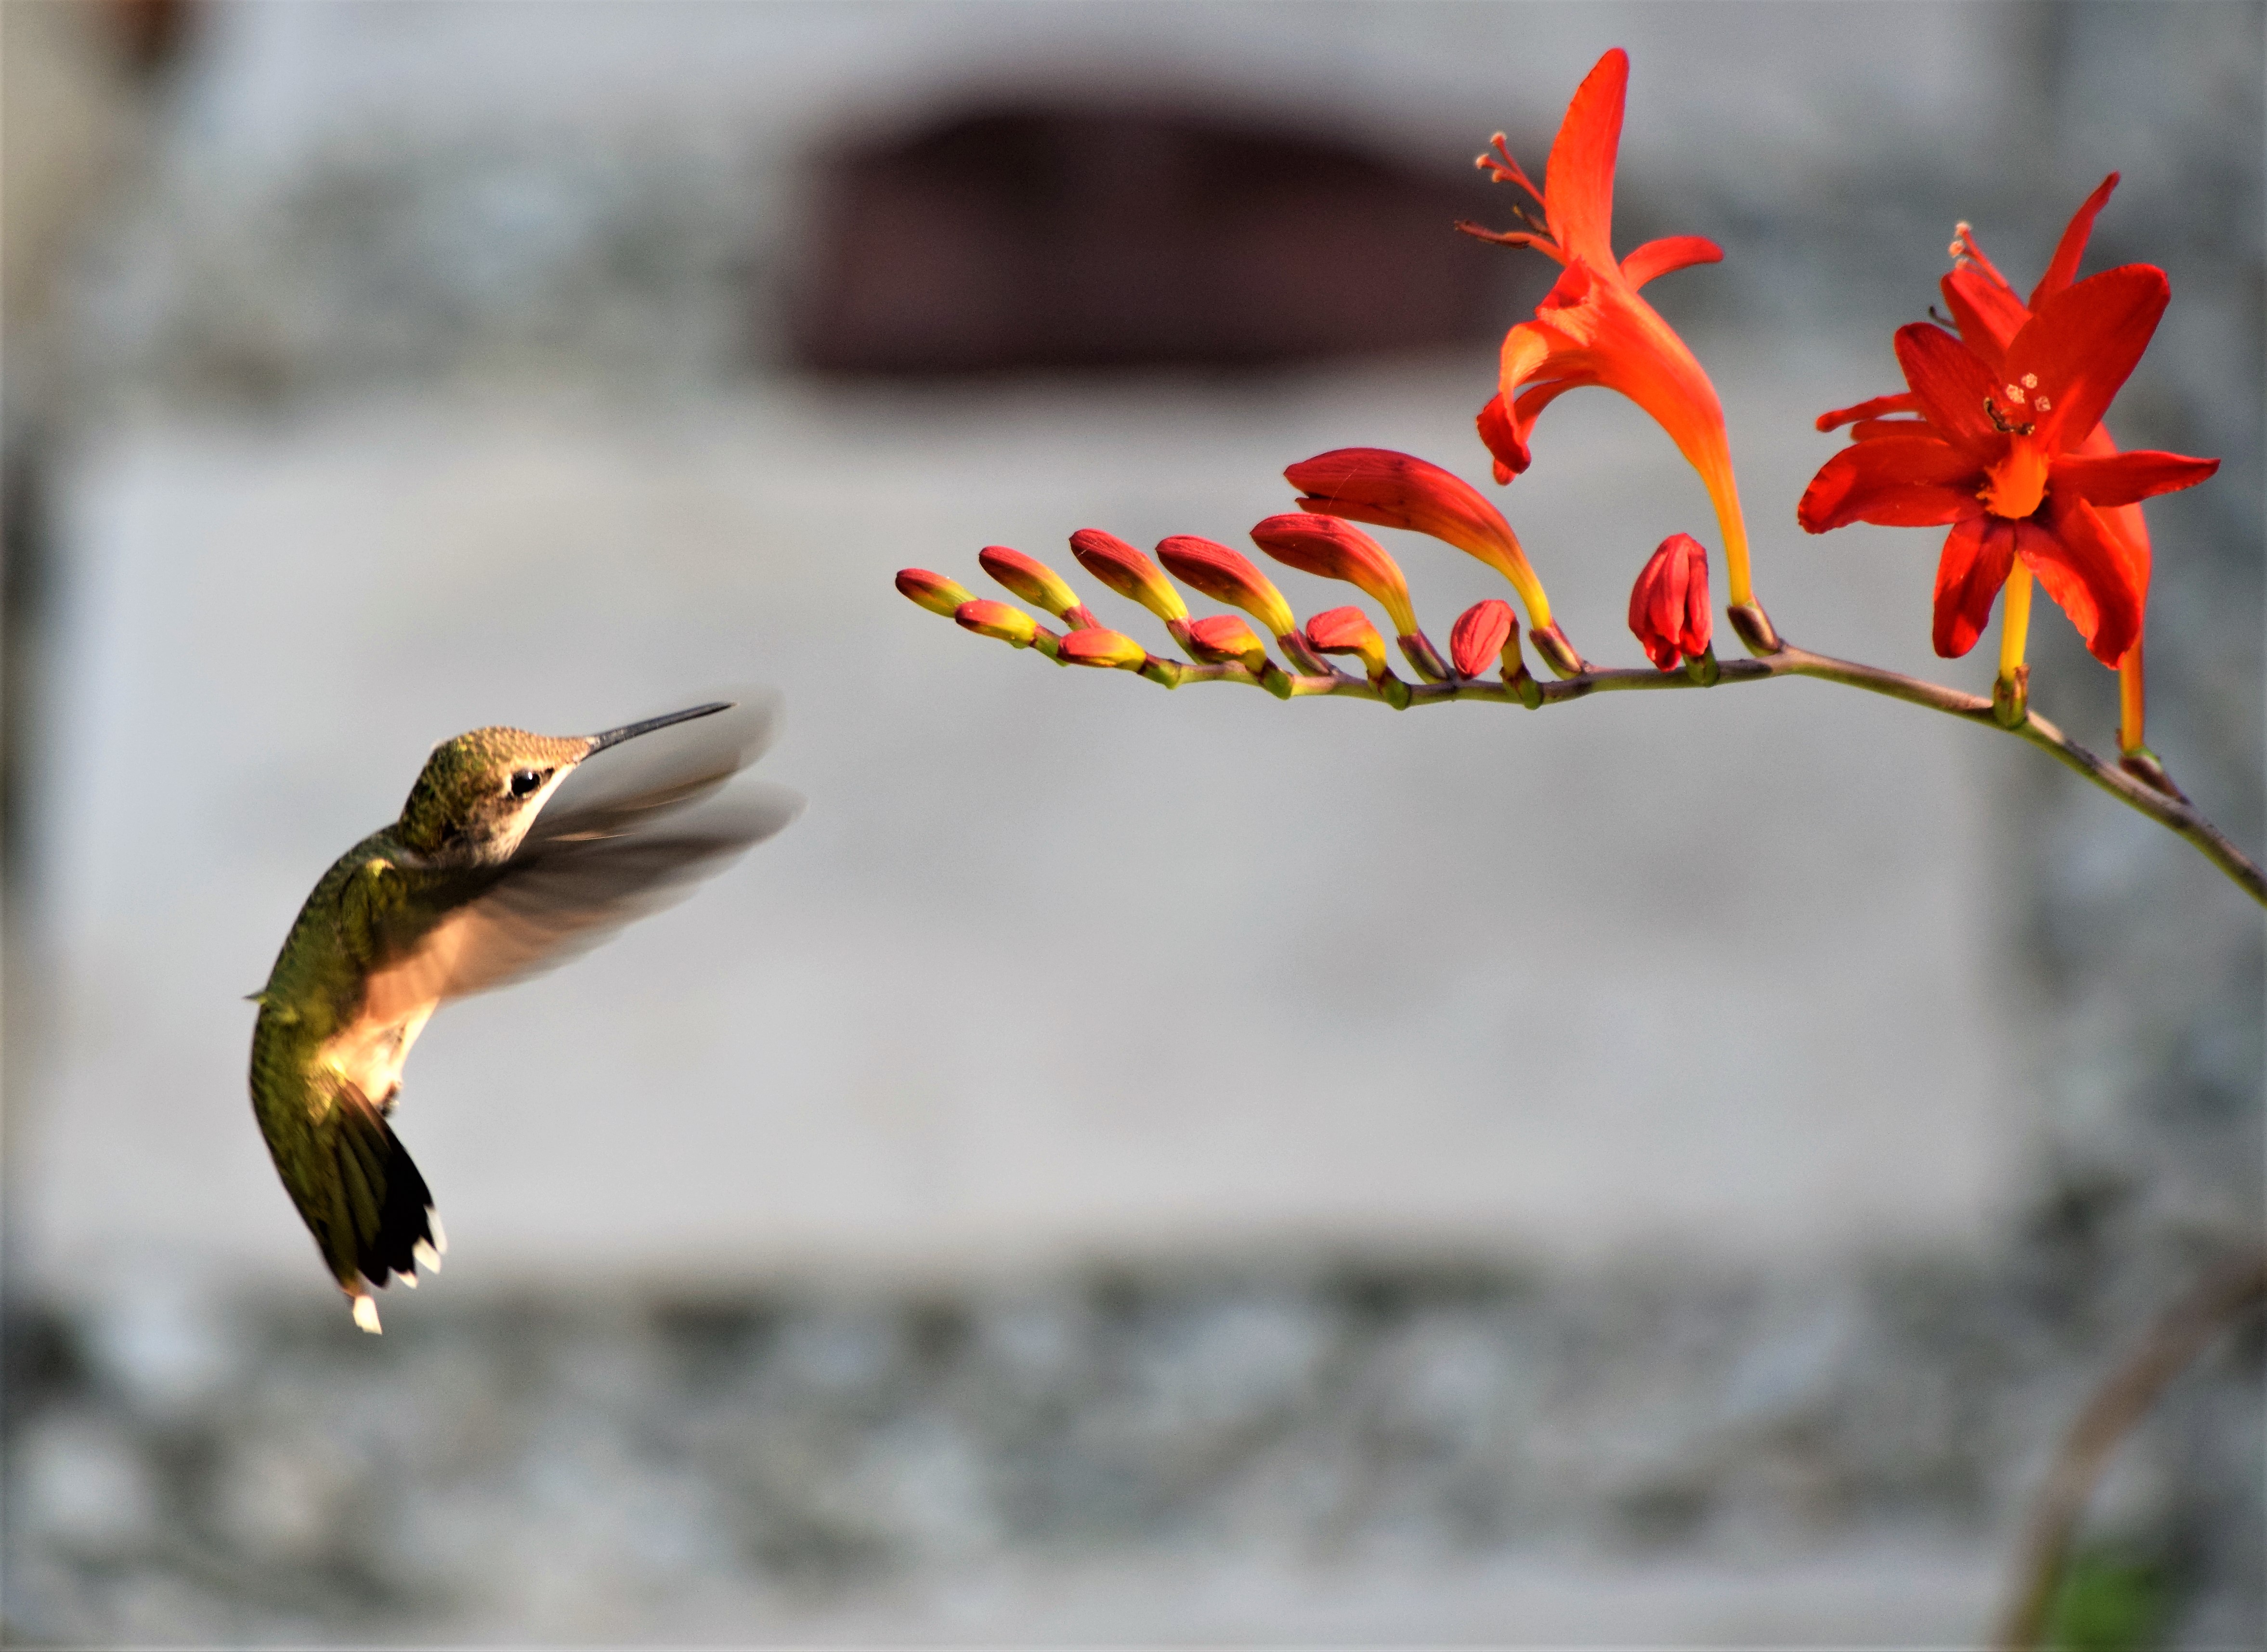
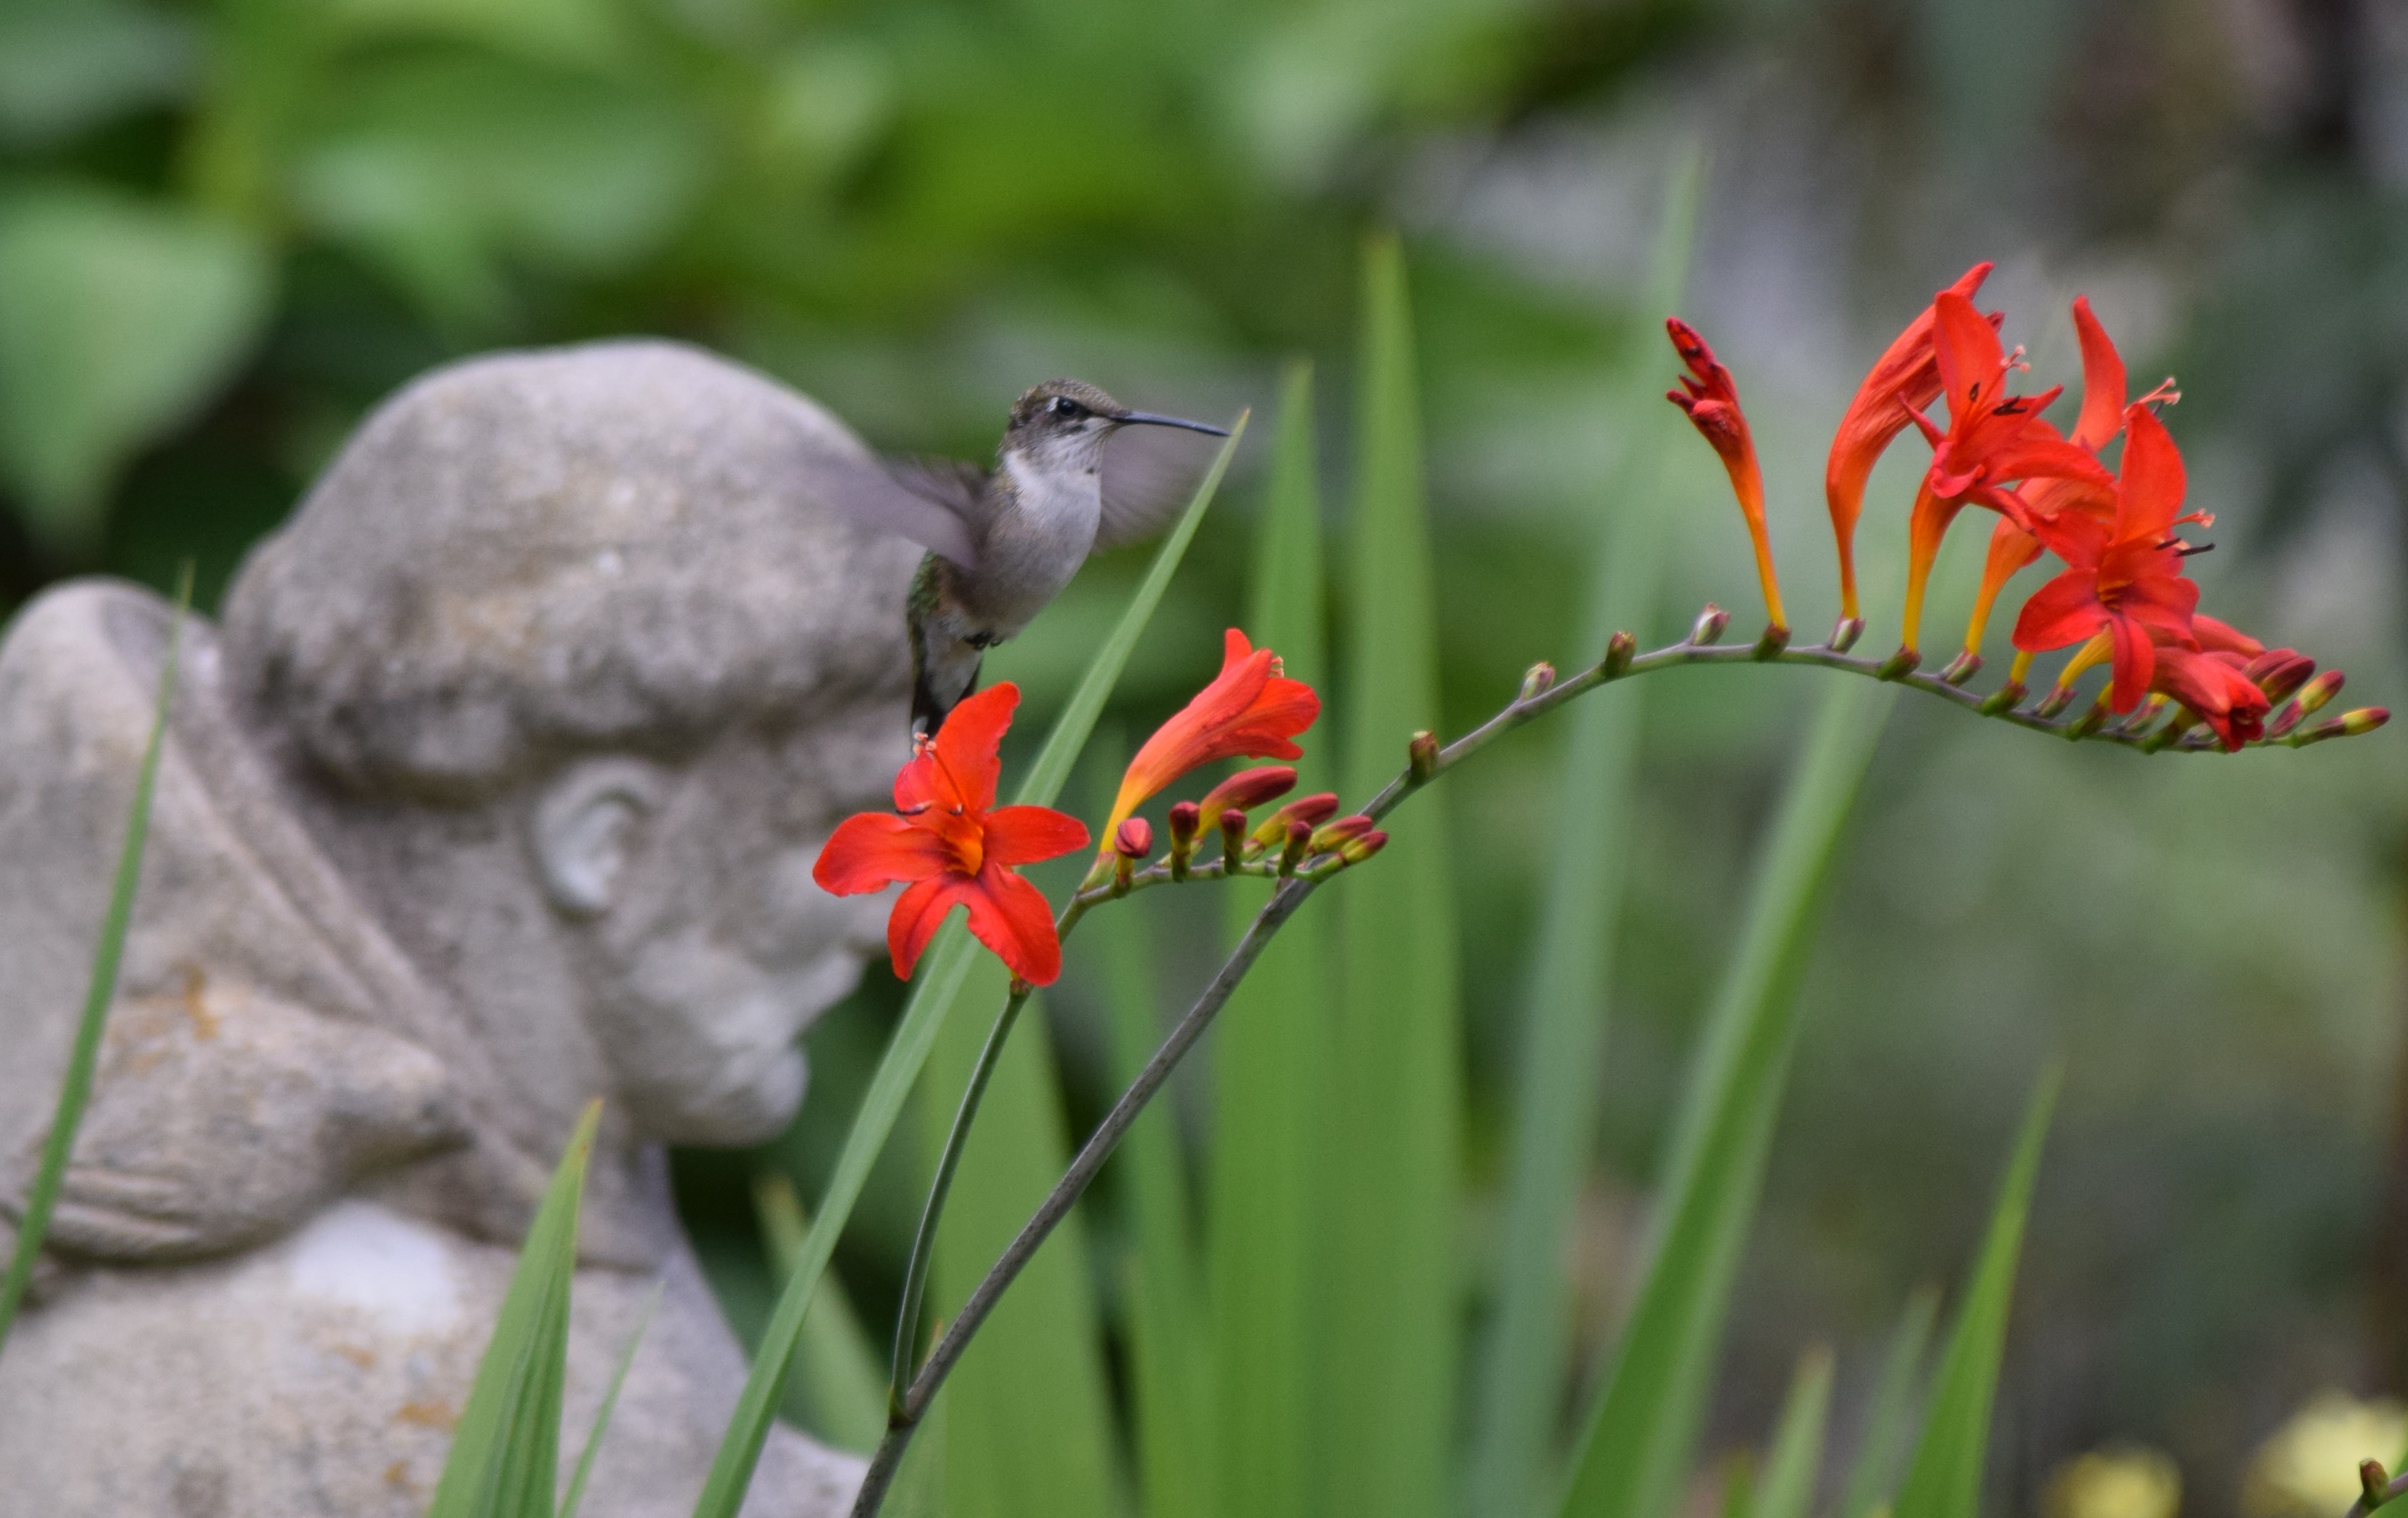
Lucifer Flower, aka: Sword Flower, aka: Crocosmia. This is new this year and big hit!
Lucifer Flower, aka: Sword Flower, aka: Crocosmia. This is new this year and big hit!
Here’s another of the Lucifer Flower, with St Francis (Patron Saint of Animals)
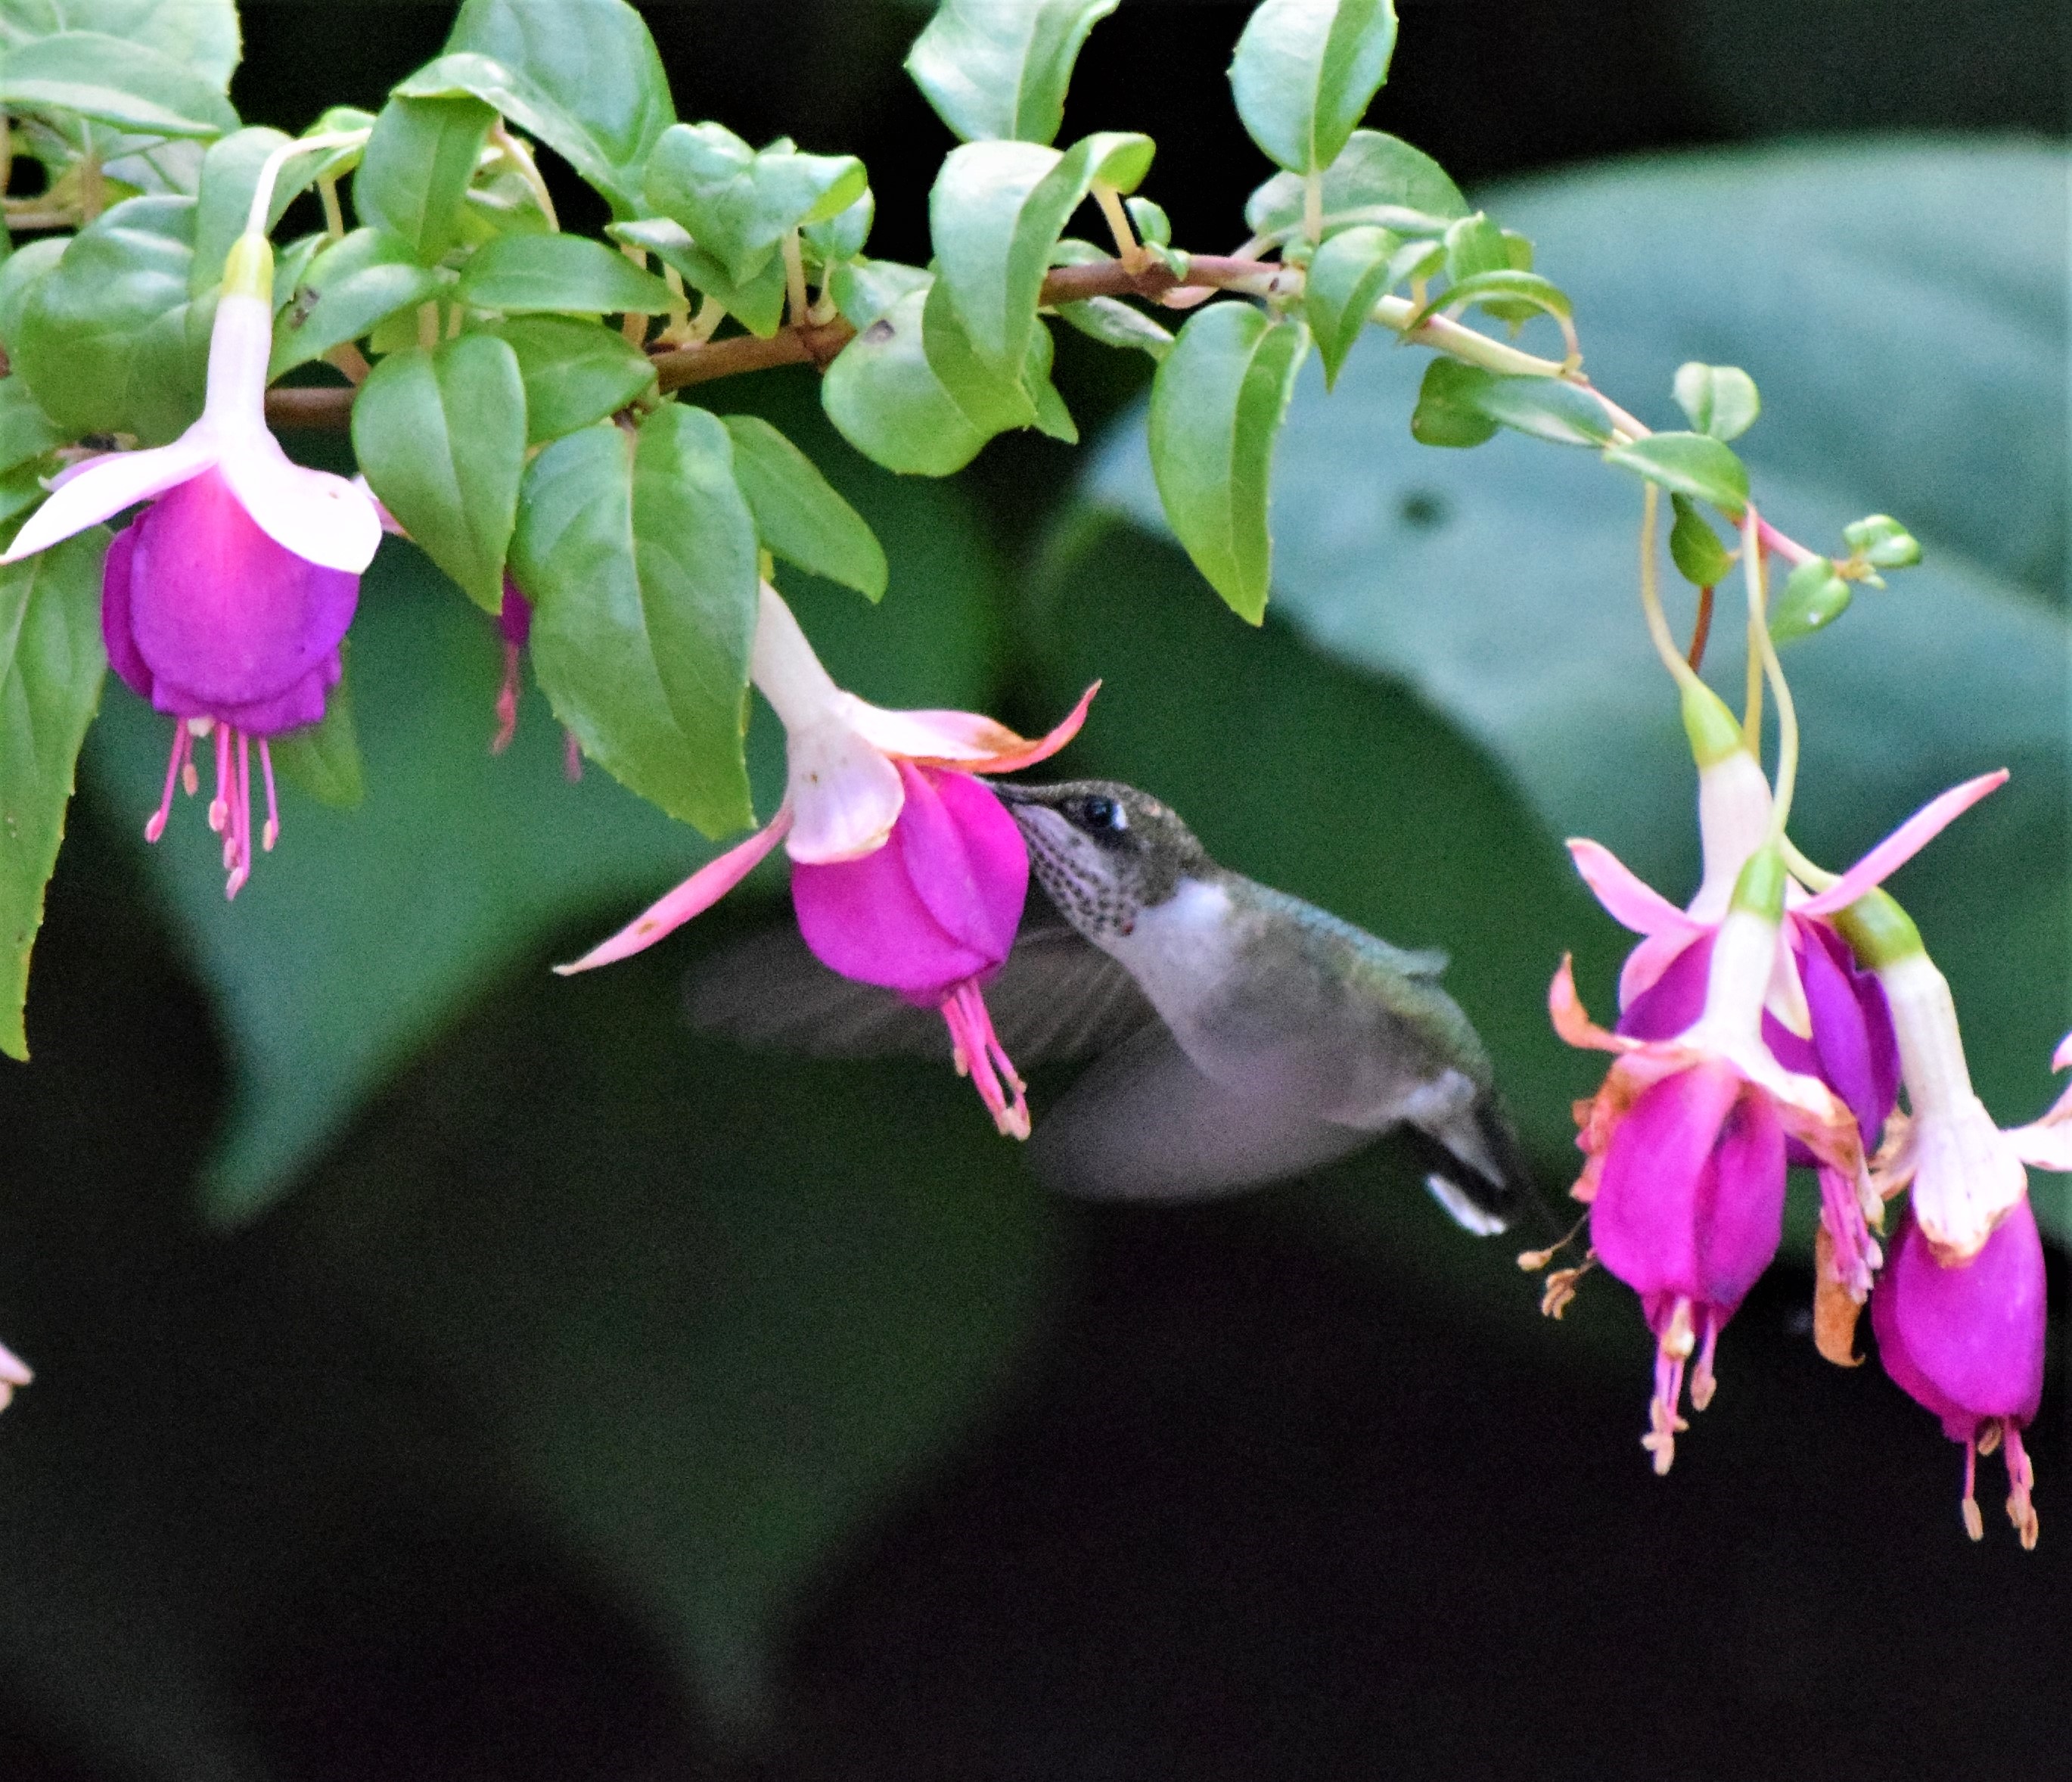
One of the few annual flowers – Fuschia. This always attracts the hummingbirds late summer.
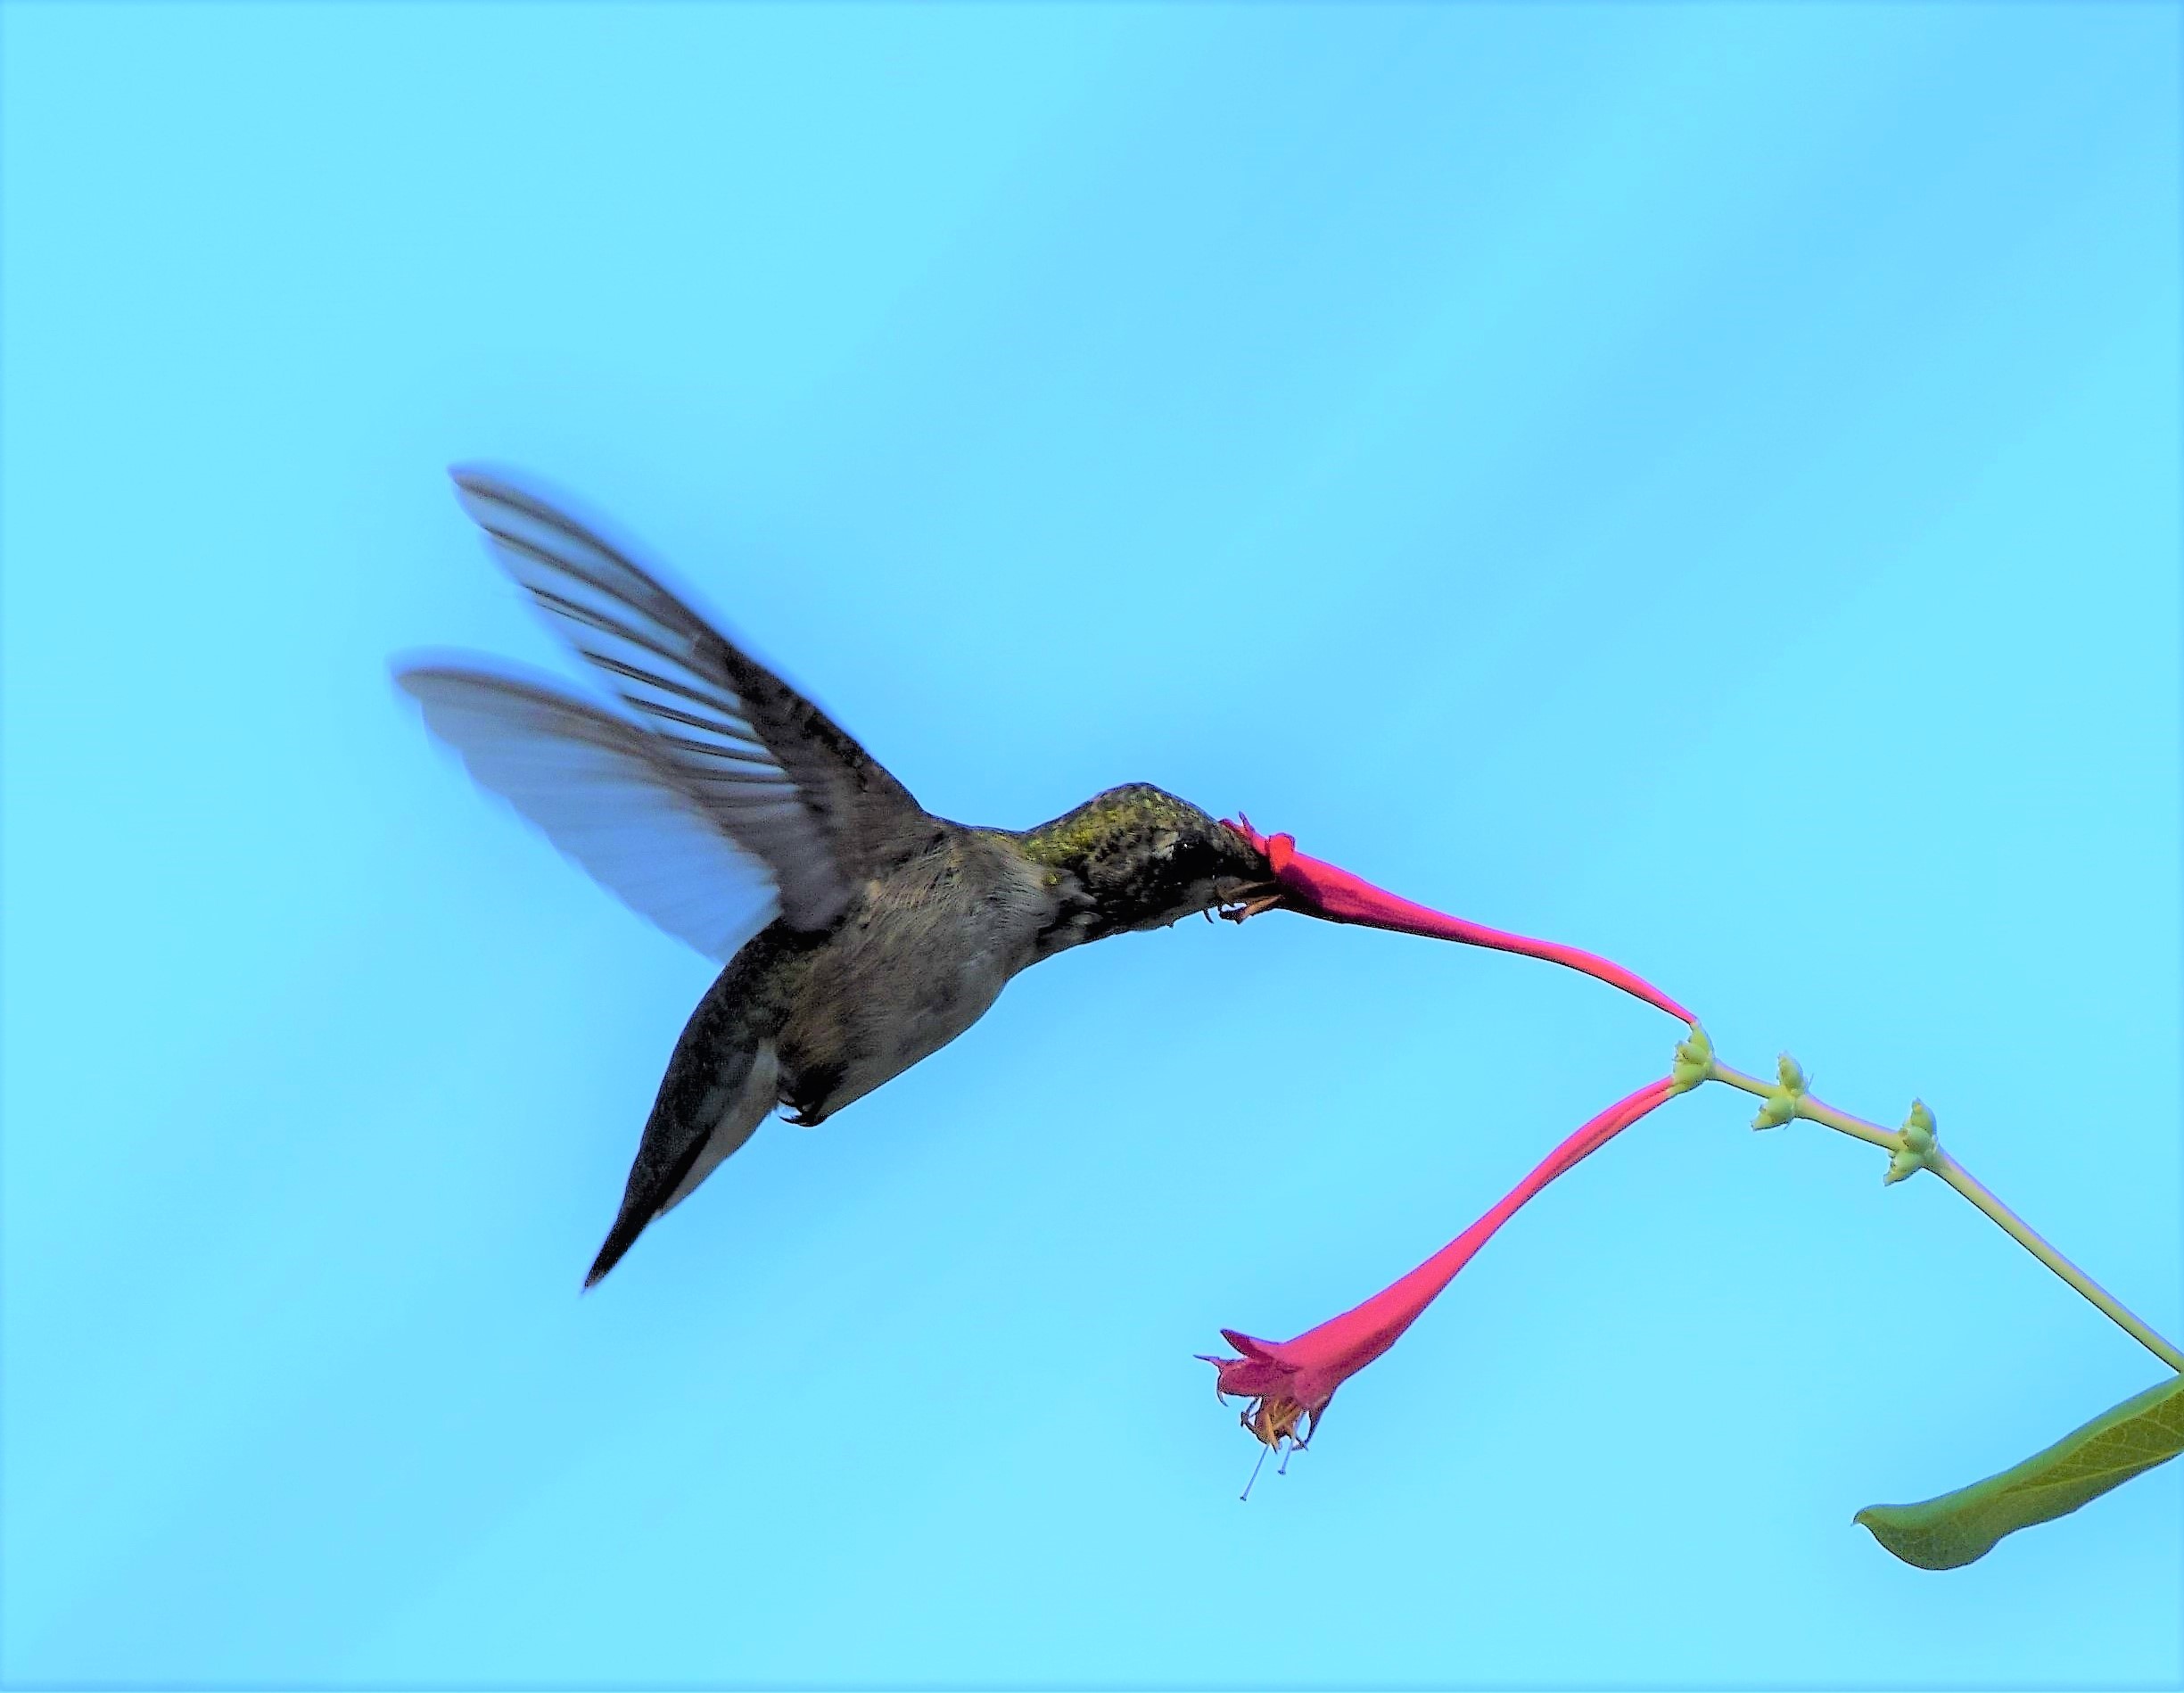
My first and all-time favorite action shot of a hummingbird above a trellis of Alabama Crimson Honeysuckle on a clear, cloudless late summer afternoon.
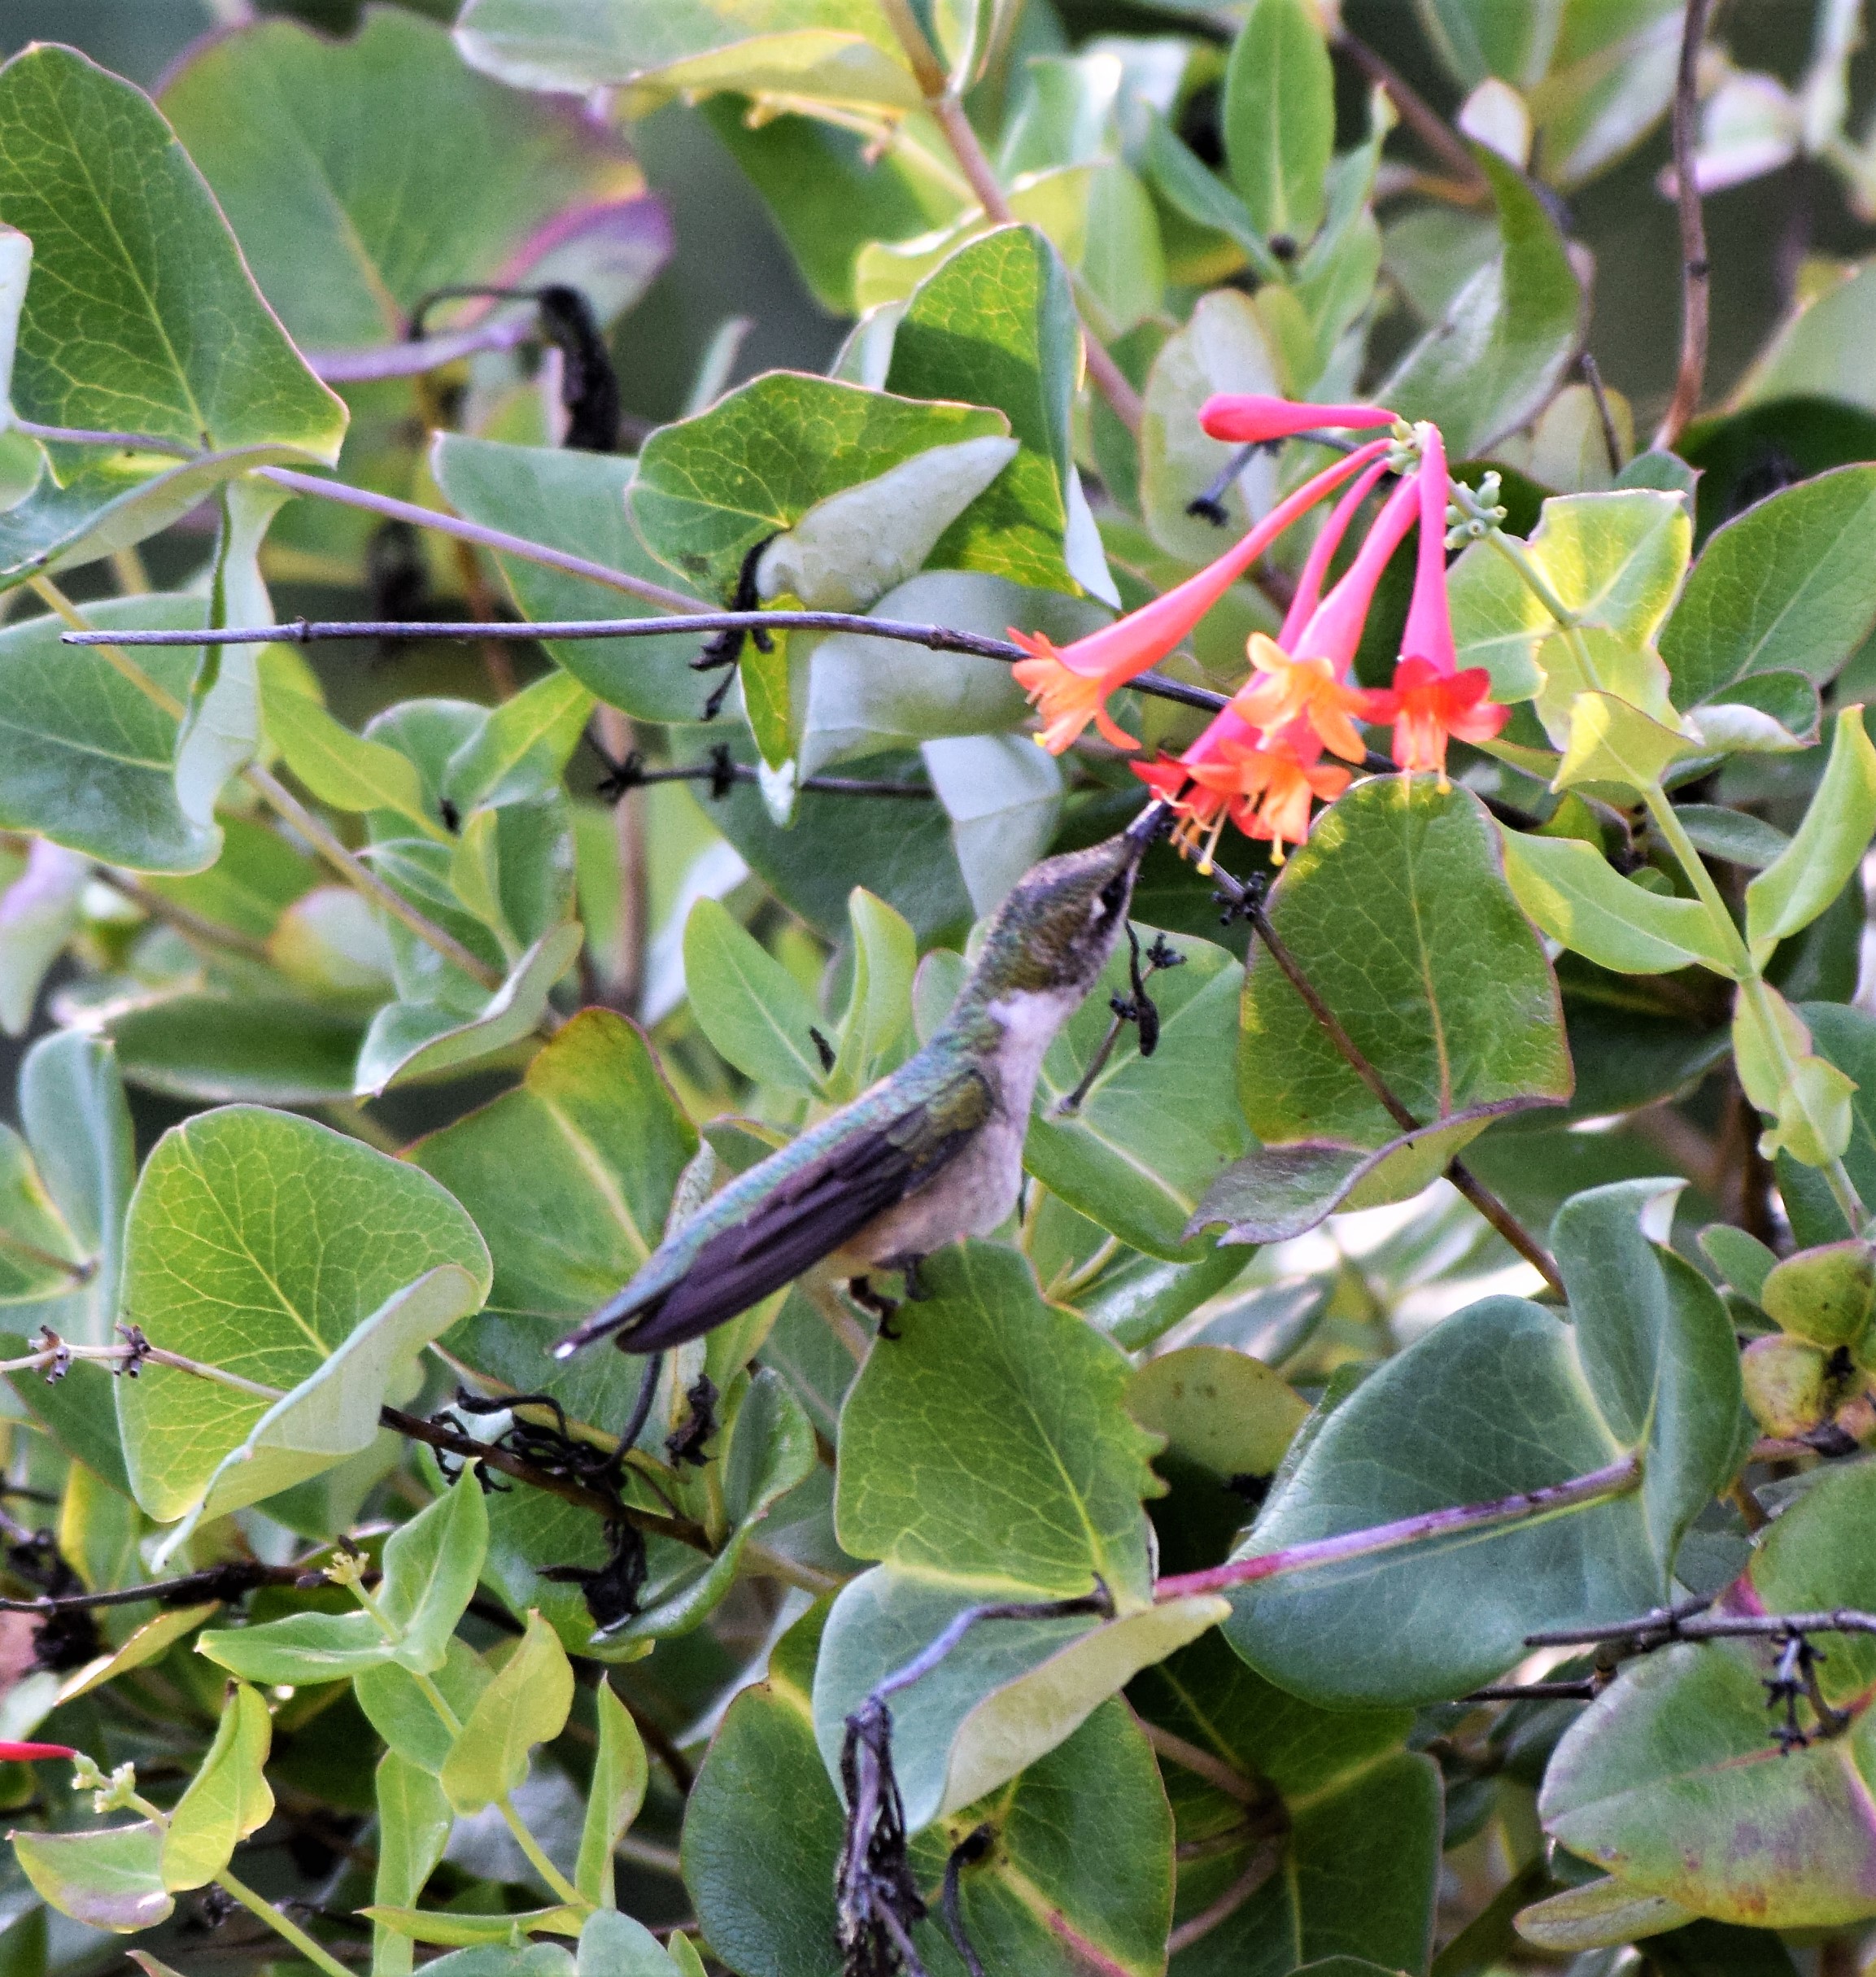
Alabama Crimson Honeysuckle. Resting on a leaf while enjoying sweet nectar.
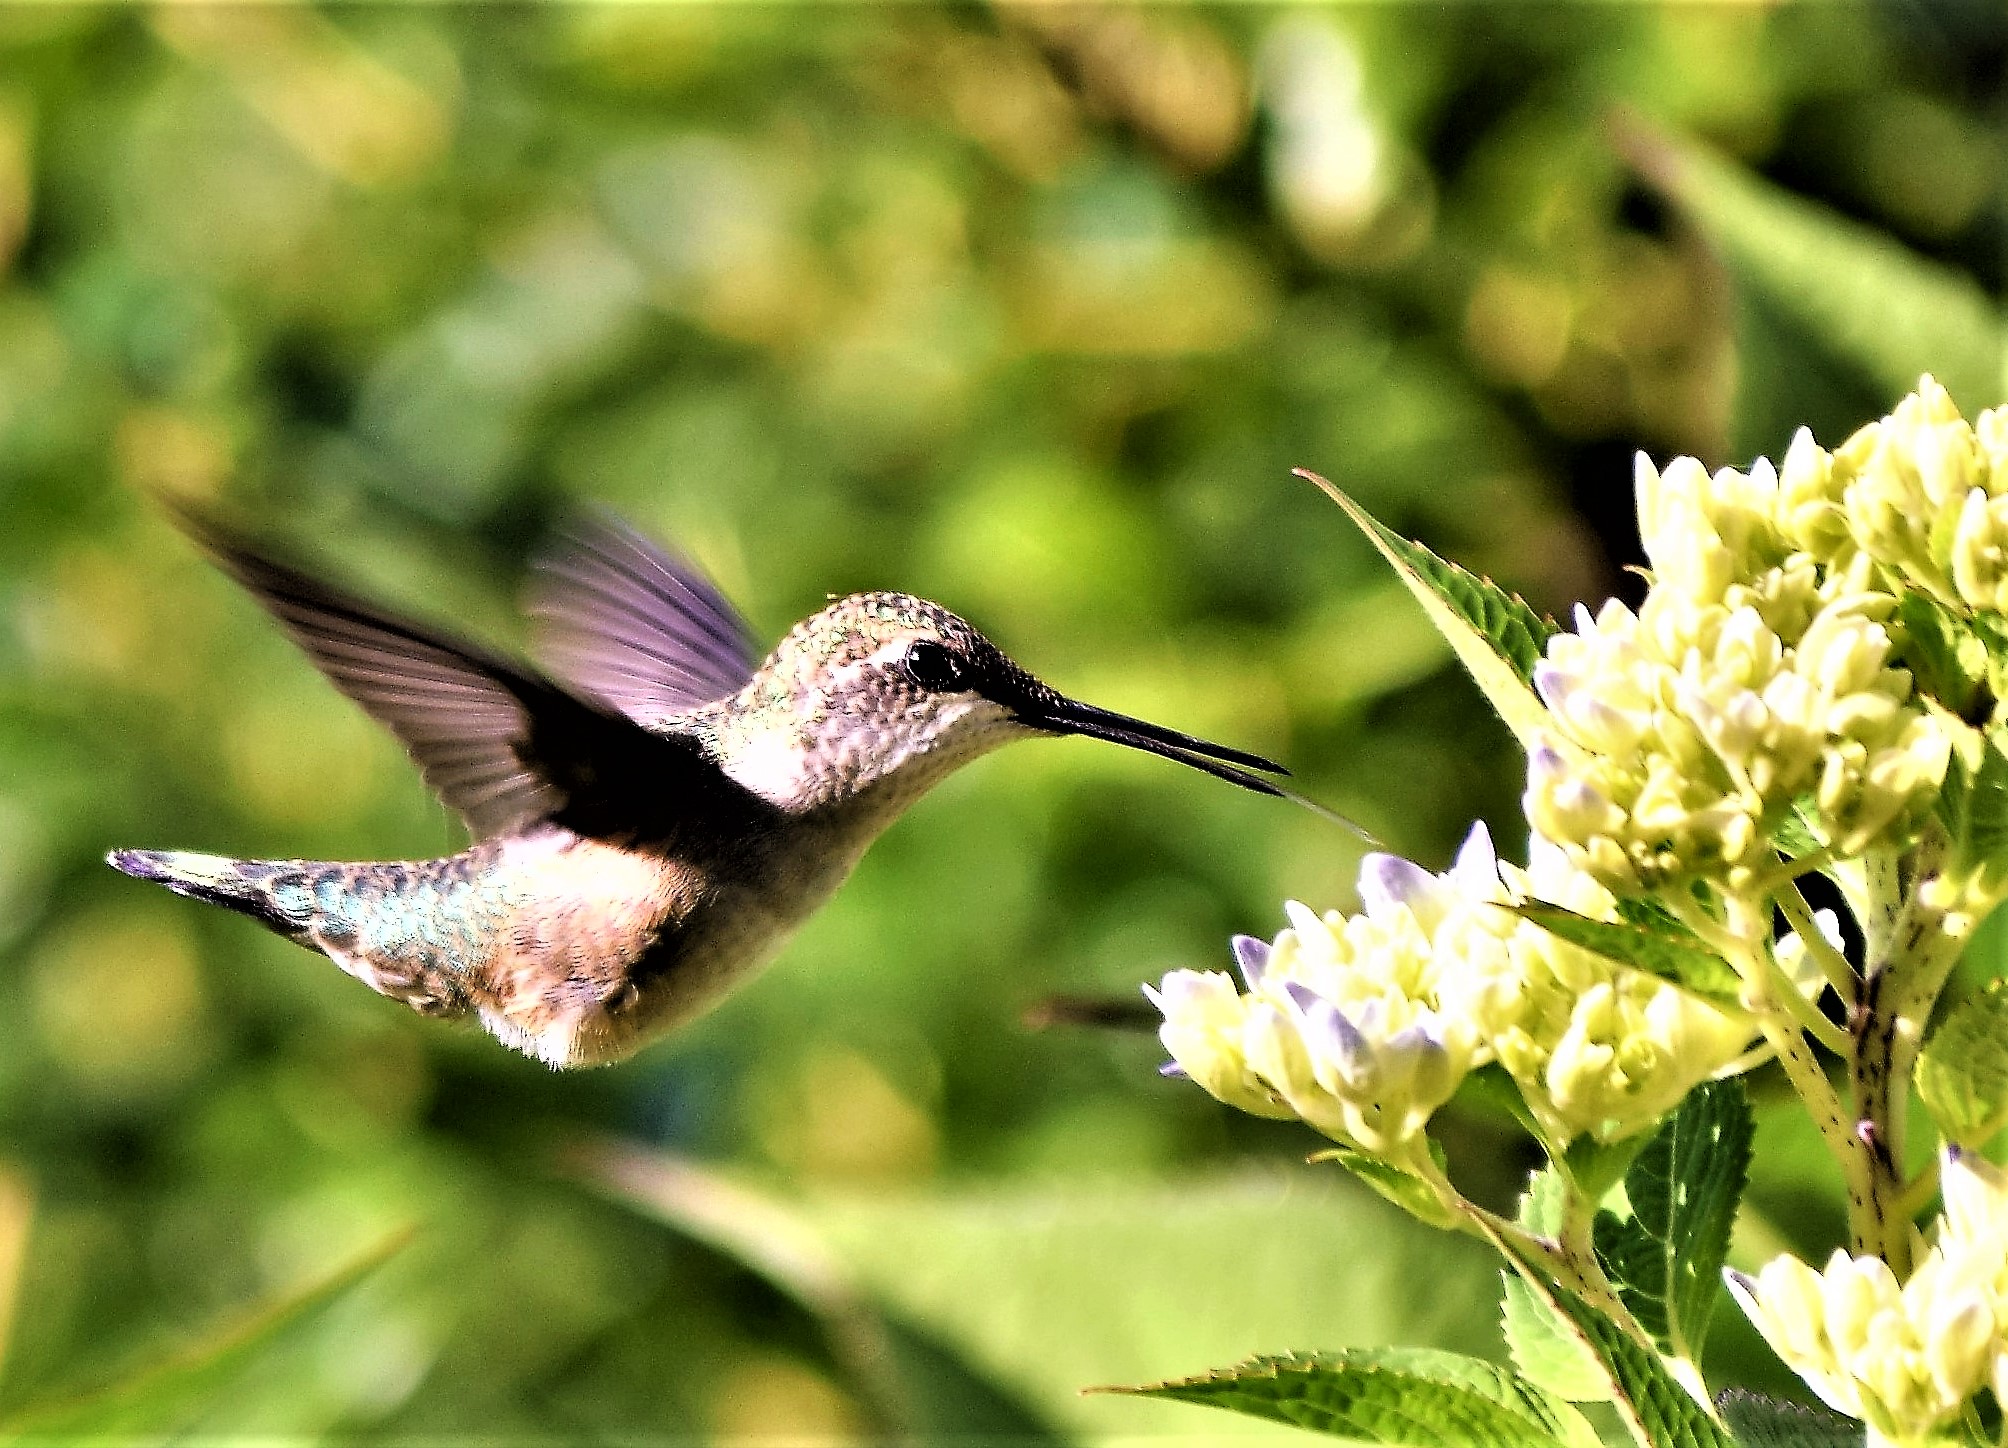
Looks closely to see this bird’s tongue sample the new buds of the Endless Summer Hydrangea.
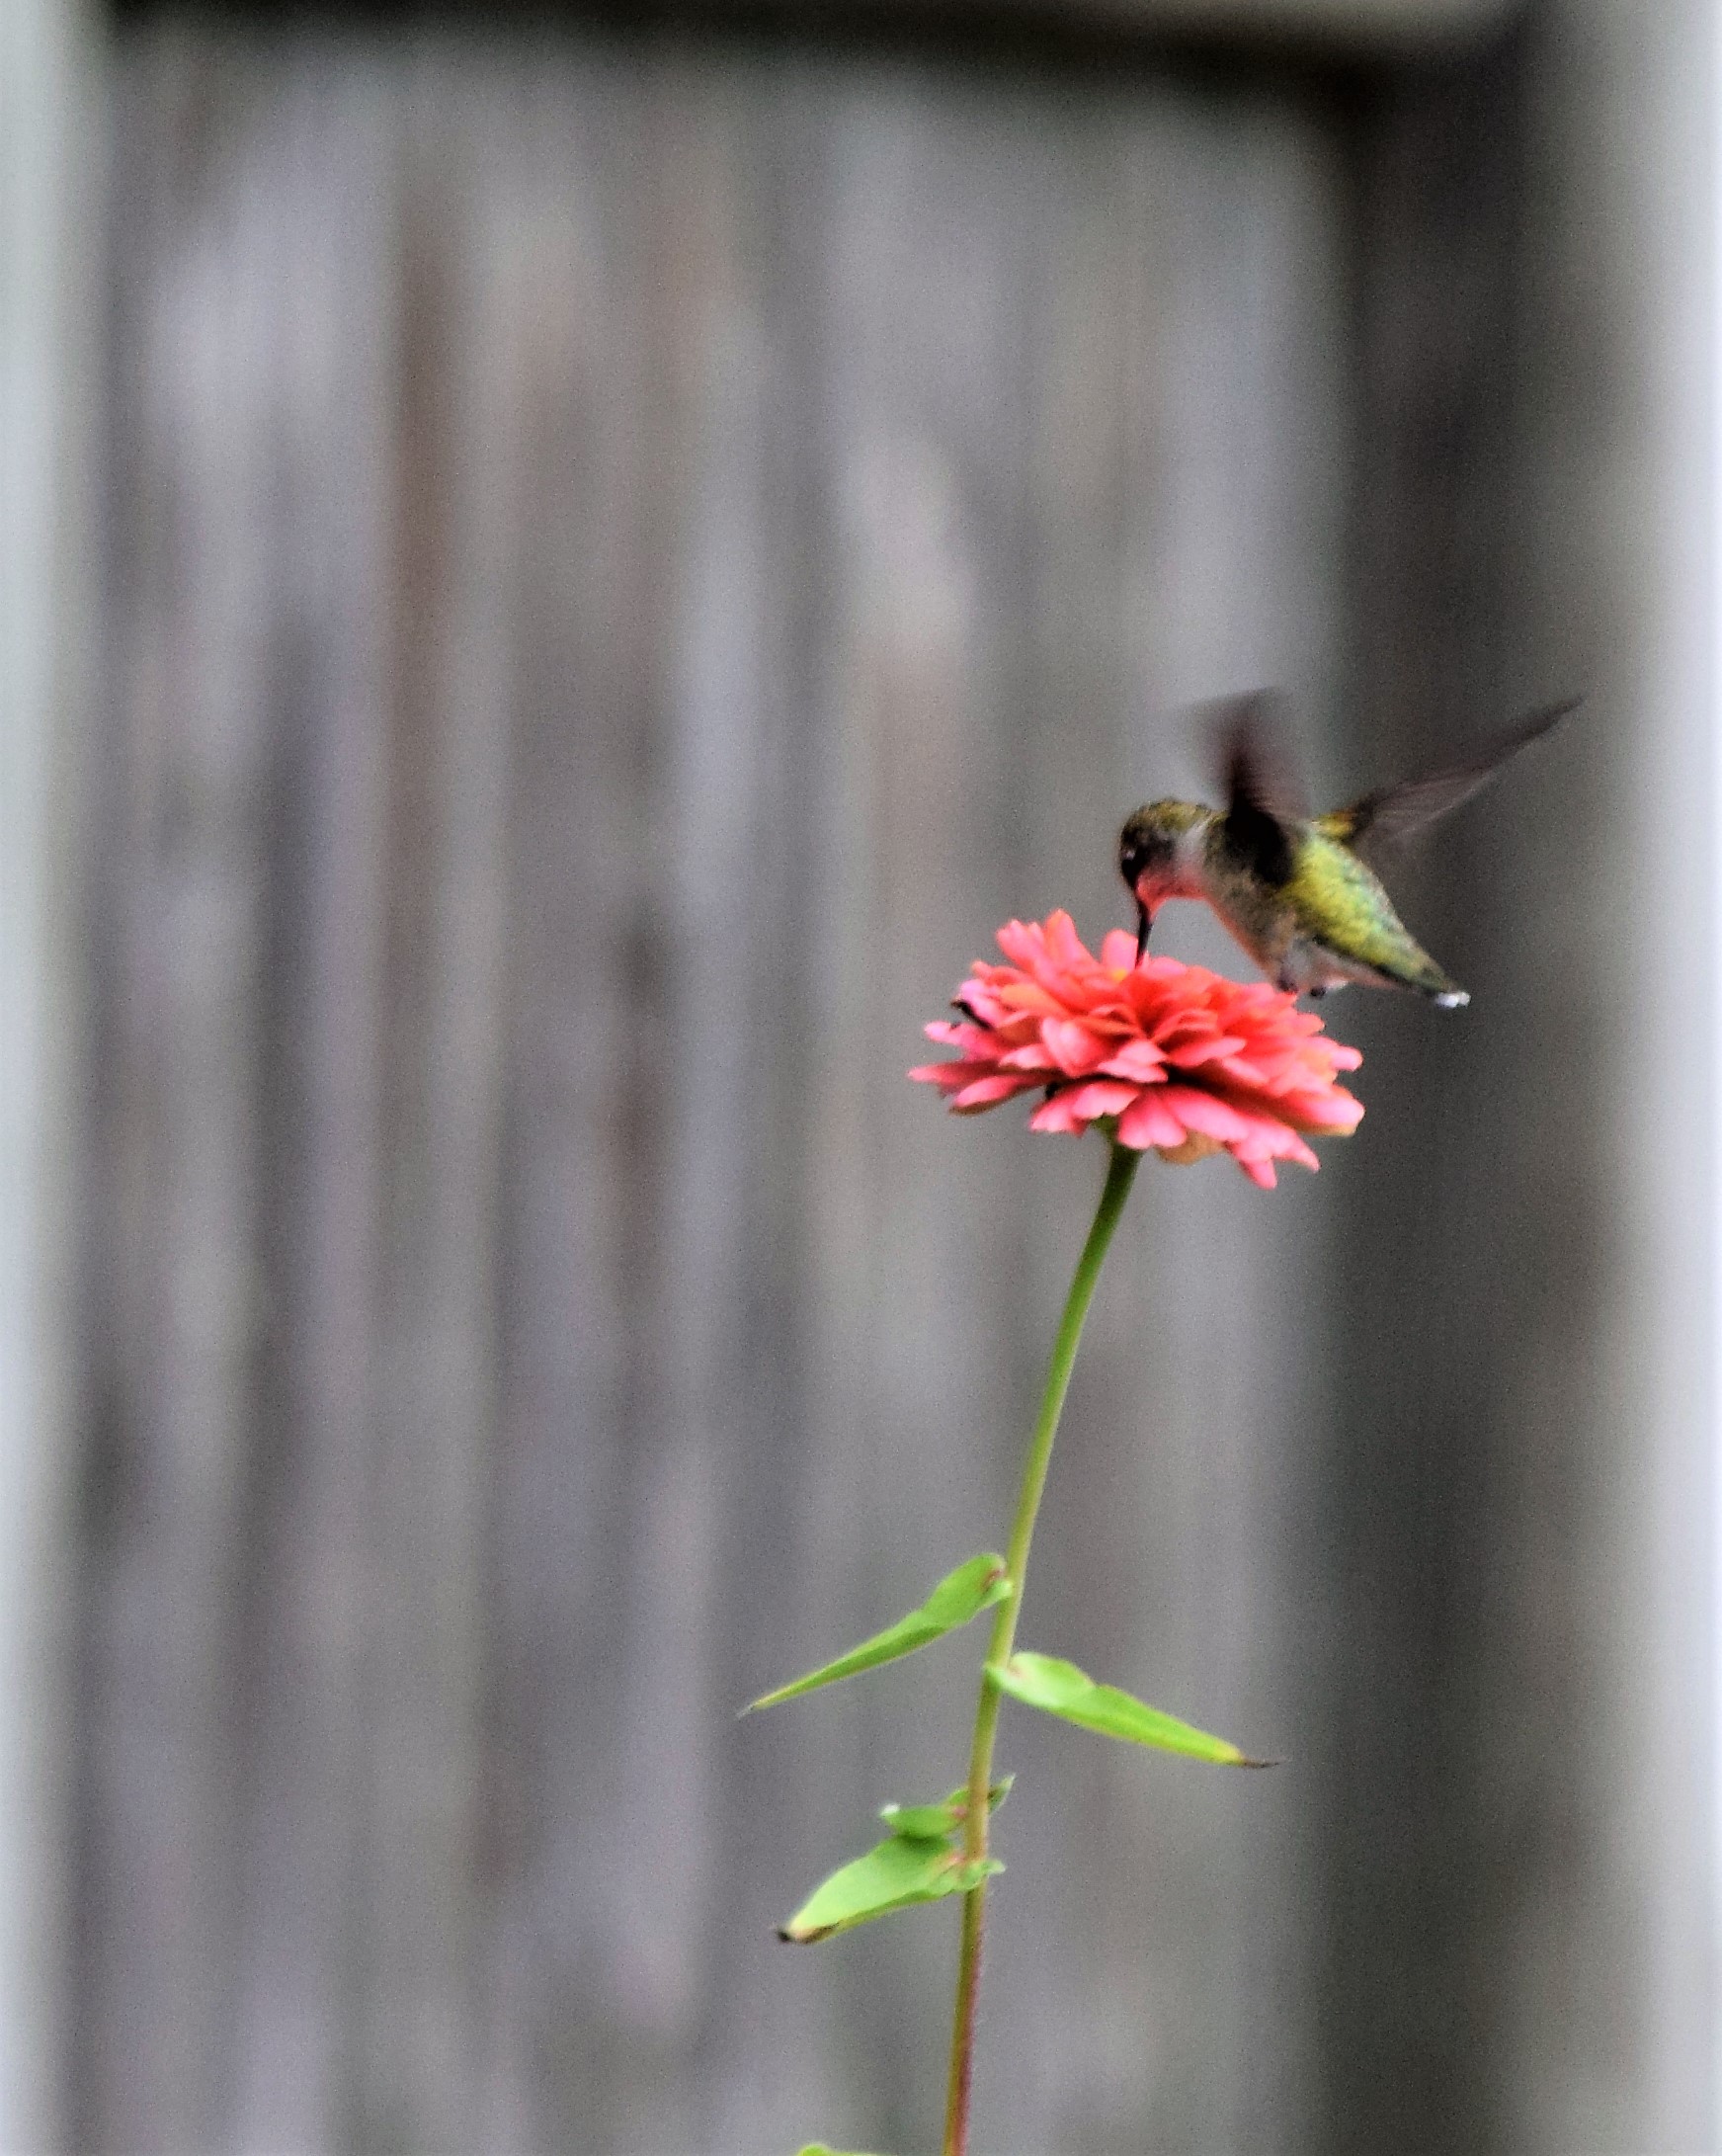
I finally captured a photo of a hummingbird visiting a zinnia in my garden on Sept 21 – well after I assumed they left for the season.
“May my faith always be at the end of the day like a hummingbird…returning to its favorite flower.” ~Sanober Khan, Turquoise Silence
The photos in this post were all taken in my garden in the summers of 2017 and 2018 and belong to the owner of this post. If you’d like to use any of these photos, please request permission via a comment on this post.
You can have the most artistic ambition and grandest plan for your garden, but the reality is a ‘green thumb’ really doesn’t happen by accident. While William Kent once said, “All gardening is landscape painting,” a beautiful, bountiful garden filled with annuals, perennials, and vegetables is actually a work of art and science.
The Science Cafe Nashua recently hosted it’s July gathering at the Riverwalk Cafe in Downtown Nashua (New Hampshire) to discuss why it’s important for gardeners to understand how science impacts their gardening aspirations. The discussion on “The Art and Science of Gardening” while free to attend, was a ‘sell-out’ with all 80+ seats at the cafe filled with gardeners ranging from novice beginners who participate in local community gardens driven by GrowNashua to expert master gardeners with beautifully designed landscapes that are worthy of Fine Gardening magazine.
While the midsummer topic was compelling, it was the strong lineup of panelists who brought people to the cafe during the midst of a week-long July heatwave. For two-full hours we participated in a Q&A session with gardening experts including:
The Art & Science of Gardening Panelists during the July 11, 2018 Science Cafe Nashua. (L-R: Gene Harrington, Cameron Bonsey, Isabelle Burke, Dave McConville, Paul Shea)
The lively discussion covered a full range of gardening topics, including how to control blight (specifically in tomatoes and peppers) to why we see so many rabbits in the Nashua area, and what’s the best way to ‘feed’ soil.
Here are a few of my big ‘ah-has’ from the panelists who did an excellent job at explaining how science impacts gardening. (If you’re reading this blog after attending this Science Cafe Nashua session, feel free to share what you learned with a comment.)
Smokers – You can attract blight! Nightshade plants like tomatoes, peppers, and eggplant are in the same plant family that include tobacco. Paul Shea explained that nightshades are very susceptible to blight – it’s a big issue and can wipe out entire tobacco farms.
With the smaller scale of a backyard vegetable garden, blight is typically spread when leaves touch contaminated soil. Helpful hints to avoid blight included keeping plant leaves trimmed well above the soil line and watering at the bottom of the plant to drive moisture directly into the soil versus via leaves.
Here’s what really surprised me. Gardeners who smoke can be more prone to finding blight on their plants – the two reasons are that some gardeners leave cigarette butts (remember tobacco attracts blight) in their gardens and the nicotine from tobacco sticks to fingers and spreads to plants when touching, pruning, and picking. This nicotine residue of tobacco attracts blight. So, gardeners who smoke now have another reason to stop their habit if they want a bountiful harvest.
Bees don’t like the red flowers. A question was asked why bees haven’t returned to one participant’s garden this year. After some discussion with Isabelle Burke, we learned that the person seeing fewer bees this year changed their garden color scheme and has almost all red flowering plants and very few purple and yellow flowers, which are favorites of bees. This surprised me for a few reasons – since pollinators include hummingbirds, and they like red, I just assumed that all pollinators, including bees, were attracted to that color. I also didn’t realize bees are drawn to color. I thought they were only attracted to the scent of flowers.
Nashua is being overrun by rabbits. Gene Harrington told us that rabbit populations have an 11 year cycle and our region appears to be in year seven or eight of that cycle. So we should be seeing fewer bunnies in coming years. He shared that he’s heard over the past few years from more customers who are seeing rabbits and, of course, they reach out to Gene to find solutions to their rabbit problems. Apparently, the best way to control rabbit damage is to put up fencing/barriers around the plants that they find delicious to eat. Another option is to plant things rabbits don’t find so delicious. In my case, the rabbits in my neighborhood love the clover that I’ve been planting as an alternative to grass, so I will just keep buying clover seed to replace it. (But I will confess, I actually enjoy seeing bunnies hop through the garden and just hope that the experience of another Science Cafe participant doesn’t happen while I’m watching – his garden bunny became lunch for a red-tailed hawk – which are also prevalent in our region. I guess everyone needs to eat.)
Soil lives and breathes – we need to treat it well. Cameron Bonsey talked a lot about soil. He likened the work of creating soil blends at Coast of Maine to the craft brewery movement in New Hampshire. He explained that their employees experiment with different mixes for different purposes. I specifically asked him about their Stonington Blend that I blogged about late last year. He explained that soil is all about biology and something things plants respond differently to different mixes of nitrogen, castings, etc. He also talked about the importance of mulch and how it feeds soil. Cameron quipped that “all the organic matter under the mulch is eating and greeting – there’s a great party going on under there.” This is why it’s better to mulch with a compost-based product and not cheap wood chips that take forever to break down and don’t provide nutrients back into soil. (Hearing this made me feel good as we stopped spreading bark chips in our garden because of this and started to mulch with compost instead.)
GMOs are not a natural evolution. There was a question about the scientific aspect versus personal feelings on the surge of GMOs (genetically modified organisms). This seemed to be a sensitive topic to both the person asking the question, as well to the panelists asked for their input. Dave McConville, the panel’s permaculture expert shared that GMOs are not a natural evolution, while not speaking for or against them. I urge you to learn more about permaculture at Dave’s website – here’s a teaser, “Although permaculture is first and foremost a design process, it is also a philosophy, a life style and a framework for making decisions. Permaculture gives us a toolkit with a set of ethics and principles, design processes and proven strategies to help us design a better culture.”
Ultimately, I learned that true gardeners – no matter how long we’ve been digging this hobby – are always eager to learn from one another and to share our own experiences, including the successes and failures. What worked this year, might not work next year – and there’s often a cause that someone learned before us. For example the gardener who wants to see more bees left the Science Cafe with the the information not to plant all red flowers next year and perhaps add a little more lavender – a favorite of bees.
Speaking of lavender, here are a few more photos from the July 2018 Science Cafe Nashua at the Riverwalk Cafe. Let’s start with the top two photos that include the fabulous “Gardener’s Gimlet” made with local lavender syrup that was offered as Riverwalk’s special craft cocktail of the evening in honor of the Science Cafe event (the woman in the top right photo with the gimlet is Jane Ruddock, co-owner of Riverwalk and quite the expert gardener herself). The other photos are of the full house of gardeners asking questions and sharing ideas and experiences.
“There are no gardening mistakes, only experiments.”
One of my favorite things about gardening is to find creative uses for harvested items, especially the herbs. Over the years, I’ve dried herbs to create interesting crafts with everlasting flowers such as lavender. However, a favorite way to save and savor some favorites from the garden involve cocktail infusions.
When I have an abundance of hot peppers at the end of each summer, I buy a bottle of plain vodka. Something like Smirnoff works well (though I do have a friend who chastises me, insisting I should only use top shelf spirits – – let’s just say that we agree to disagree!). I toss in a few spicy peppers that have been partially cut to the new bottle of vodka and within a week, it becomes a spicy ingredient for a fantastic Bloody Mary! And as the Pepper Vodka ages, it gets even hotter — so I simply top the bottle off from time to time with more plain vodka. It’s seems like an endless bottle by mid winter. By the next summer, I’m really to start all over again.
In years past, my neighbor usually had so many peaches and plums that he resorted to begging his friends to take them from him – or he secretly delivered them to our homes, whether we wanted them or not! With his harvests, I’ve infused the peaches and plums in brandy.
Other experiments included pears infused in brandy and rhubarb infused in vodka. (Those were never made again, but were worth trying. In the end, it was a waste of good pears and rhubarb that could have been better used in a baked item where they would be enjoyed more.)
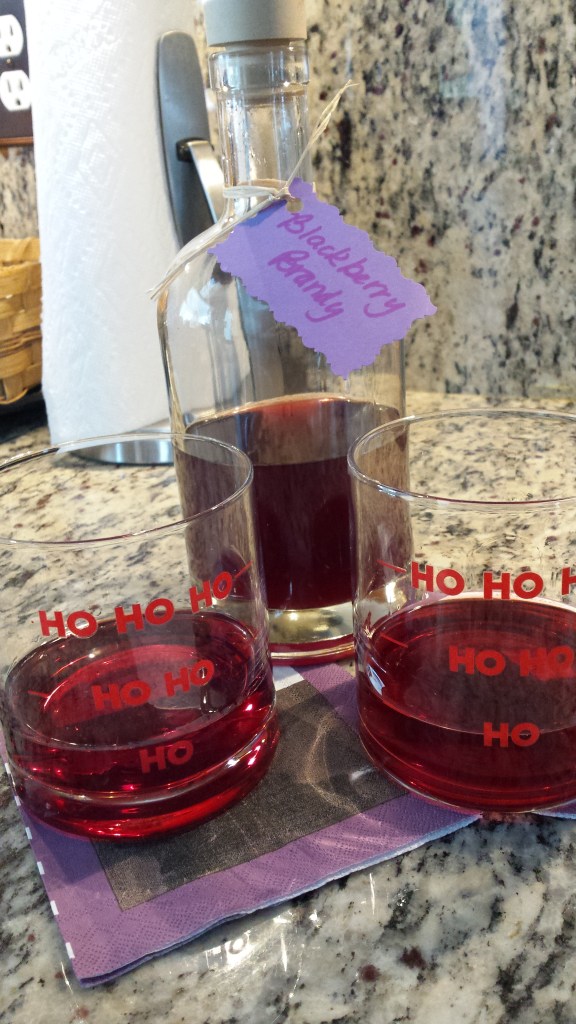
This year, I tried two new infusions. Blackberry Brandy and Lemongrass Vodka.
My friend Bobbi lives at the NH seacoast and is a fellow gardener. I love that her garden has a blackberry and blueberry patch, along with some pear and apple trees (and a pony named Sachi!) At the end of last summer, I paid her a visit and returned home with armfuls of peaches, pears, blueberries, and blackberries. The peaches, pears and blueberries were saved for eating. But, the blackberries were picked with the intent to make a batch of Blackberry Brandy for the 2017 holiday season.
Blackberry Brandy is very easy to prepare. I simply took a large (sterilized) glass jar, added the blackberries (about 1.5 c) and a few tablespoons sugar (since the berries were more tart than sweet this year), lightly muddled the ingredients and then poured a bottle of E&J Brandy over the mixture. I let it sit in my cool, dark basement for 8 weeks, and stirred the dark, thick contents of the bottle weekly. Then I strained it through cheesecloth and bottled it. I’m pleased with the results, but will add more blackberries if I try this again next year.
The surprise creation of the summer was the Lemongrass Vodka. I’ve grown lemongrass in the garden on and off for the past 20 years. Lemongrass plants are sometimes hard to find, so I simply get a stalk of lemongrass from the grocery store in the spring, put it in water, let it root and plant it in the garden in early summer (sometimes in a container, sometimes in the ground.) It makes a beautiful filler plant and sparks good conversation when friends wander through the garden and realize that it’s very fragrant.
I browsed online for ways to create an infusion and all suggested cutting up the inner parts of the lemongrass stalk – some suggested chopping it in a food processor, but I just hand cut it. The stalks on my lemongrass were cut a few weeks before I did this project, which make them smaller, drier, and less pliable. You can see in the photo on the left, the lemon grass just sitting in the jar of freshly poured vodka. Within two weeks, the spirit took on a beautiful golden hue.
My Lemongrass Vodka has an herbaceous fragrance and taste with just a light citrus background note. I’ve tried a few cocktails with the infusion, including using the spirit in a straight up dry martini with hint of vermouth. I’ve also tried it with a bit of Lillet instead of vermouth. Both options were good. Most recently, I mixed equal parts of Sake and Lemongrass Vodka and served it very cold. That was also nice — and a little lighter as far as the hit of alcohol from a straight vodka cocktail.
I ended up with enough Lemongrass Vodka to fill two small bottles – one for my bar and one for a friend who appreciates unique cocktails as much as I do. He and his wife are on a kick now making a lot of Asian cuisine, including Ramen dishes. I’m looking forward to hear how they create an Lemongrass cocktail to pair well with their newfound culinary experiments!
As I look ahead to planning my 2018 garden in the coming months, I hope to find new items to grow to bring to the bar. Perhaps this will even be the year to create an official Cocktail Garden! (Afterall, it would be an ideal setting for the perfect party!)
One of the first signs of spring in my world is always the fragrance of newly opened bags of potting soil for seed starting and transplanting. Fellow gardeners know — fresh dirt just smells incredible! It’s a heavenly spring fragrance, especially after a long New England winter.
I have about a dozen large pots for annuals, including flowers, herbs, and vegetables around my garden that I fill with fresh potting soil late each spring – it’s about a $100 investment………….for dirt!
This year, I used different soil mixes in different pots for different plantings. I didn’t intend to conduct an experiment. There was some left over Doctor Earth soil in my potting shed that I used in some of my tomato planters. Then I found some Organic Miracle Grow Moisture Control with coir potting soil at Costco (huge bags – I think 15 qts for $9.99 each.) I used this in my five coleus planters and one of my herb planters. And finally, I got some Coast of Maine potting soil from the Nashua Farmer’s Exchange for my other large herb planter. Coast of Maine products have long been a favorite product in my garden – especially their awesome Lobster Compost.
It’s important that no matter how experienced we are, good gardeners always seek experts to help us to grow our skills and knowledge. Gene and Judy, the owners of the Nashua Farmer’s Exchange, are the experts I count on for good advice. They have been ‘trusted advisors’ to both my mom and me for many years when it comes to trying new things and finding solutions to garden challenges.
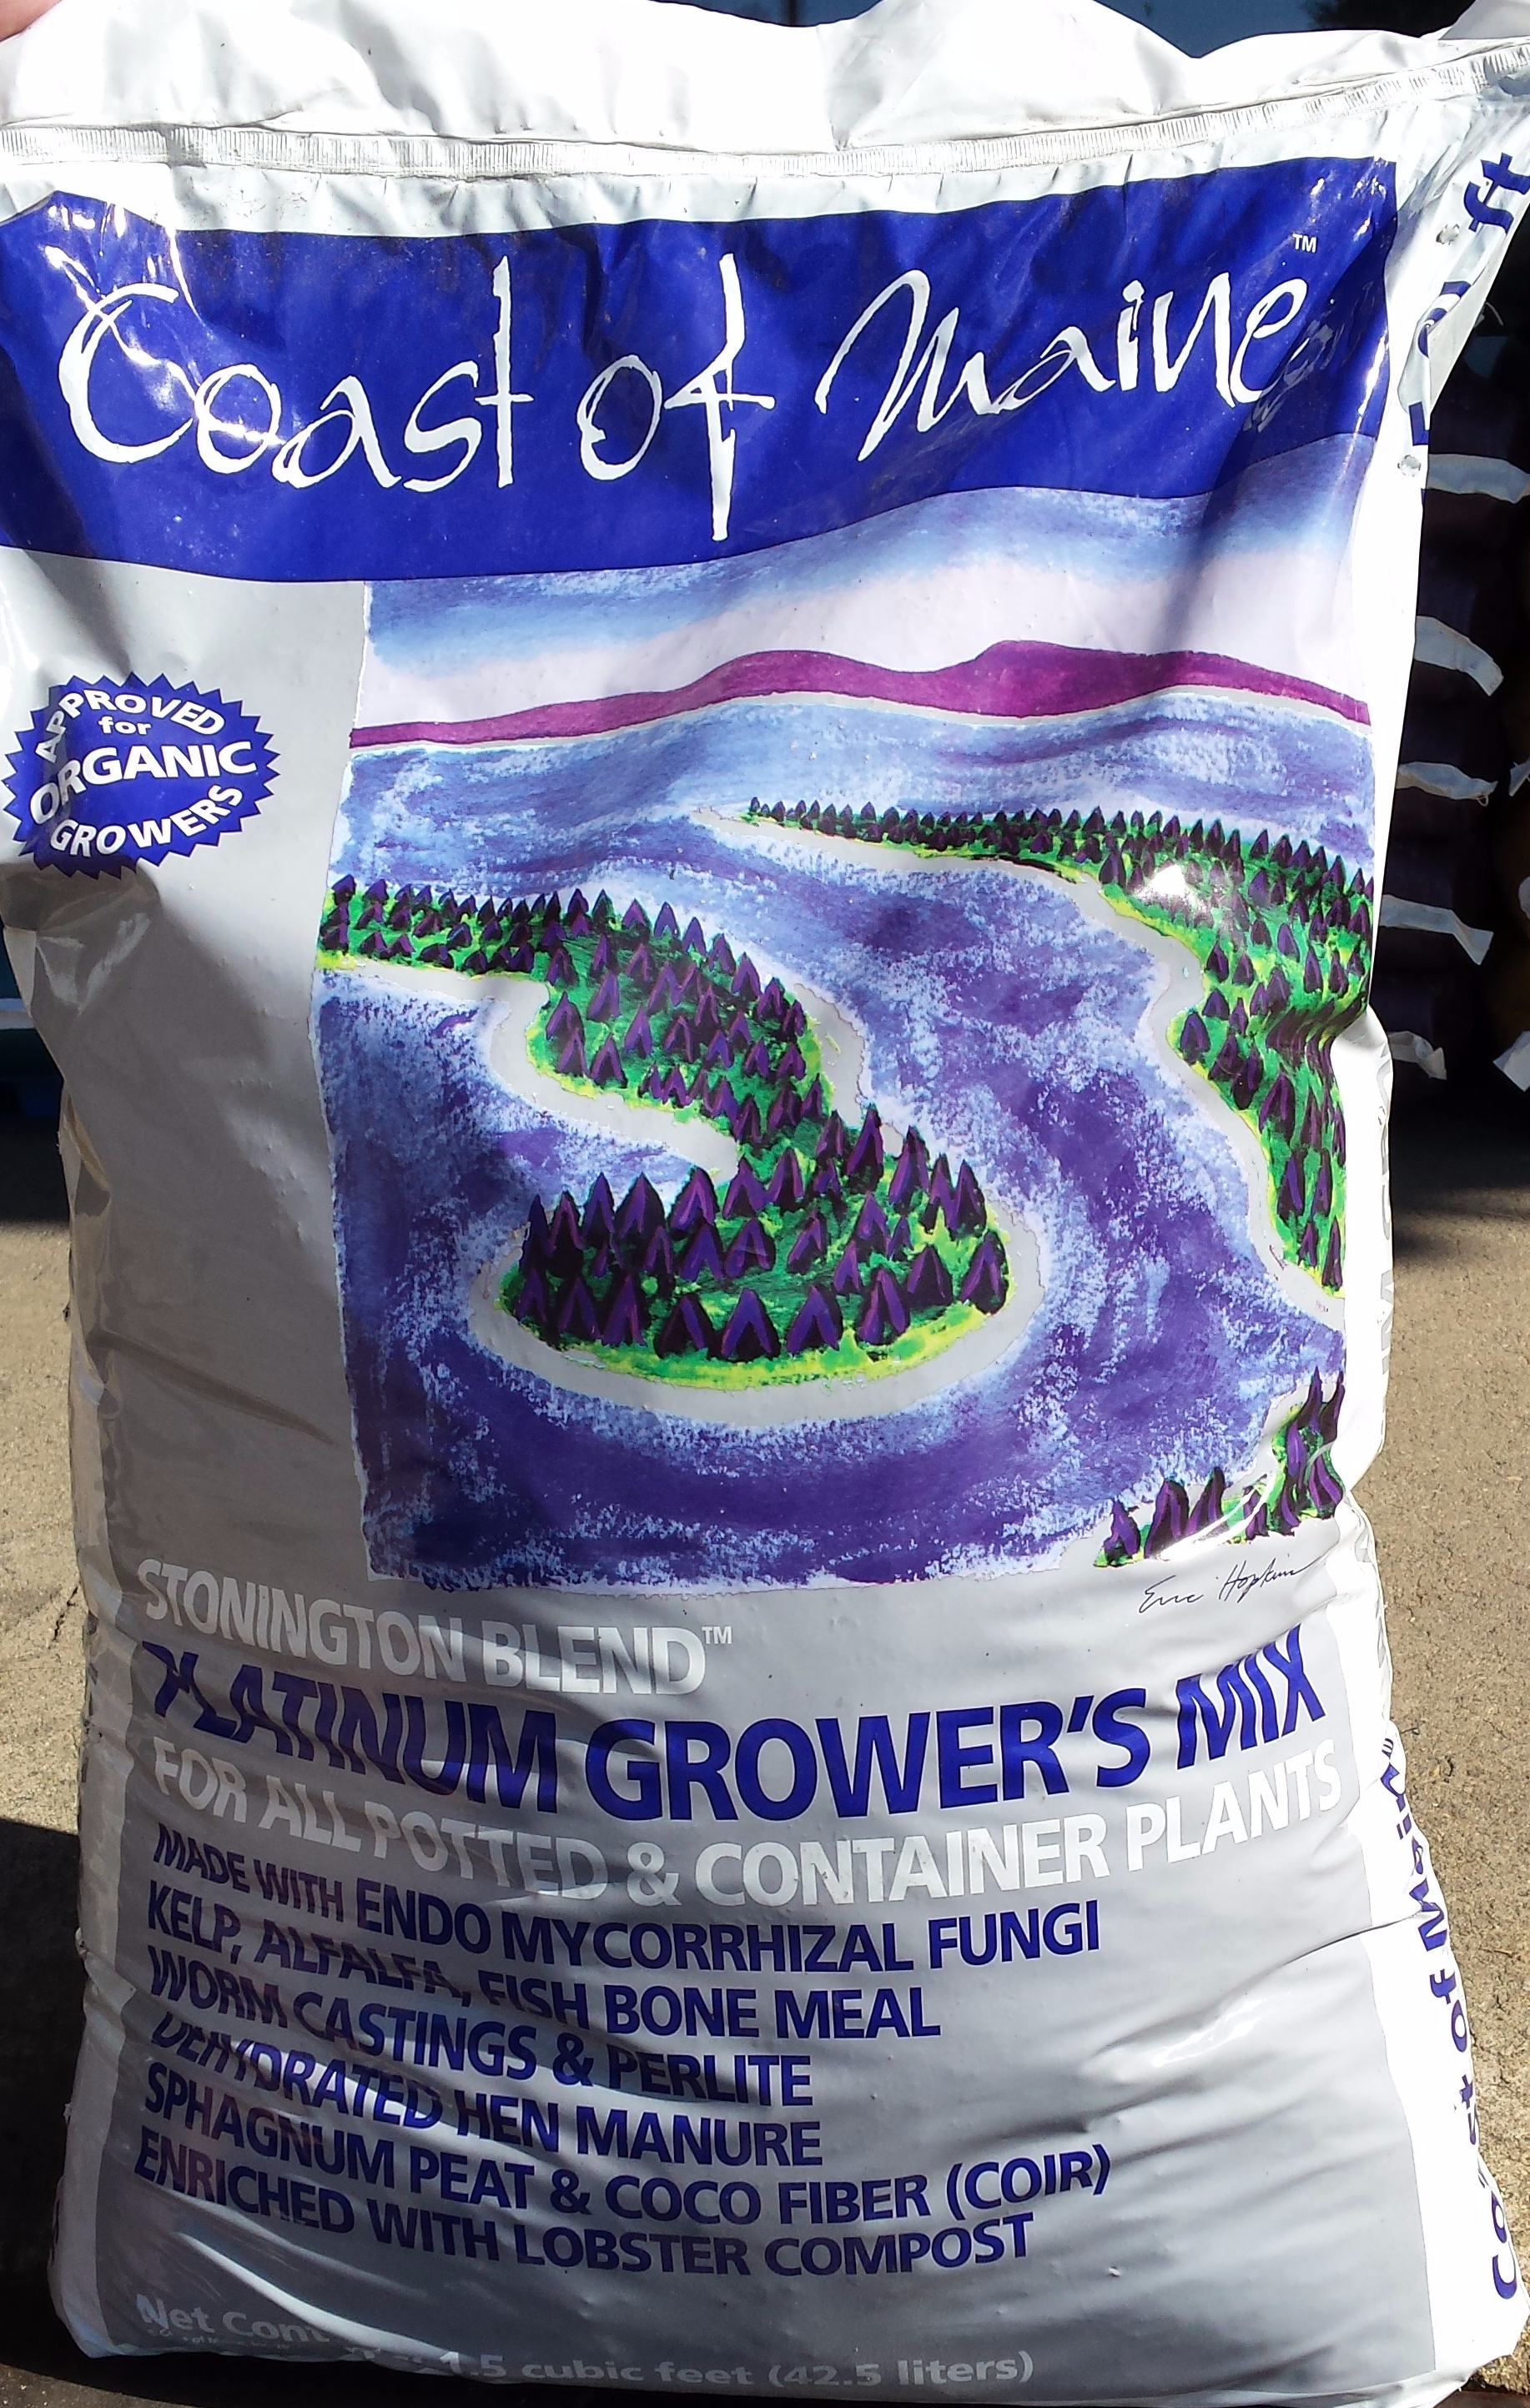
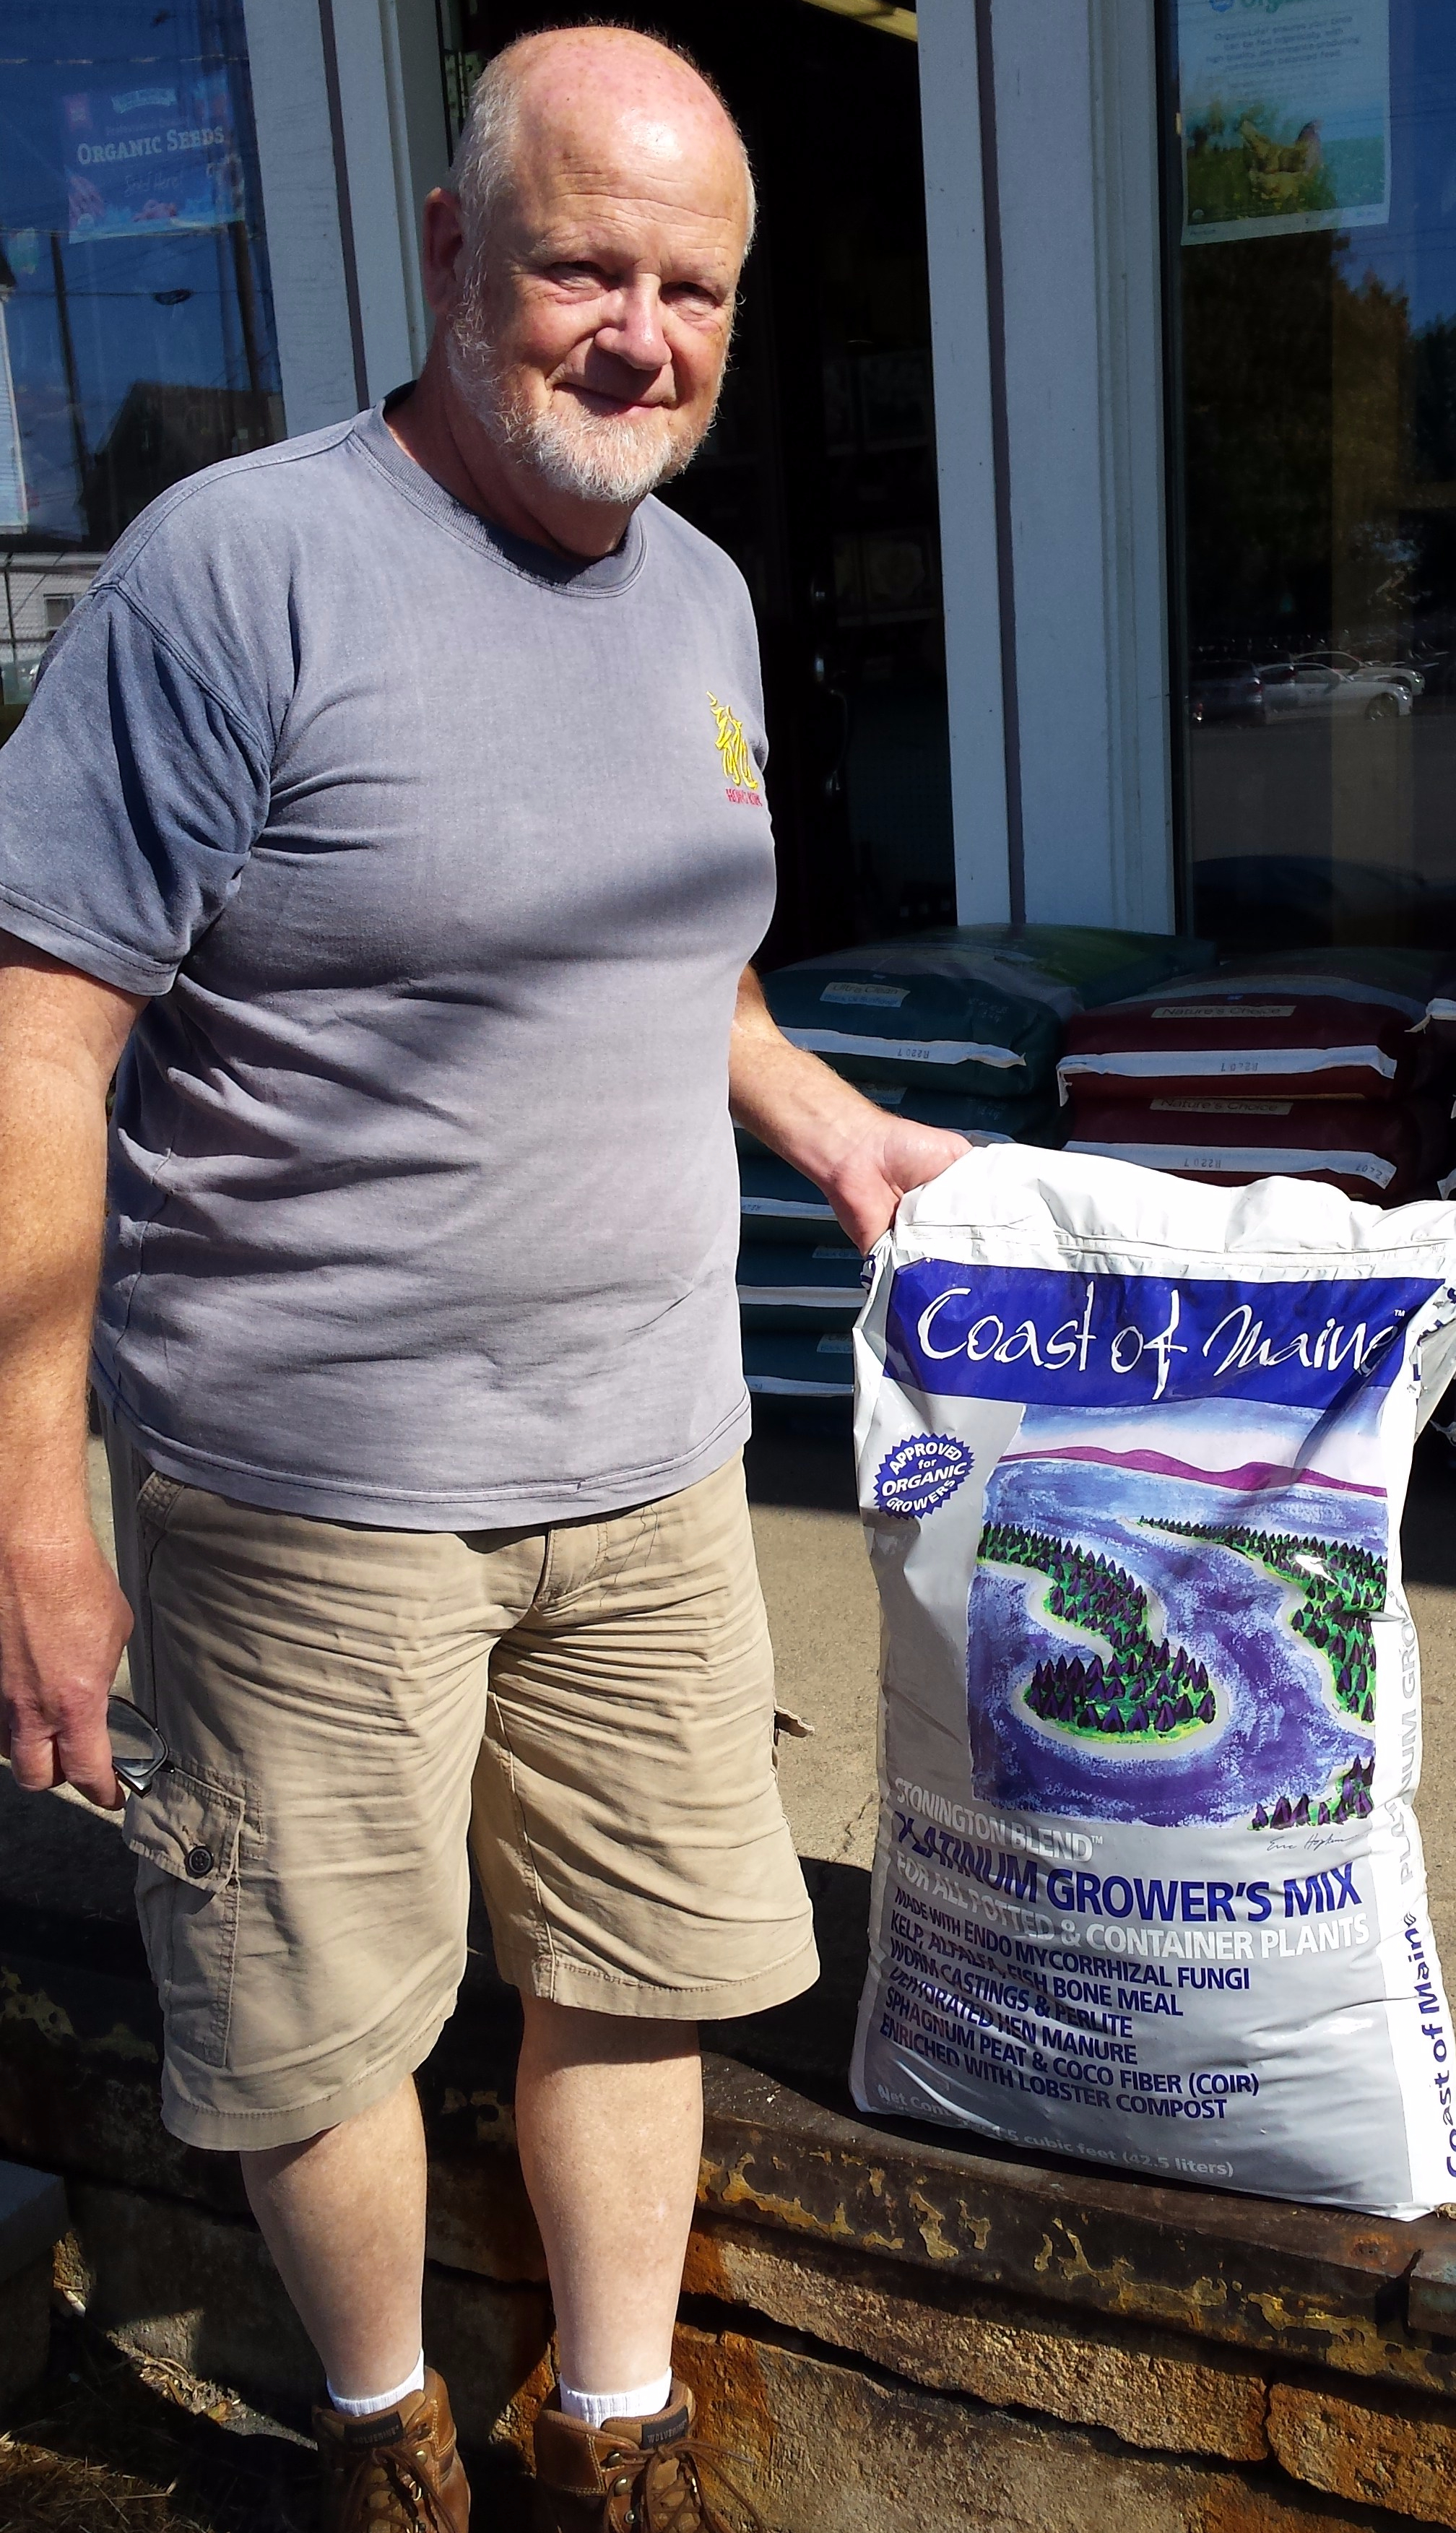
This year, Judy recommended the Stonington Blend potting soil from Coast of Maine when I stopped in to get the dirt on the best dirt for my large herb containers. Knowing the great quality of the Coast of Maine products, I took Judy’s advice. While the product is a little more expensive than I typically purchase, it was on sale and worth a try. As I paid for my purchase, Judy whispered to me that the Stonington Blend has a great reputation among medicinal marijuana growers. I found that interesting and kind of funny since I was purchasing POTting soil.
Stonington Blend by Coast of Maine – A New Garden Favorite!
Not realizing that I’d need A LOT of soil for my herb planters, I bought only enough Stonington Blend for one container (which wasn’t an issue – or so I thought! – since I bought those huge bags of the organic Miracle Grow mix from Costco). So, each herb planter used different soil – which set up my unintended gardening experiment this summer.
Seeing is believing!
First, I will share that both planters had the exact same conditions and were set about 10 feet away from each other, with the same amount of sun. The only difference is that one had the Miracle Grow Soil and the other had the Stonington Blend. The Sweet Basil in both containers is the true testament to the difference – both came from the same batch of seedlings, started at the same time.
September 2, 2017 – Miracle Grow – Organic with Coir Moisture Control (#1)
September 2, 2017 – Stonington Potting Mix – Coast of Maine (#2)
Both of these containers were planted during Memorial Day Weekend of 2017. And clippings from both containers were taken all summer – however, the quality of the herbs in the Miracle Grow was just terrible this year. I actually took more cuttings from the Stonington Blend container (#2) because it was so much further ahead all summer. Initially, I started the Thai Basil – on the far left of container #2 – in the Miracle Grow container. It didn’t do well, so, I transplanted it to the Stonington Blend container in early August – within three weeks, it quadrupled in size – that was my confirmation that the soil was the big difference between the two containers. (I harvested the Thai Basil last week to make Spicy Tofu Basil for dinner last week. It was so good, I ended up making it twice! That herb is now top of the list to plant again in 2018!)
Here’s the comparison on the day that I harvested Sweet Basil on September 9, 2017.
Both bunches of basil were started together and harvested at the same time. The big, bright bunch on the left was grown in the Stonington Blend. The lighter, smaller leaves were grown in Miracle Grow Organic Moisture Control Mix. Same number of plants in each container.
I visited the Nashua Farmer’s Exchange in mid September to share the results of my unintended experiment with Gene. He gave me a lot of background on the movement of soil producers around the country to create top quality potting mixes for the medicinal marijuana market. From what I gather, the product I used from Coast of Maine is one of, if not the top, potting soil available for this purpose today. For my own use, I’m just awestruck with the results we saw for my herb containers.
My Garden Advisor, Gene, owner of the Nashua Farmer’s Exchange.
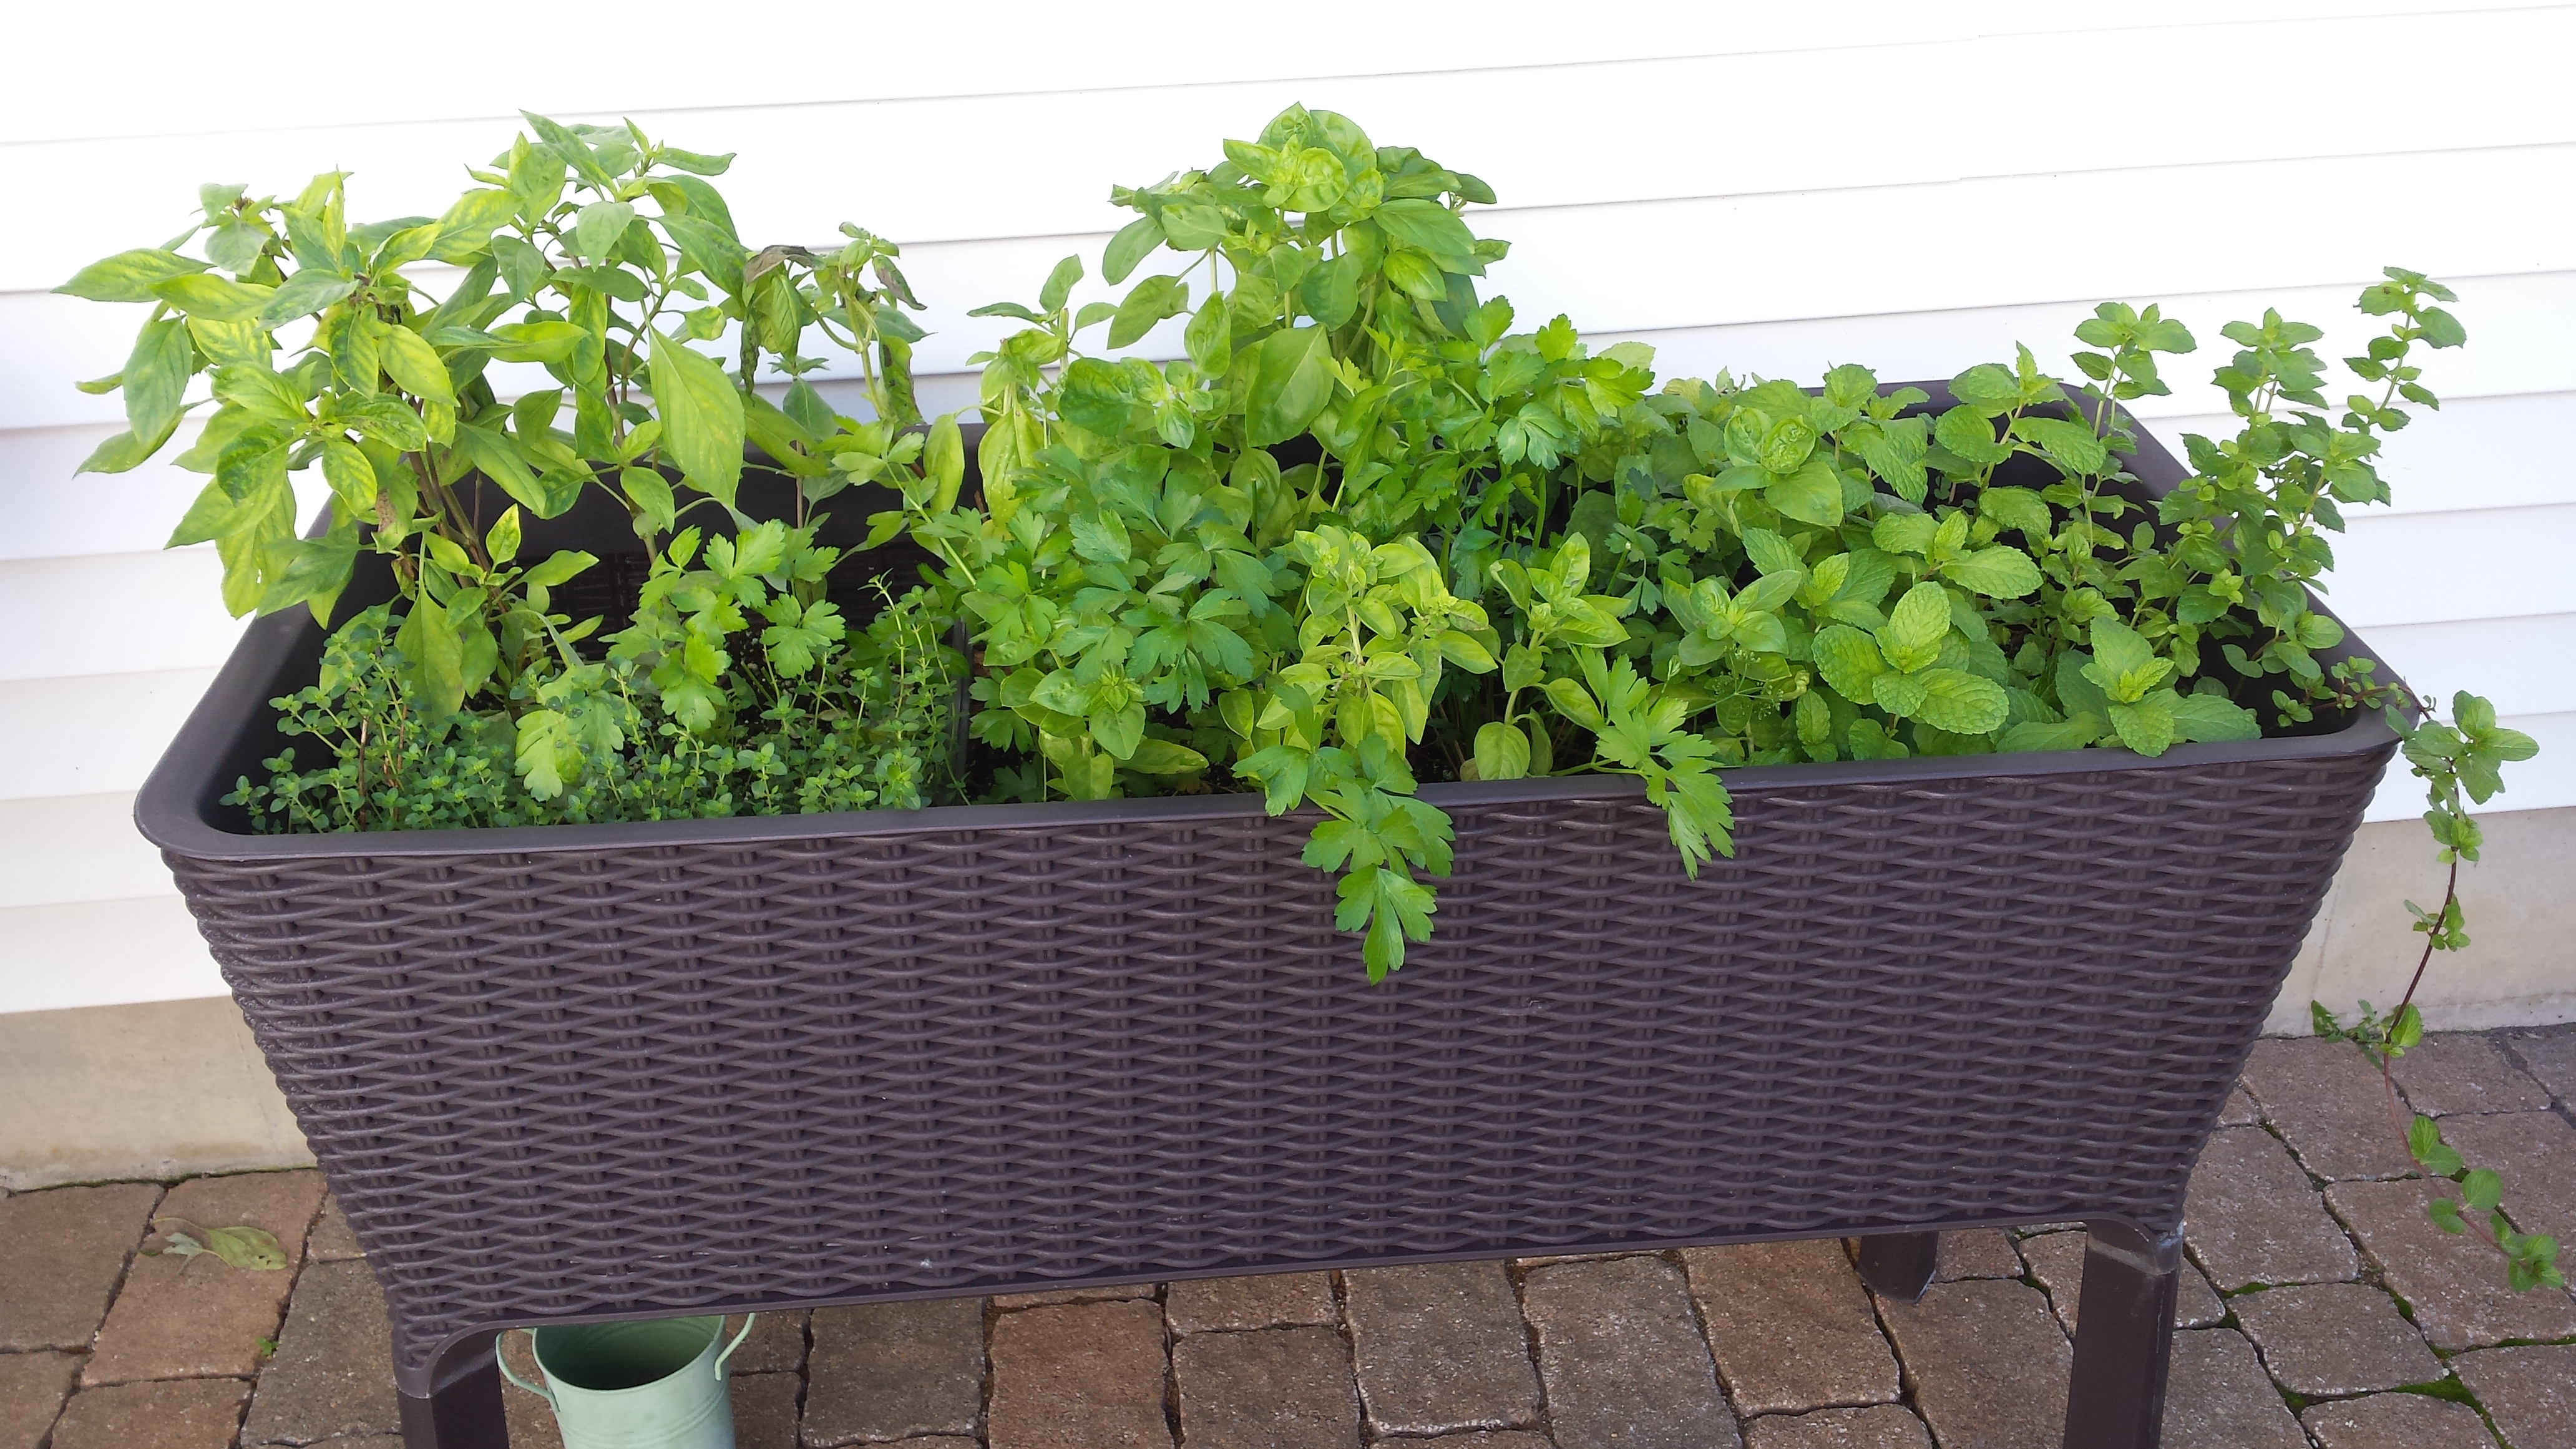
Container #2 with the Stonington Blend is still on my back patio – and is absolutely flourishing! The flat-leaf parsley and mints that looked terrible just one month ago in the Miracle Grow container were transplanted to the Stonington Blend – that I mixed up well – on September 2. Here’s how that planter looked one month later on October 1, 2017 (Before I harvested the Thai Basil):In the past, this was a week when remaining herbs would be removed and containers cleaned and put away until spring. However, with absolutely no frost or freezes expected in southern New Hampshire for at least two more weeks, these are staying put so I can enjoy the parsley and mint through October. Halloween Mojitos, anyone?
“There are no gardening mistakes, only experiments.” ~Janet Kilburn Phillips
If our garden had a theme song for the 2017 Gardening Season, it would be “The Magic Garden.” (Specifically, the version by Dusty Springfield!)
It’s been a beautiful and busy gardening season. And while I had the best of intentions to post more stories, there was always another reason to spend more time outside instead of inside writing blogs.
The weather was wonderful (some would say a little too cool at times!) with just enough rain, sun, and warmth to bring us the most beautiful flowers we’ve seen in years. Some of the perennials we thought we’d lost during last year’s drought came back to life and were better than ever, and even the new lawn of clover took in well (the bunny can attest to that!)
Here’s a visual overview of this summer’s Magic Garden!
“There is a garden
Something like the shadow of a butterfly
And lies beyond the gates of dark and light
And darling, it belongs to me
And when you go there
There will be such laughter in the dimpled sky
The songs I sing
Will drive away the night
The magic garden
Has a way of making you feel free
It’s the place I’ve made for you
From five Players cards and dominoes
And it won’t fall down
And when your dreaming vanishes
Like snowflakes in the summer sky
Melts away in darkness
And you don’t know why the magic garden
Waits with all the gates wide open
And darlin’, I’ll be standin’ just inside
It’s so soft and warm
Behind those hedges
No hard edges
No hard edges
It’s so soft and warm
Behind those hedges
No hard edges
No hard edges”
Once again, a calendar is not needed when paying attention to the garden. It’s been easy to know we’re in late July because it’s time to weed the thyme.
A few years ago, we replaced bark mulched paths in the garden with blue stone. The spaces between the blue stone are perfect for planting Creeping Thyme. It spreads between the spaces of the stones, emitting a soft herbal fragrance when people and pets walk along the paths.
In late May, the thyme produces flowers bringing the stone to life, adding extra color to the late spring garden and creating patterns of purple and green in the spaces where the stones almost meet. While we’ve planted various colors of thyme – purple, white, and hot pink over the years, the thyme with purple blossoms is the hardiest and has outlived other colors over the years. We’ve also learned that while Woolly Thyme adds texture and a lighter, almost silvery color among the blue stone, it doesn’t last as long as the regular creeping thyme.
The flowers on the thyme bloom from late May until early July in our Nashua, NH garden. It’s at that point on the calendar when the garden truly transitions from spring to summer. The purple and pink colors across the garden fade as the green, orange and red plants take over.
This year, the weeds have emerged during this transition period and have been more prolific than ever. We usually see this trend later in the summer, so attribute the abundance of midsummer weeds to the ‘extreme drought’ our region experienced in 2016. (Or perhaps I’m just noticing more weeds since attending a weeding seminar with Roger Swain at the Nashua Public Library earlier this year?!)
Over the 10 days, my mother and I have spent a combined 25+ hours weeding the various beds and paths throughout the garden. Her time out there beats mine by 2:1! The challenge has been the infiltration of weeds with the thyme. In addition to the typical crabgrass, it seems the ideal impostor weed has been the spotted spurge.
You see, it’s a flat weed that starts under the thyme plants. It spreads like thyme as well. The bigger challenge: As you walk along the garden paths, it’s not easy to see until suddenly it’s huge because it’s taken over the delicate thyme planted in that space. The single deep root sends shoots that spread up to a few feet in diameter. And, it seems to happen overnight. When it does, it’s difficult to remove just the weed, so inevitably, some sprigs of thyme are pulled in the mix.
Yes, there’s also white clover mixed in too, which is my fault. However, while some gardeners consider white clover to be a weed, it’s the latest solution to the Sad Sod Situation I’ve shared in the past. (I’ll save that story update for later – but here’s a sneak preview: The second planting of lawn two years ago died during the 2016 drought. It was decided we’d fill that area with white clover last fall and this spring, and the seed shaker helped scatter a little clover to a few paths where it wasn’t intended to grow.)
Even after hours and hours (and yes, more hours) of weeding through the thyme over the past week…sometimes feeling like I was wasting time…I must admit there’s something cathartic about the process of weeding. It allows me to get incredibly close to to the garden and forces me to slow down. It takes time to find the roots of weeds and fully remove them. Additionally, when working so close to the ground, it’s easier to notice soil conditions, pest issues, and beneficial garden creatures including dragonflies, toads, and worms.
That said, I’m thrilled the worst part of weeding thyme is behind us so we can spend the rest of the summer enjoying thyme!
Patchouli reminds me of Brussels Sprouts or Cilantro. You either love it – or hate it. There’s really no in-between.
Personally, I’ve always been fond of Patchouli, enjoying its fragrance in candles and essential oils. I knew Patchouli came from some exotic plant, but never in my wildest dreams thought about growing it in New Hampshire – until early spring of 2015.
While shopping for container annuals and herbs at Salem’s Lake Street Nursery during the early days of spring, there it was….a tiny 4 inch pot of Patchouli for under $5!
This trip to the nursery was after the record breaking winter of 2015, so there was so much hope for the months ahead – coming across the small Patchouli plant was an unplanned bonus. I had no idea what to do with it – nevertheless, it made its way back to Nashua to be added as a whimsical item for the 2015 garden.
The young leaves had the fragrance of….well…Patchouli!
It was amazing to touch the leaves, releasing their oils to scent my hands and the air nearby. It was also fun to show it to garden visitors, by breaking off a piece and asking them to guess what it is. Most people remarked it smelled familiar, but they can’t come up with the plant. Once I tell them, there’s always great discussion on the memories that the Patchouli fragrance evokes. One garden guest immediately shared that it smelled just like our friend, Karen. (She was absolutely right – I never think of Karen without thinking of her signature fragrance!)
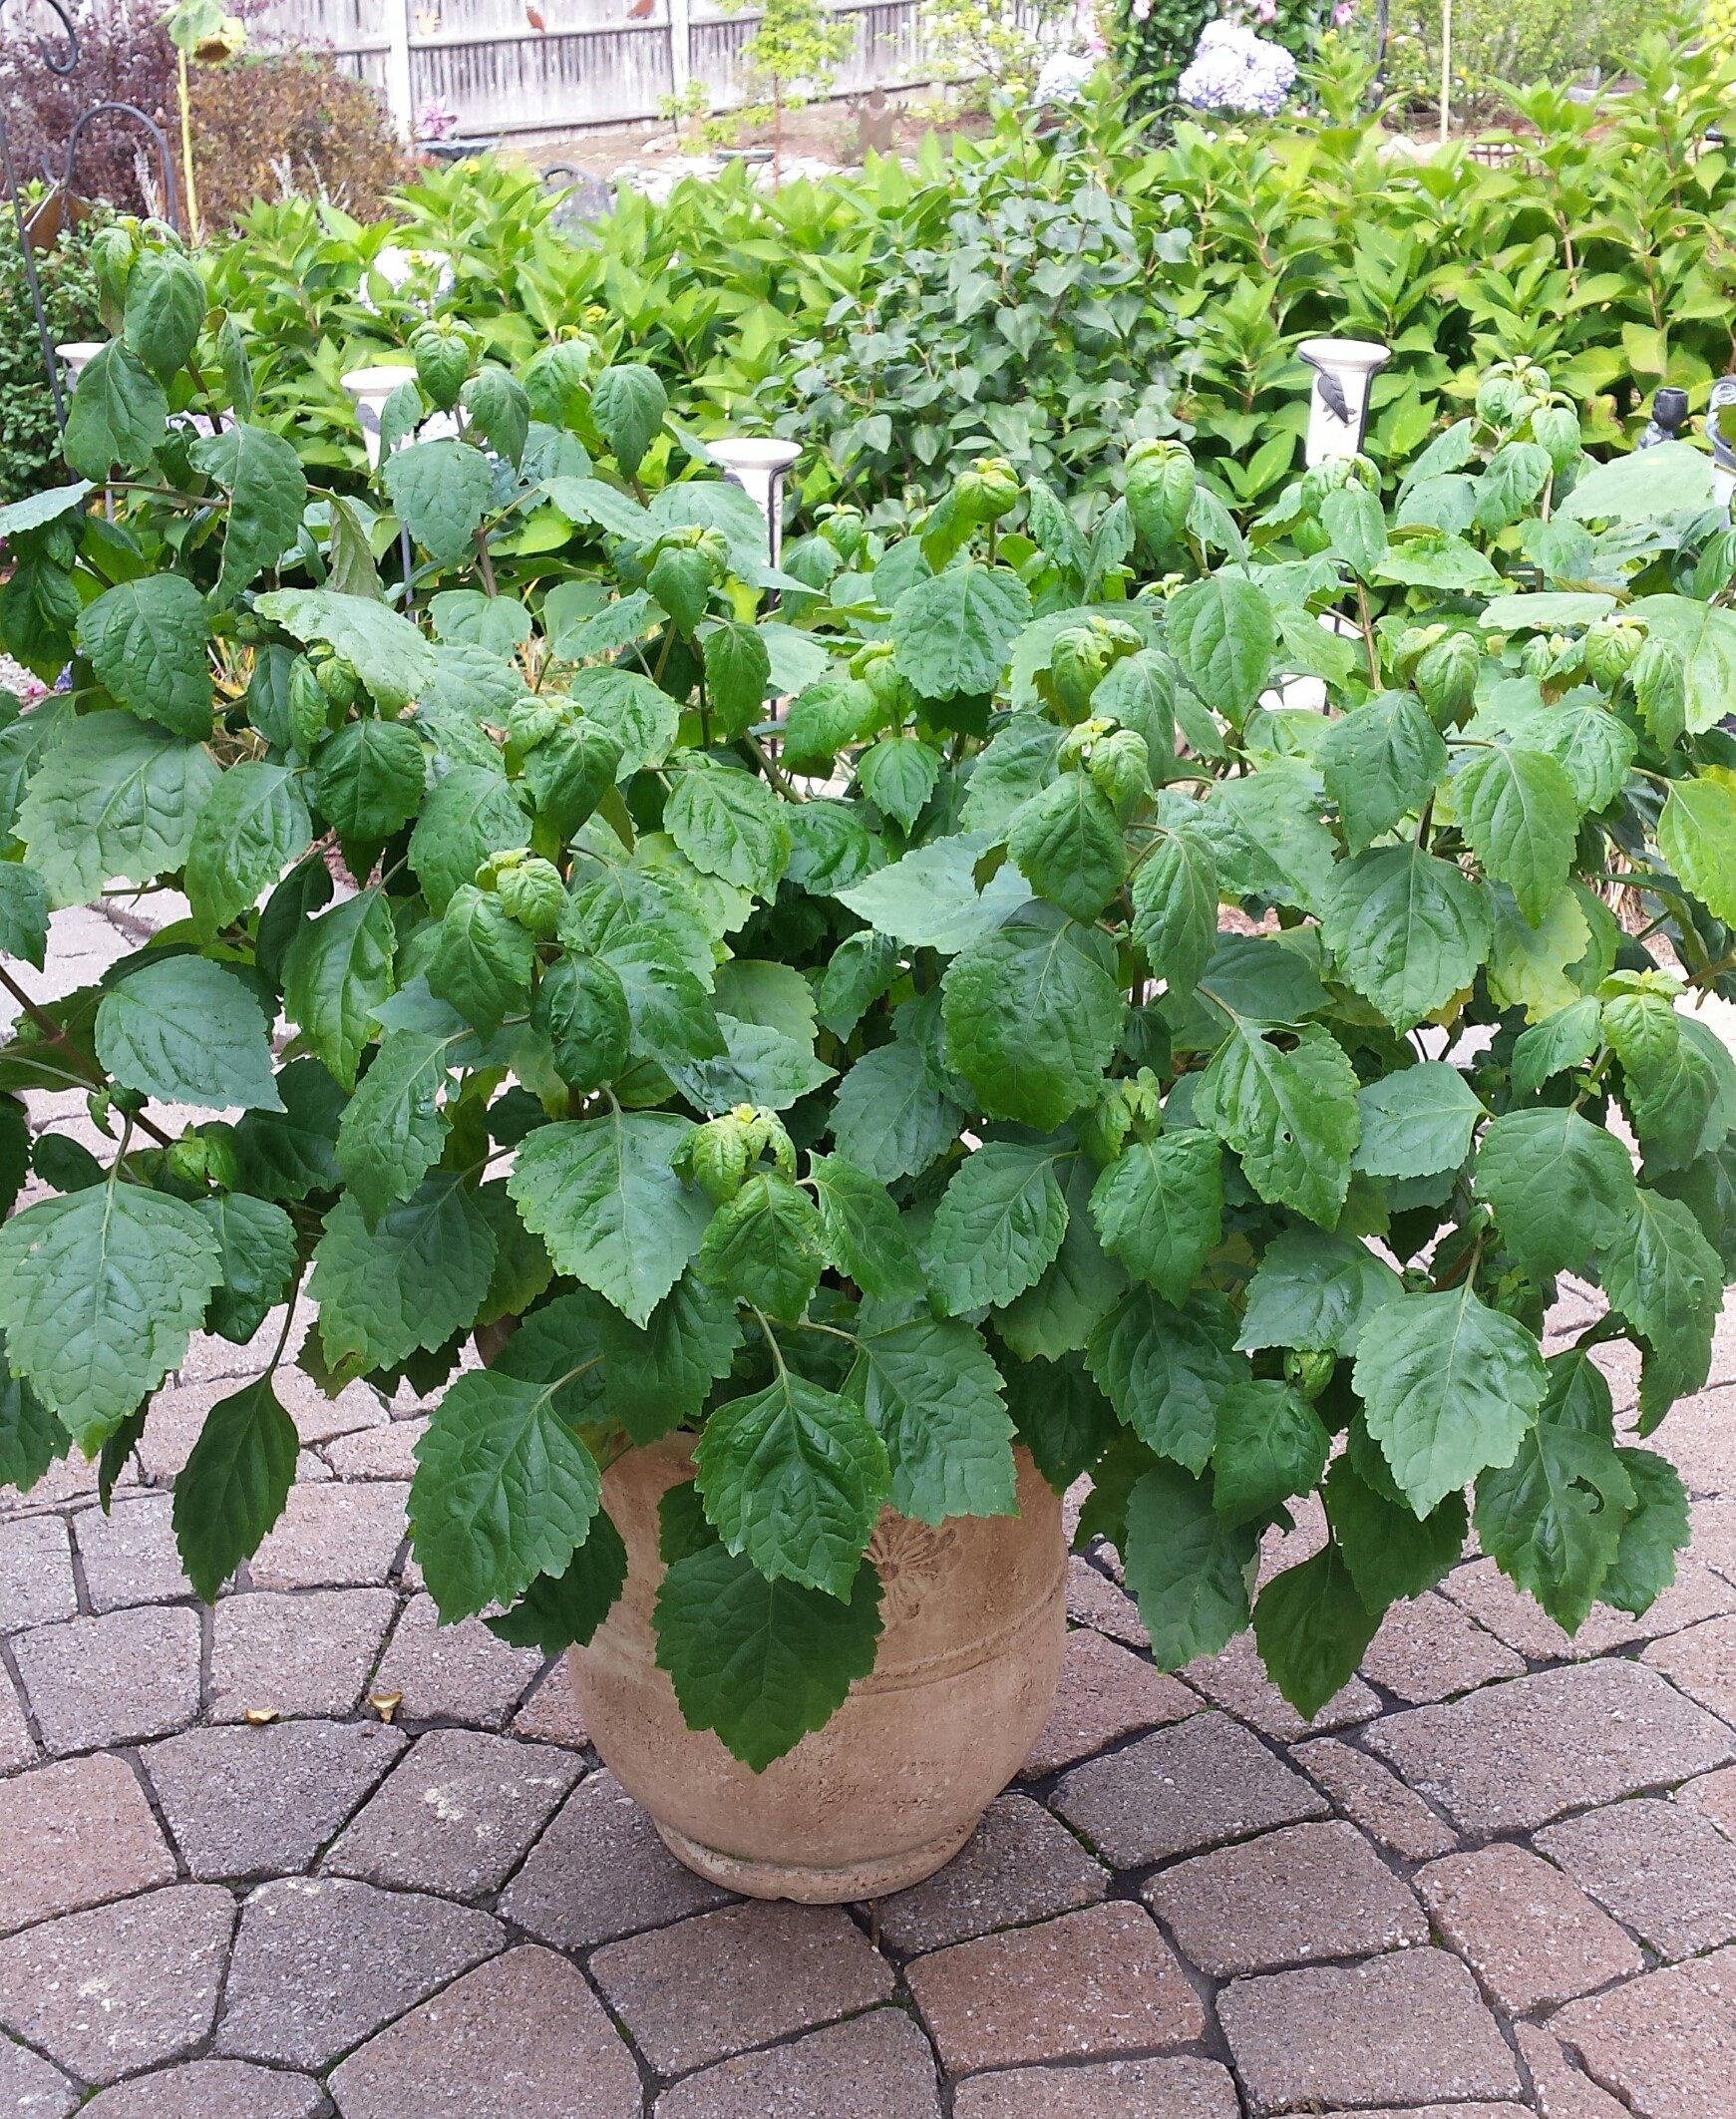
By the end of the 2015 growing season, the Patchouli plant was about a foot and a half tall and wide and it seemed a shame to let the October frost claim it. So, an experiment ensued.
I cut the stems off and dried the leaves to create a small dish of Patchouli Potpourri. Within a few weeks, the fragrance from the dried leaves disappeared. After cutting back the plant to the soil level, it was watered well and over-wintered in the basement. By spring of 2016, the Patchouli plant came back to life and was ready for another growing season in our New Hampshire garden.
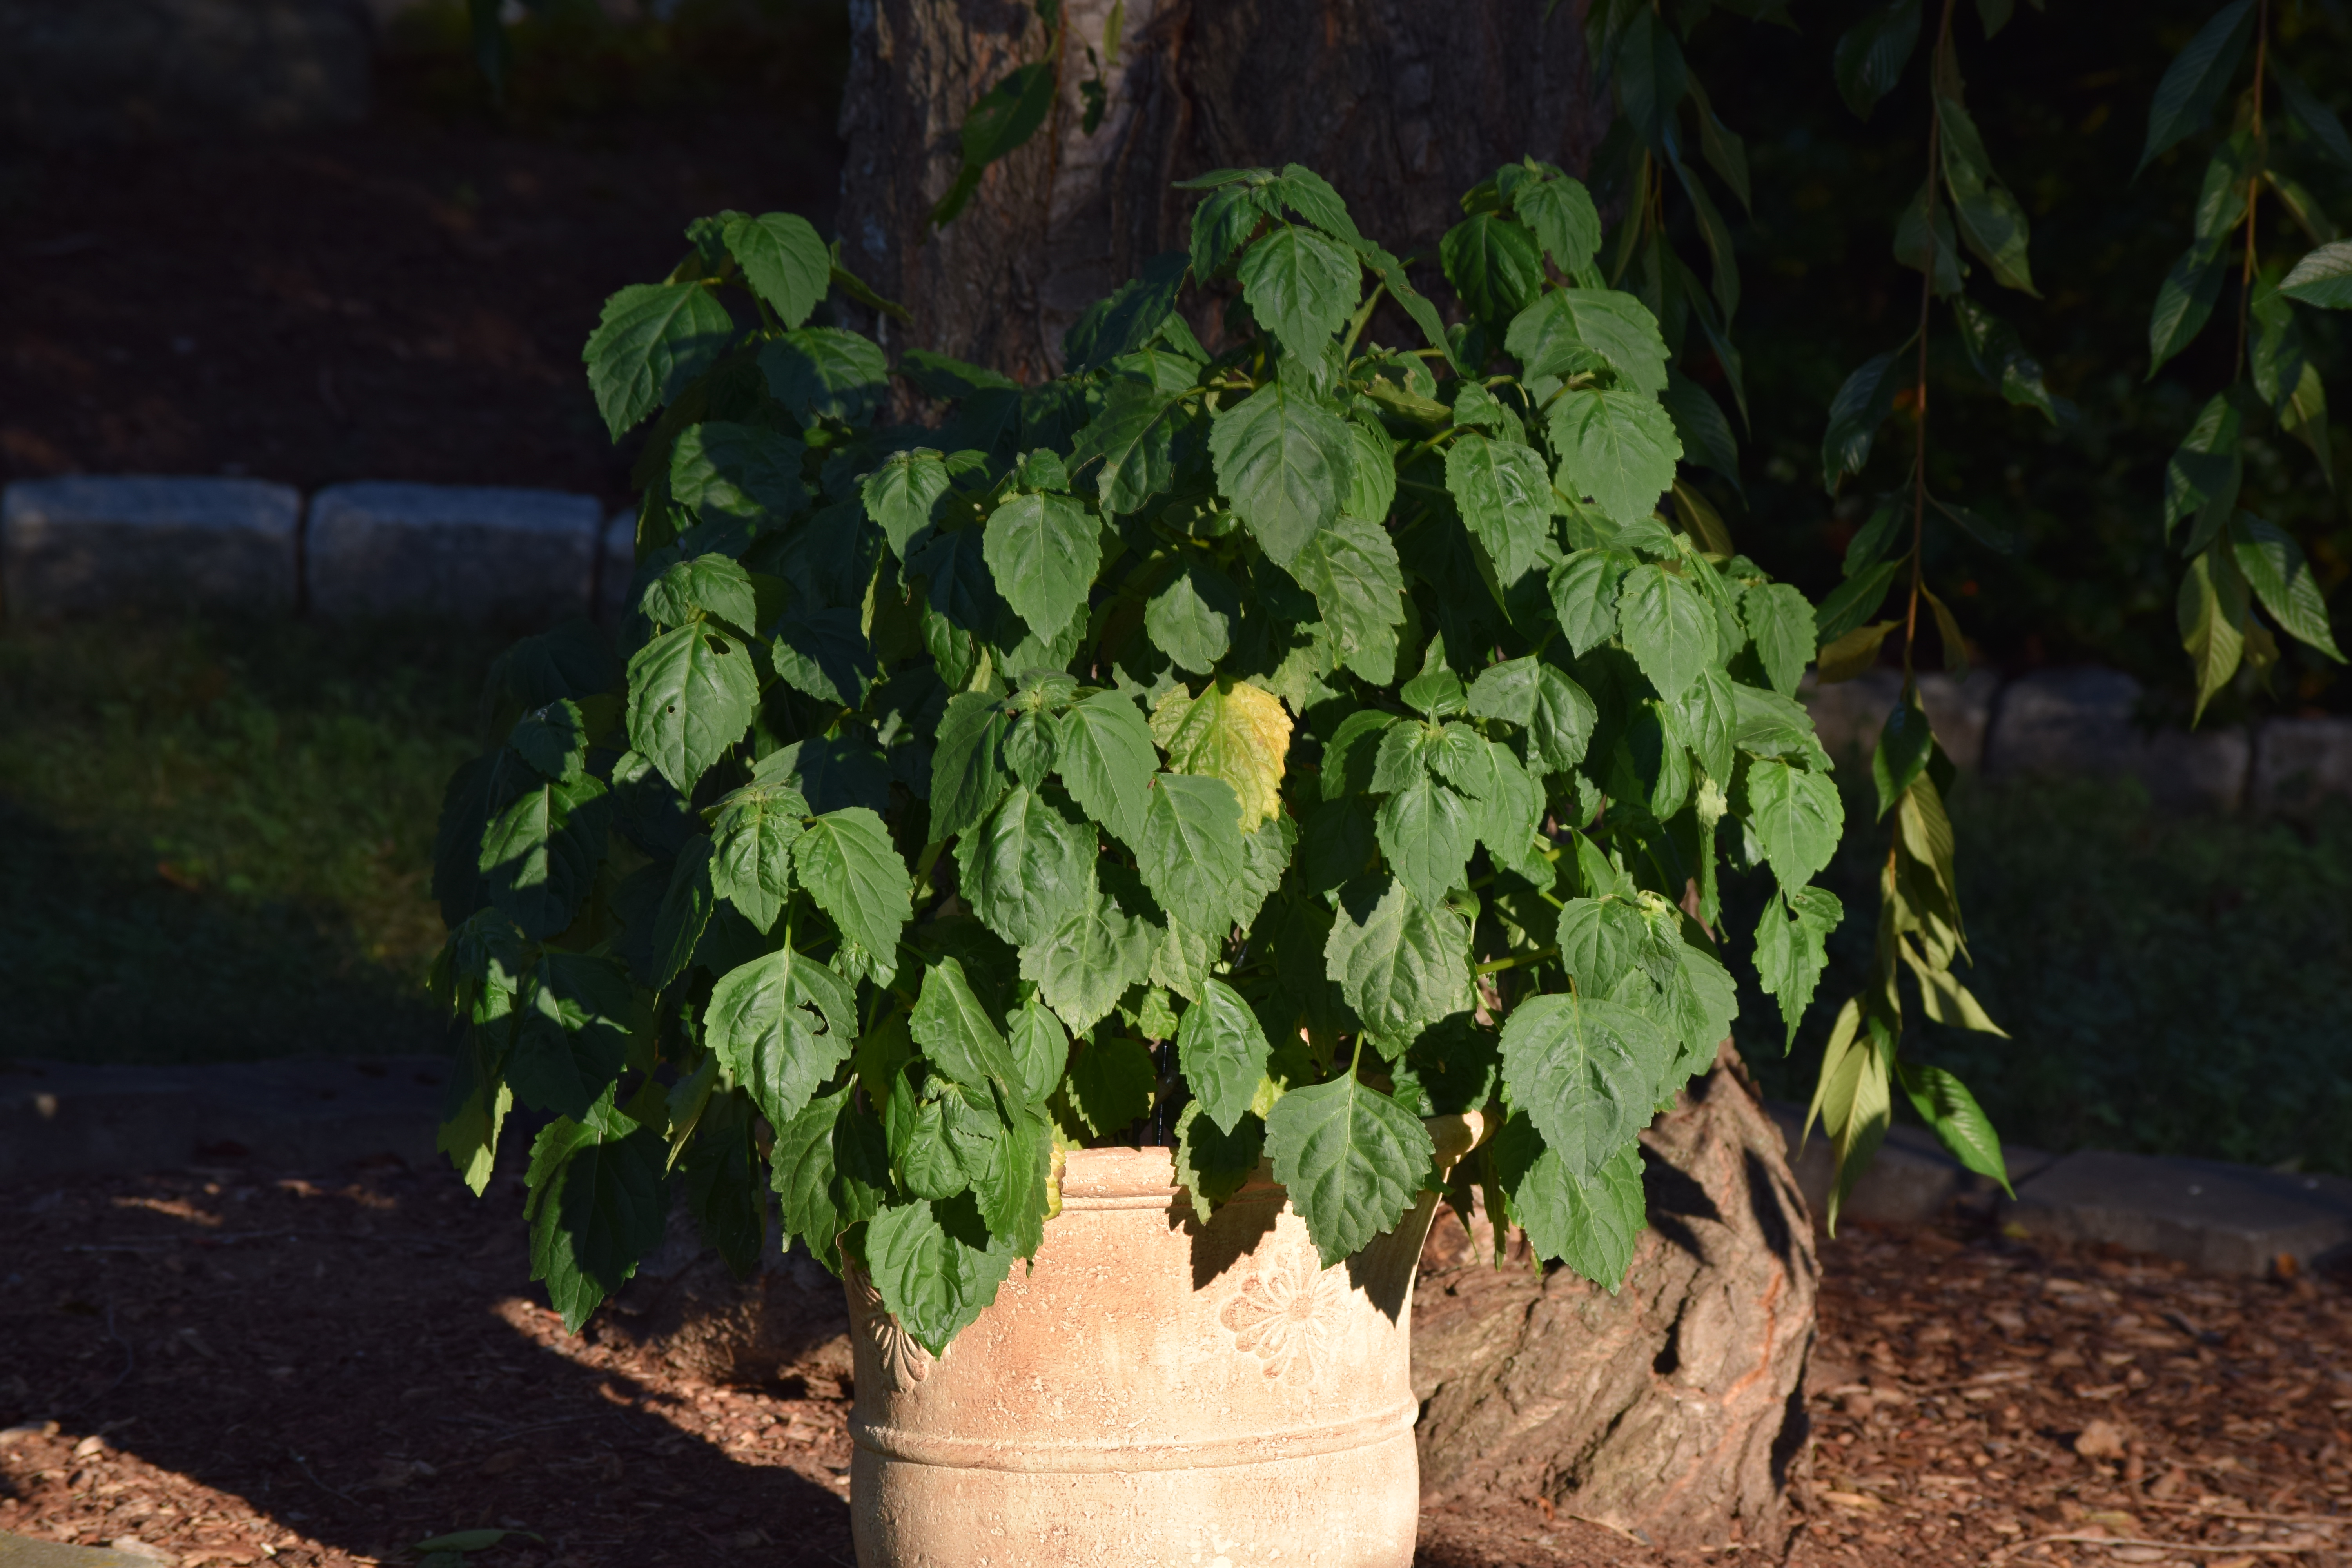
The perfect place in the 2016 garden was under a 30 year old Weeping Cherry tree in the backyard. By the end of the summer, it turned into a huge shrub – reaching its maximum size of 3′ x 3′. Unfortunately, the growing season was not long enough to allow it to reveal the white flowers I’ve read about when researching Patchouli.
By late September, as the cooler nights started to set in, it was time to do something with the Patchouli. I really wanted to create some essential oil…..so I did.
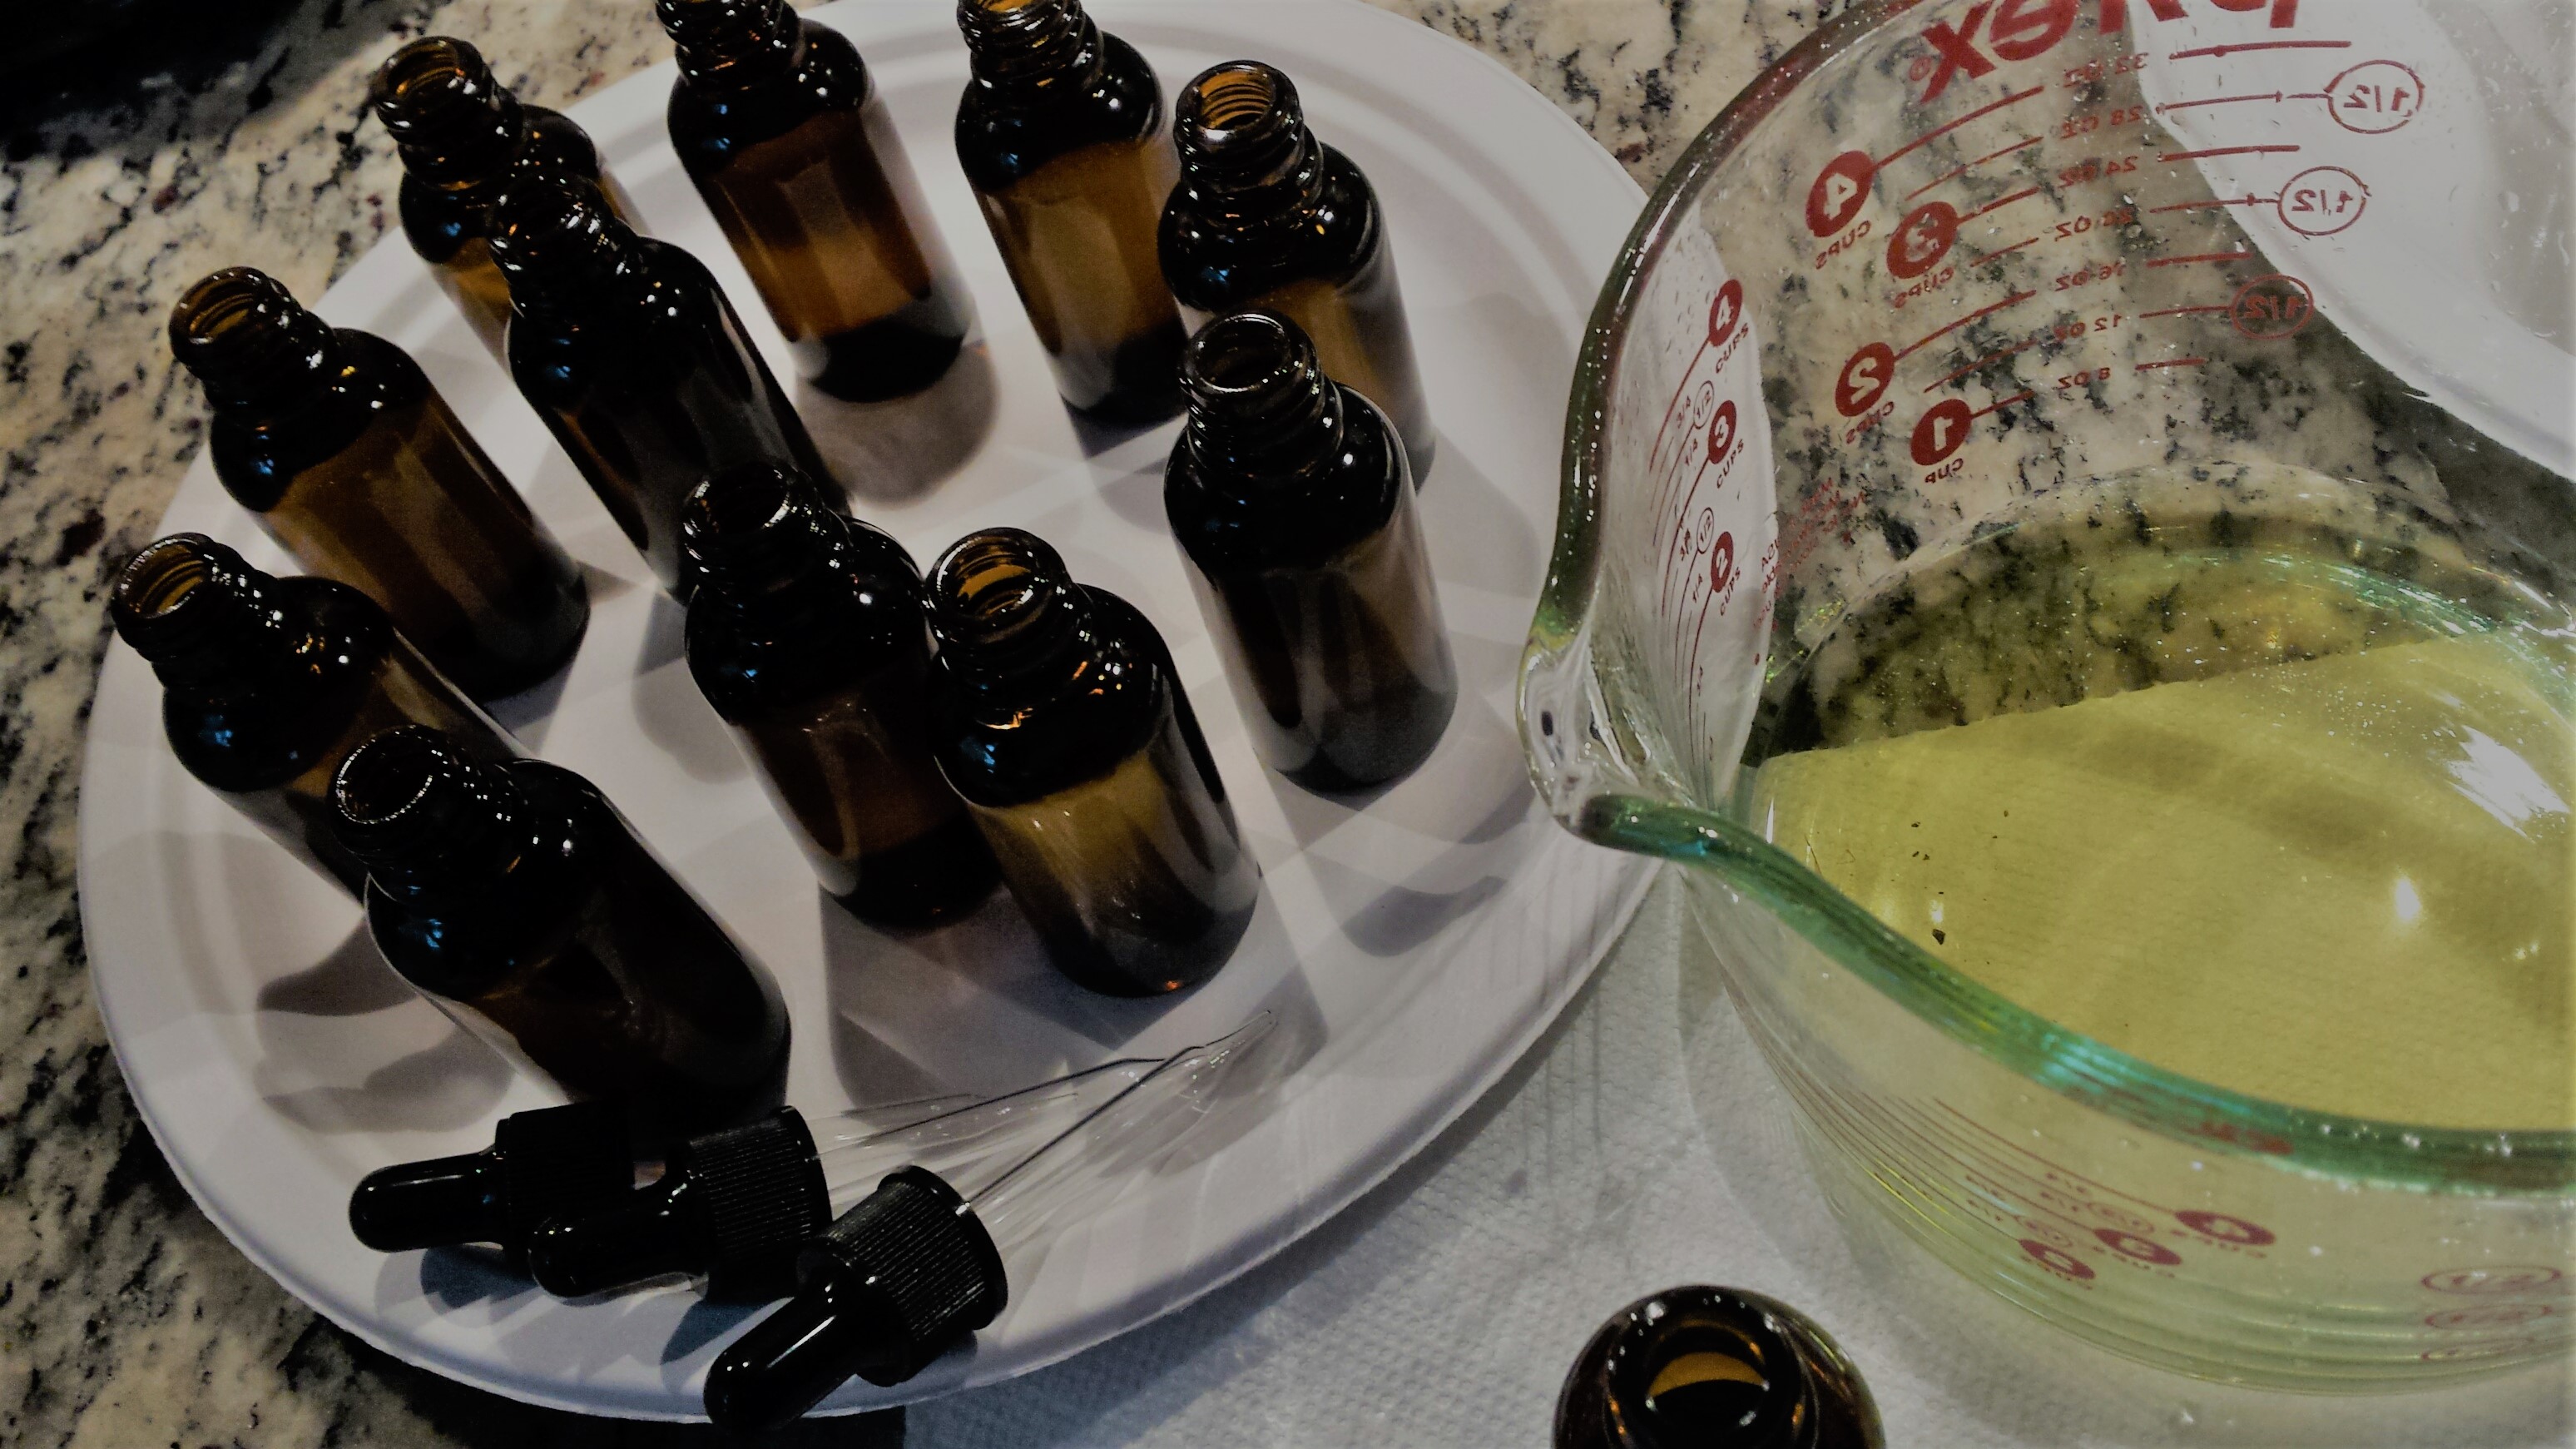
It was a several week process — I used instructions found online. Since I don’t have the equipment to steam distill the oil, I used the method of infusing the dried leaves in the oil. Basically, you dry the leaves and infused them in a carrier oil. I used organic Sweet Almond Oil.
Time to cut back the Patchouli
The neighborhood Garden Cat supervised the Patchouli Harvest
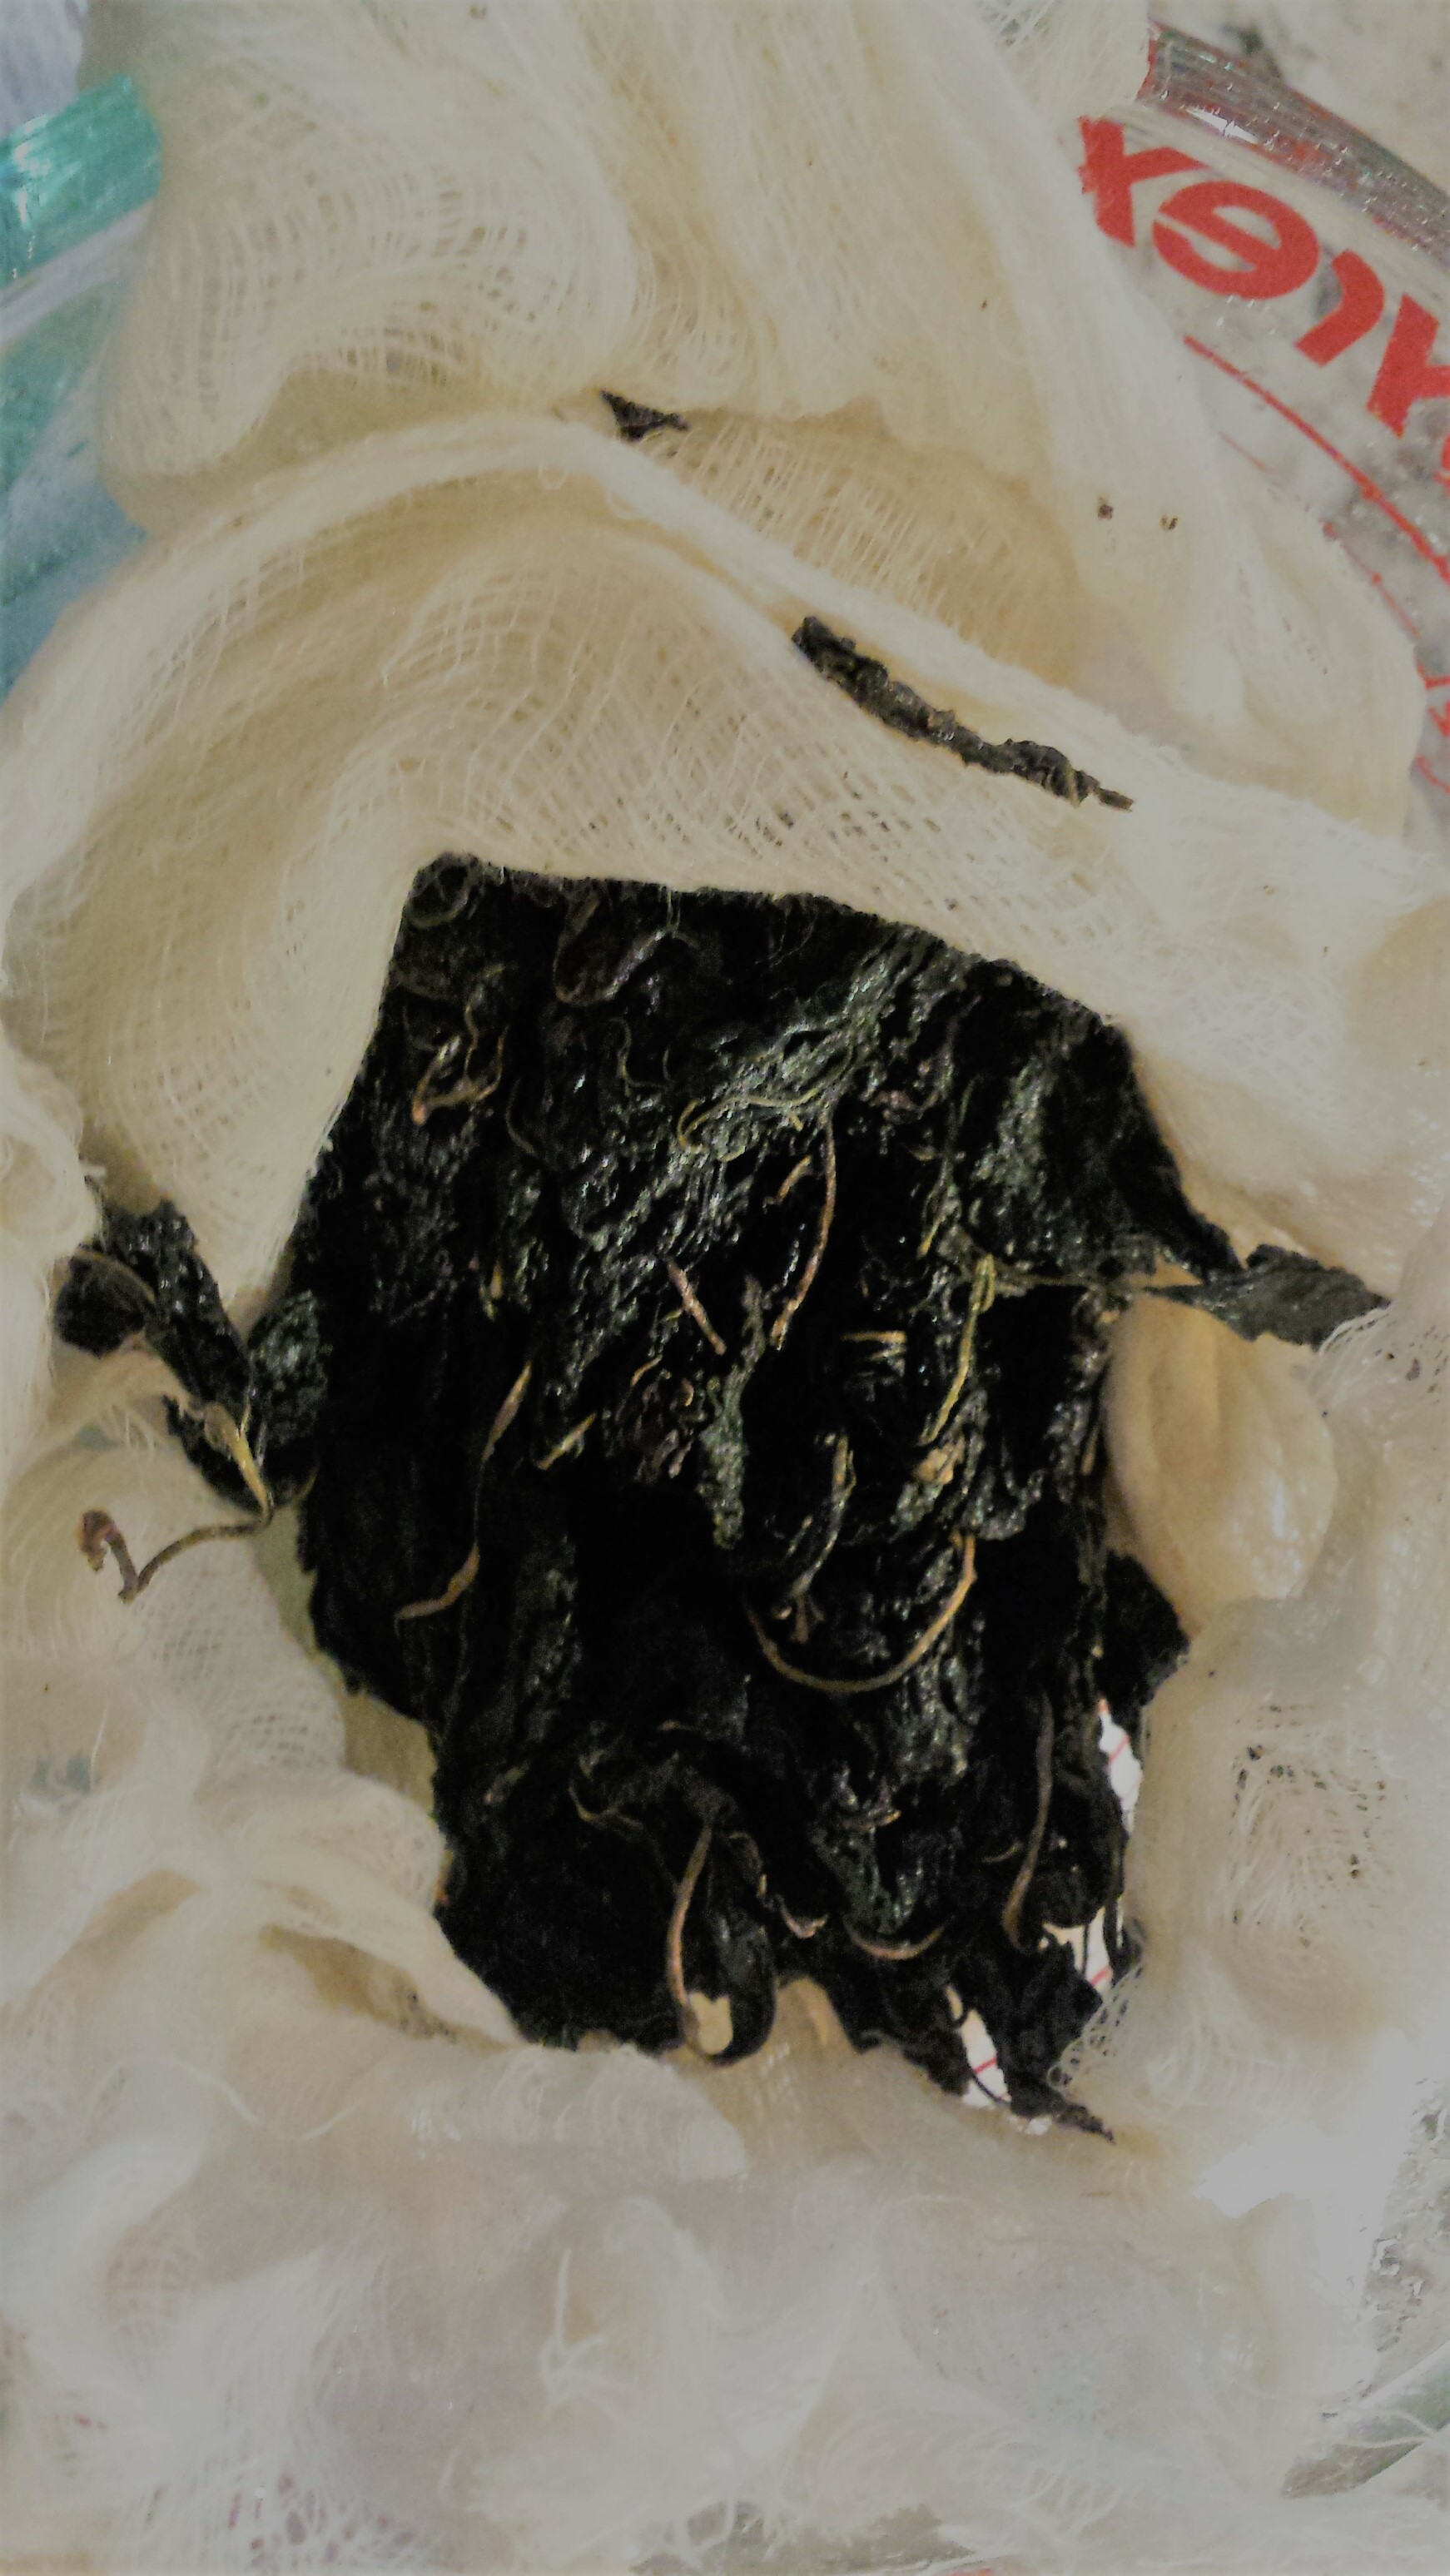
Patchouli after being infused in oil for 2 months. The entire plant fit in one hand.
Production line – 12 one ounce bottles!
The jury is still out on the final result. Personally, the fragrance is light and smells fresh or green – not deep and musky as I expected. Apparently Patchouli Oil improves with time. As it ages, it turns darker and the fragrance grows more potent.
Interestingly, many people are anxious to receive gifts made with plants from my garden. Not true with the Patchouli Oil. More people than not have kindly said, “Thanks but no thanks.” So my few Patchouli loving friends are part of a longer term experiment to determine if the end product actually improves as it ages – like a fine wine!
In the meantime, I’ve been researching the various uses for the oil beyond it’s powerful fragrance. Among other things, I learned Patchouli Oil has been used for thousands of years and was once considered very valuable, being used as an exchange for gold by early European traders. One pound of Patchouli for one pound of gold. King Tut even arranged to have 10 gallons of it buried in his tomb!
The history also includes use to scent fabric in the 19th century, to keep moths away, as well as to treat skin maladies and sexual dysfunction. Today, it’s being used primarily as I expected, as a fragrance. The aromatherapy benefits of Patchouli Oil include anxiety, stress, and depression relief. You can learn more about the history and uses of Patchouli Oil at Mercola’s website.
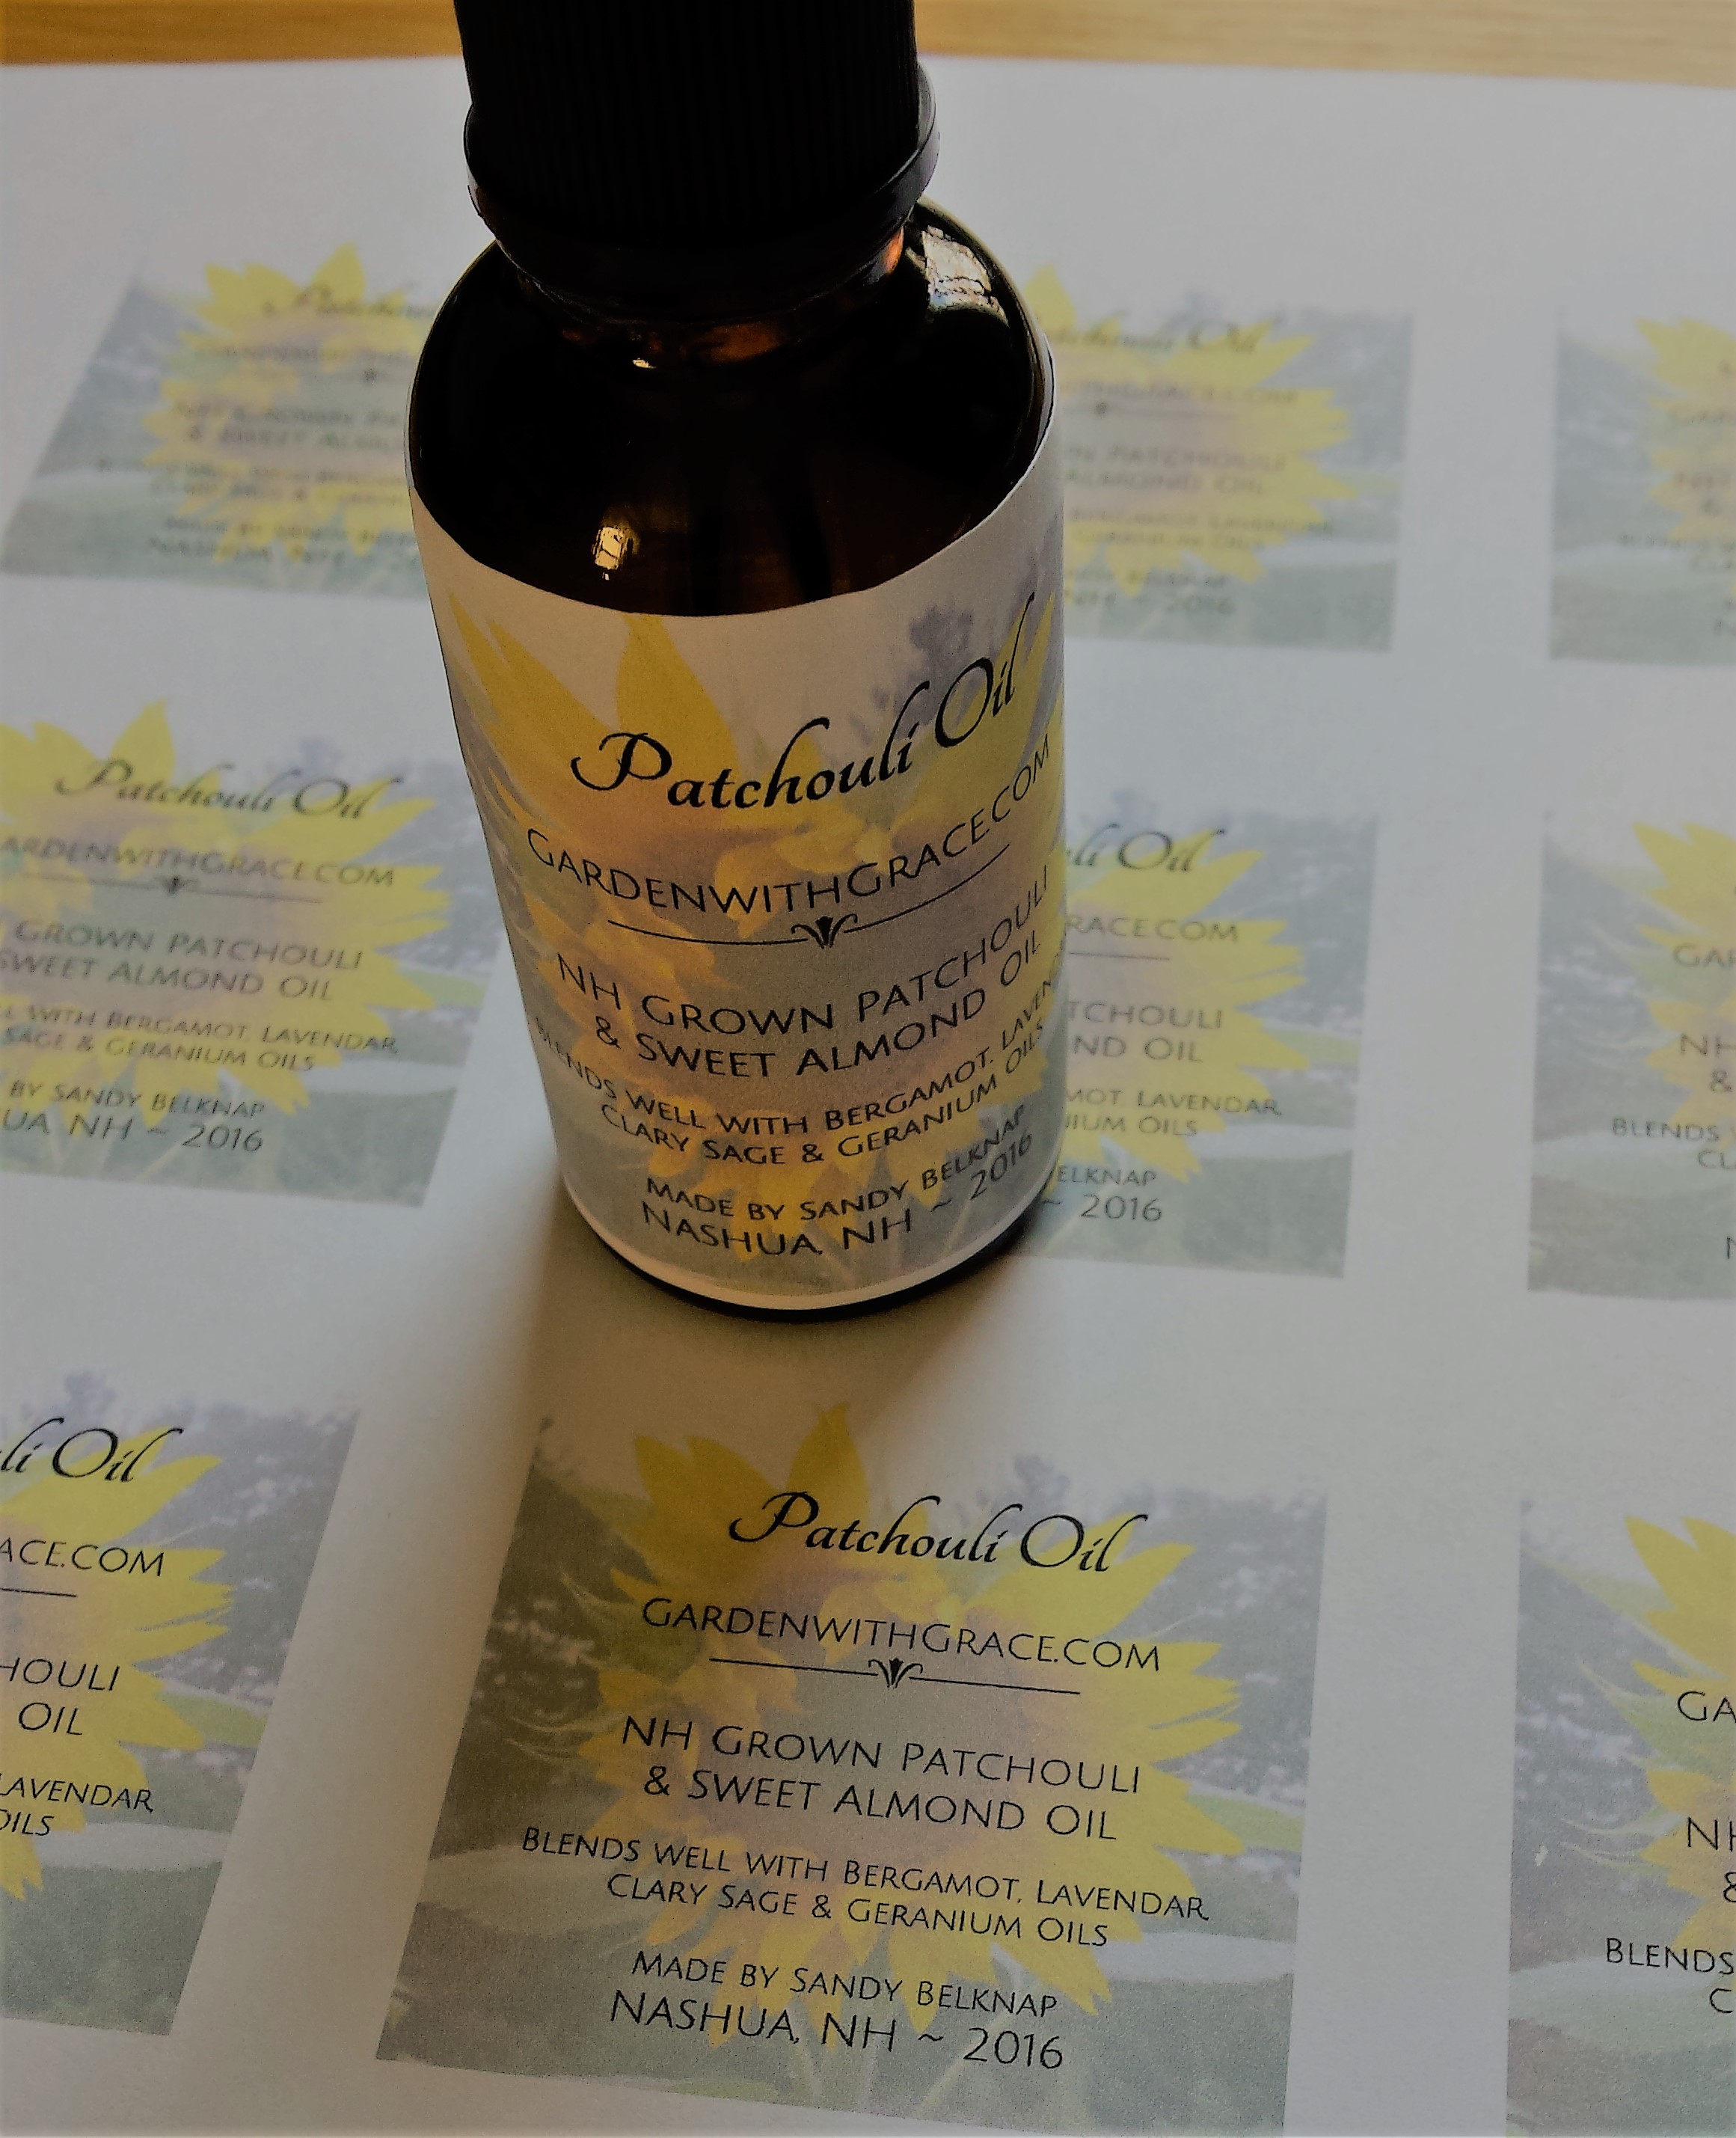
In the end, my production of Patchouli Oil resulted in 12 ounces of medium-yellow colored oil – to perfectly fill the 12 bottles I ordered for the project. The label designed for the bottles includes one of the sunflowers from my garden grown during the 2016 season. It will be interesting to save a bottle or two for a few years to see if the fragrance and color deepen to what I was initially expecting. Only time will tell.
“Suddenly, I felt like I was wearing Patchouli Oil in a room full of Chanel.”
There is always so much hope when seeds are planted in late spring.
Especially sunflower seeds.
We look forward to their golden petals all summer, while at the same time, know that their arrival signals the transition to shorter days and the autumn season.
The New England weather challenged backyard gardeners all summer long as severe to extreme drought conditions gripped the region. (We lost our little bit of lawn — again — yes, that ‘Sad Sod Situation’ continues to be a challenge – but we’ll discuss that in another post someday.)
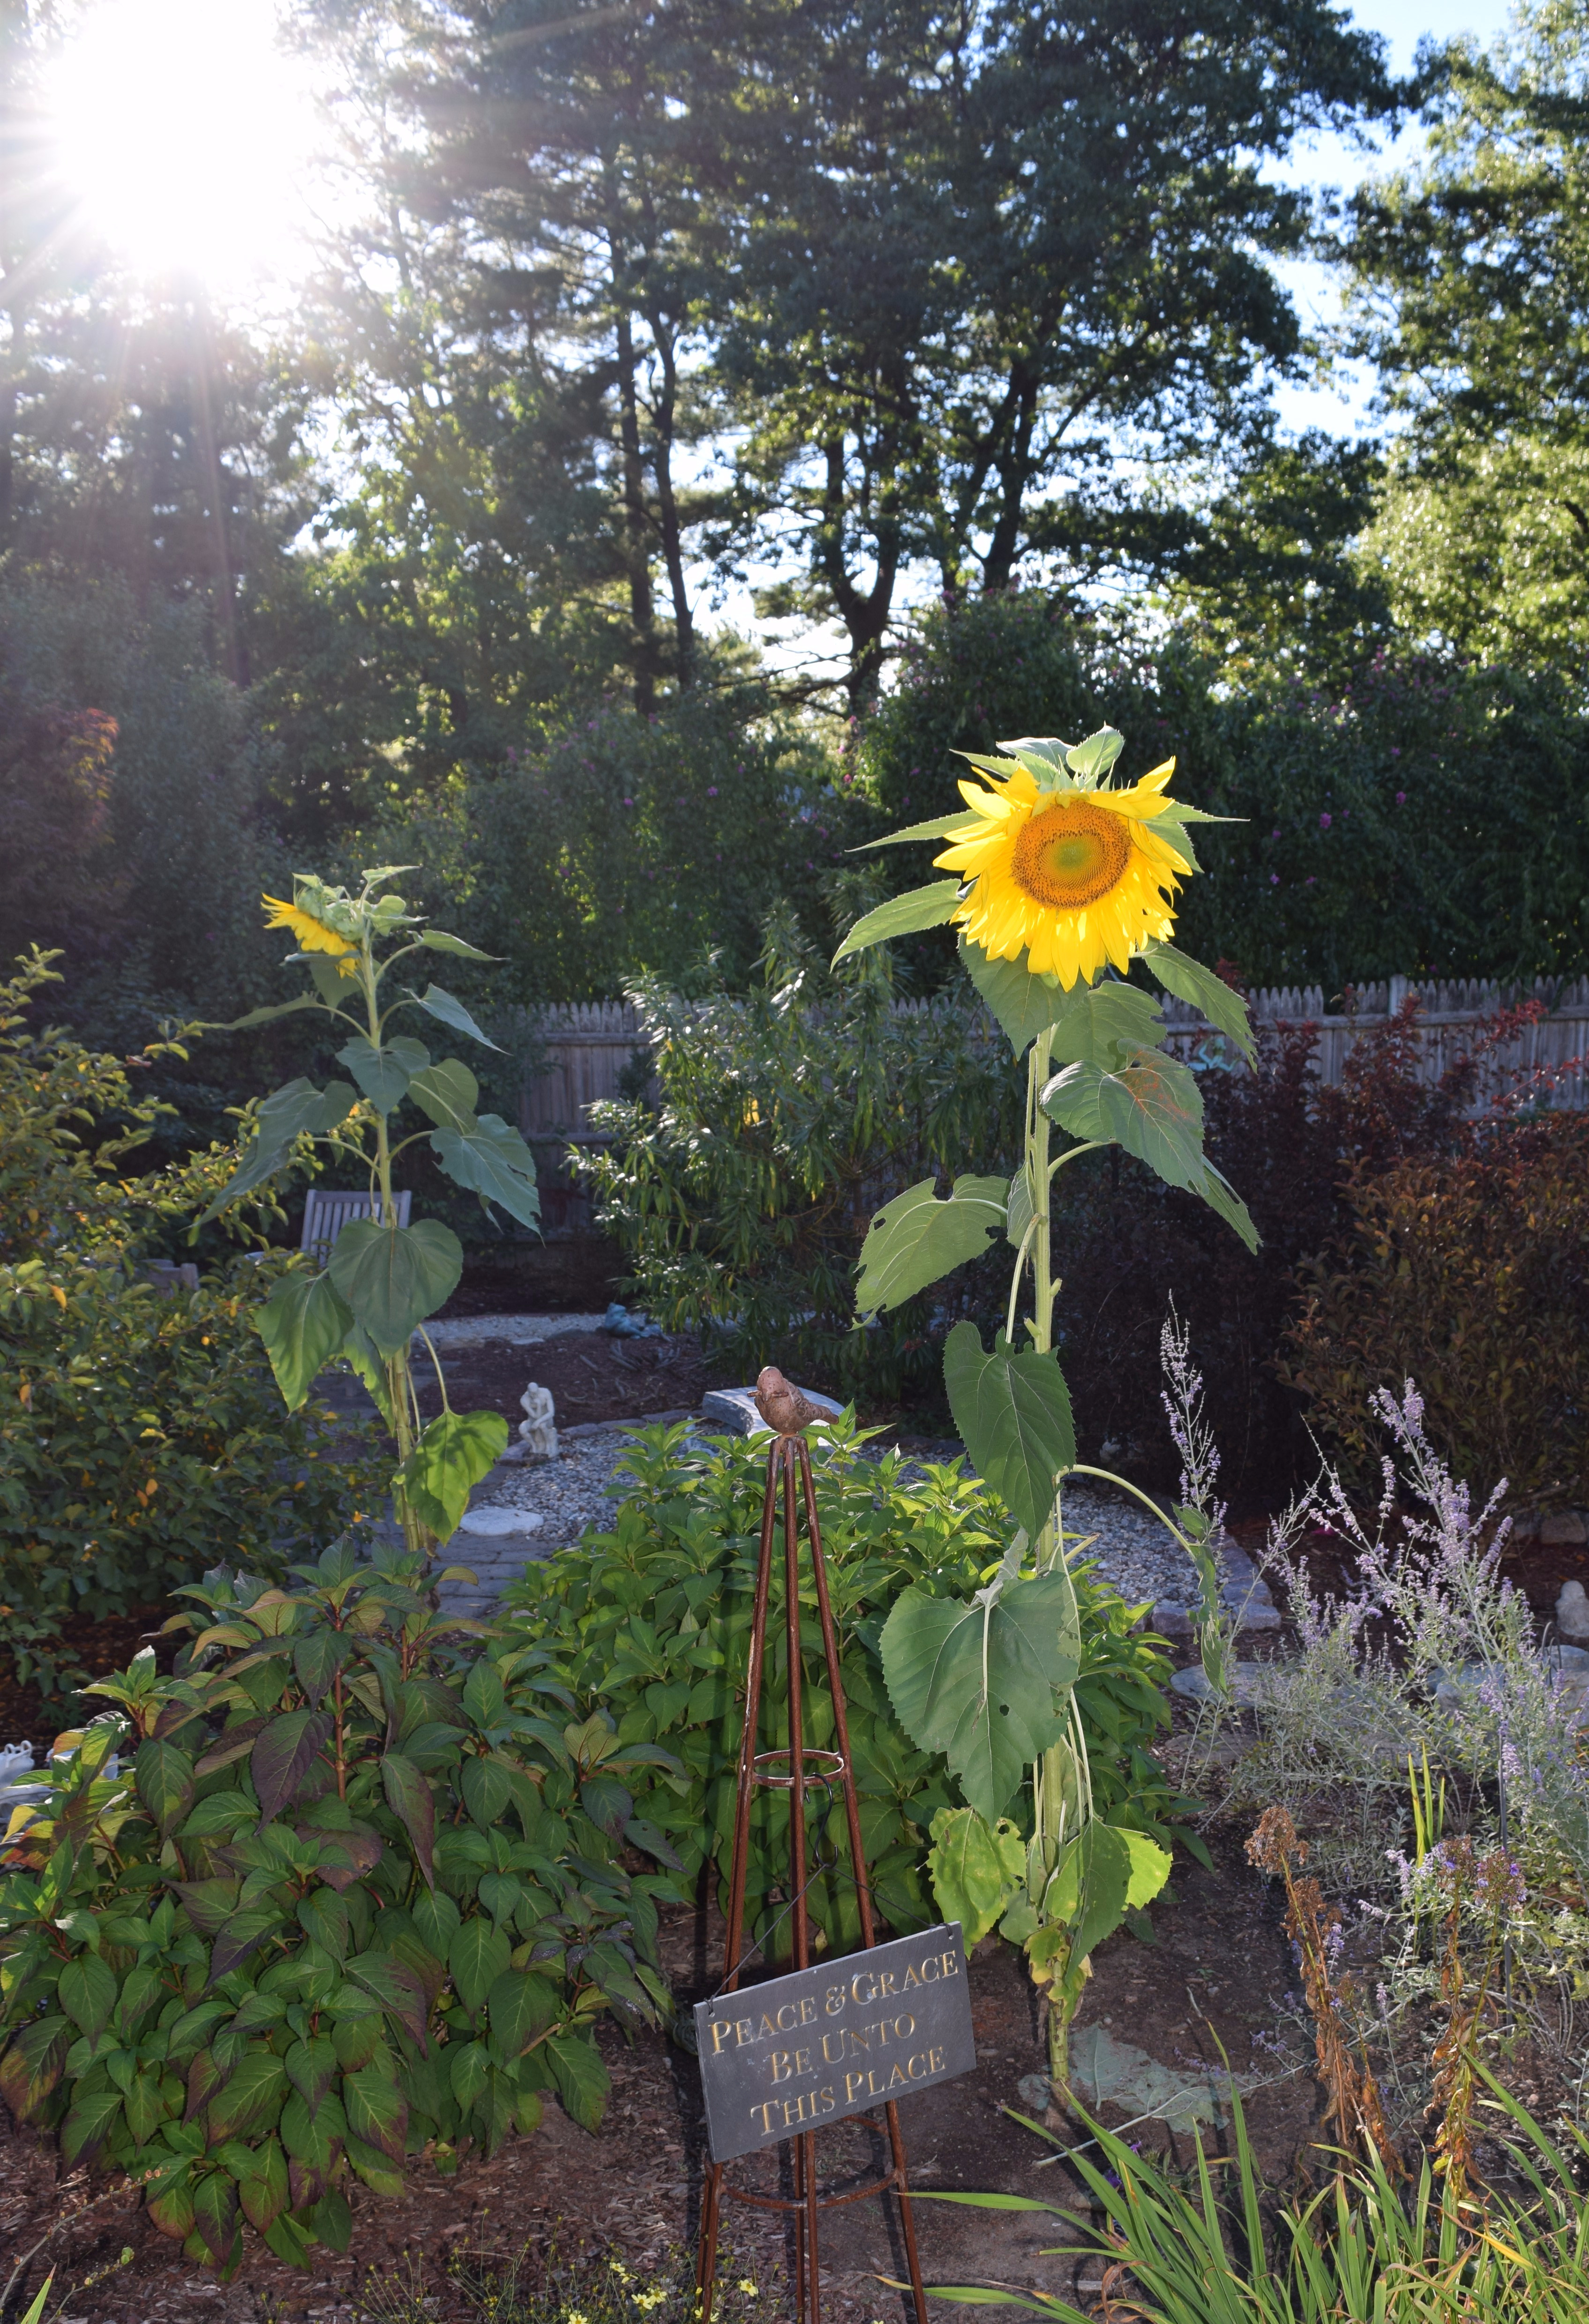
Beginning in June, we watched the sunflowers struggle. The dozen or so inch-high seedlings were a much sought after ‘garden buffet’ delicacy for this year’s over abundance of chipmunks and squirrels. In the end, we were able to grow a TWO eight foot tall sunflowers that became a stunning, late early autumn focal point, adding much-needed color to the garden. (Even the hydrangea failed to bloom due to the challenge of changing climate conditions.)
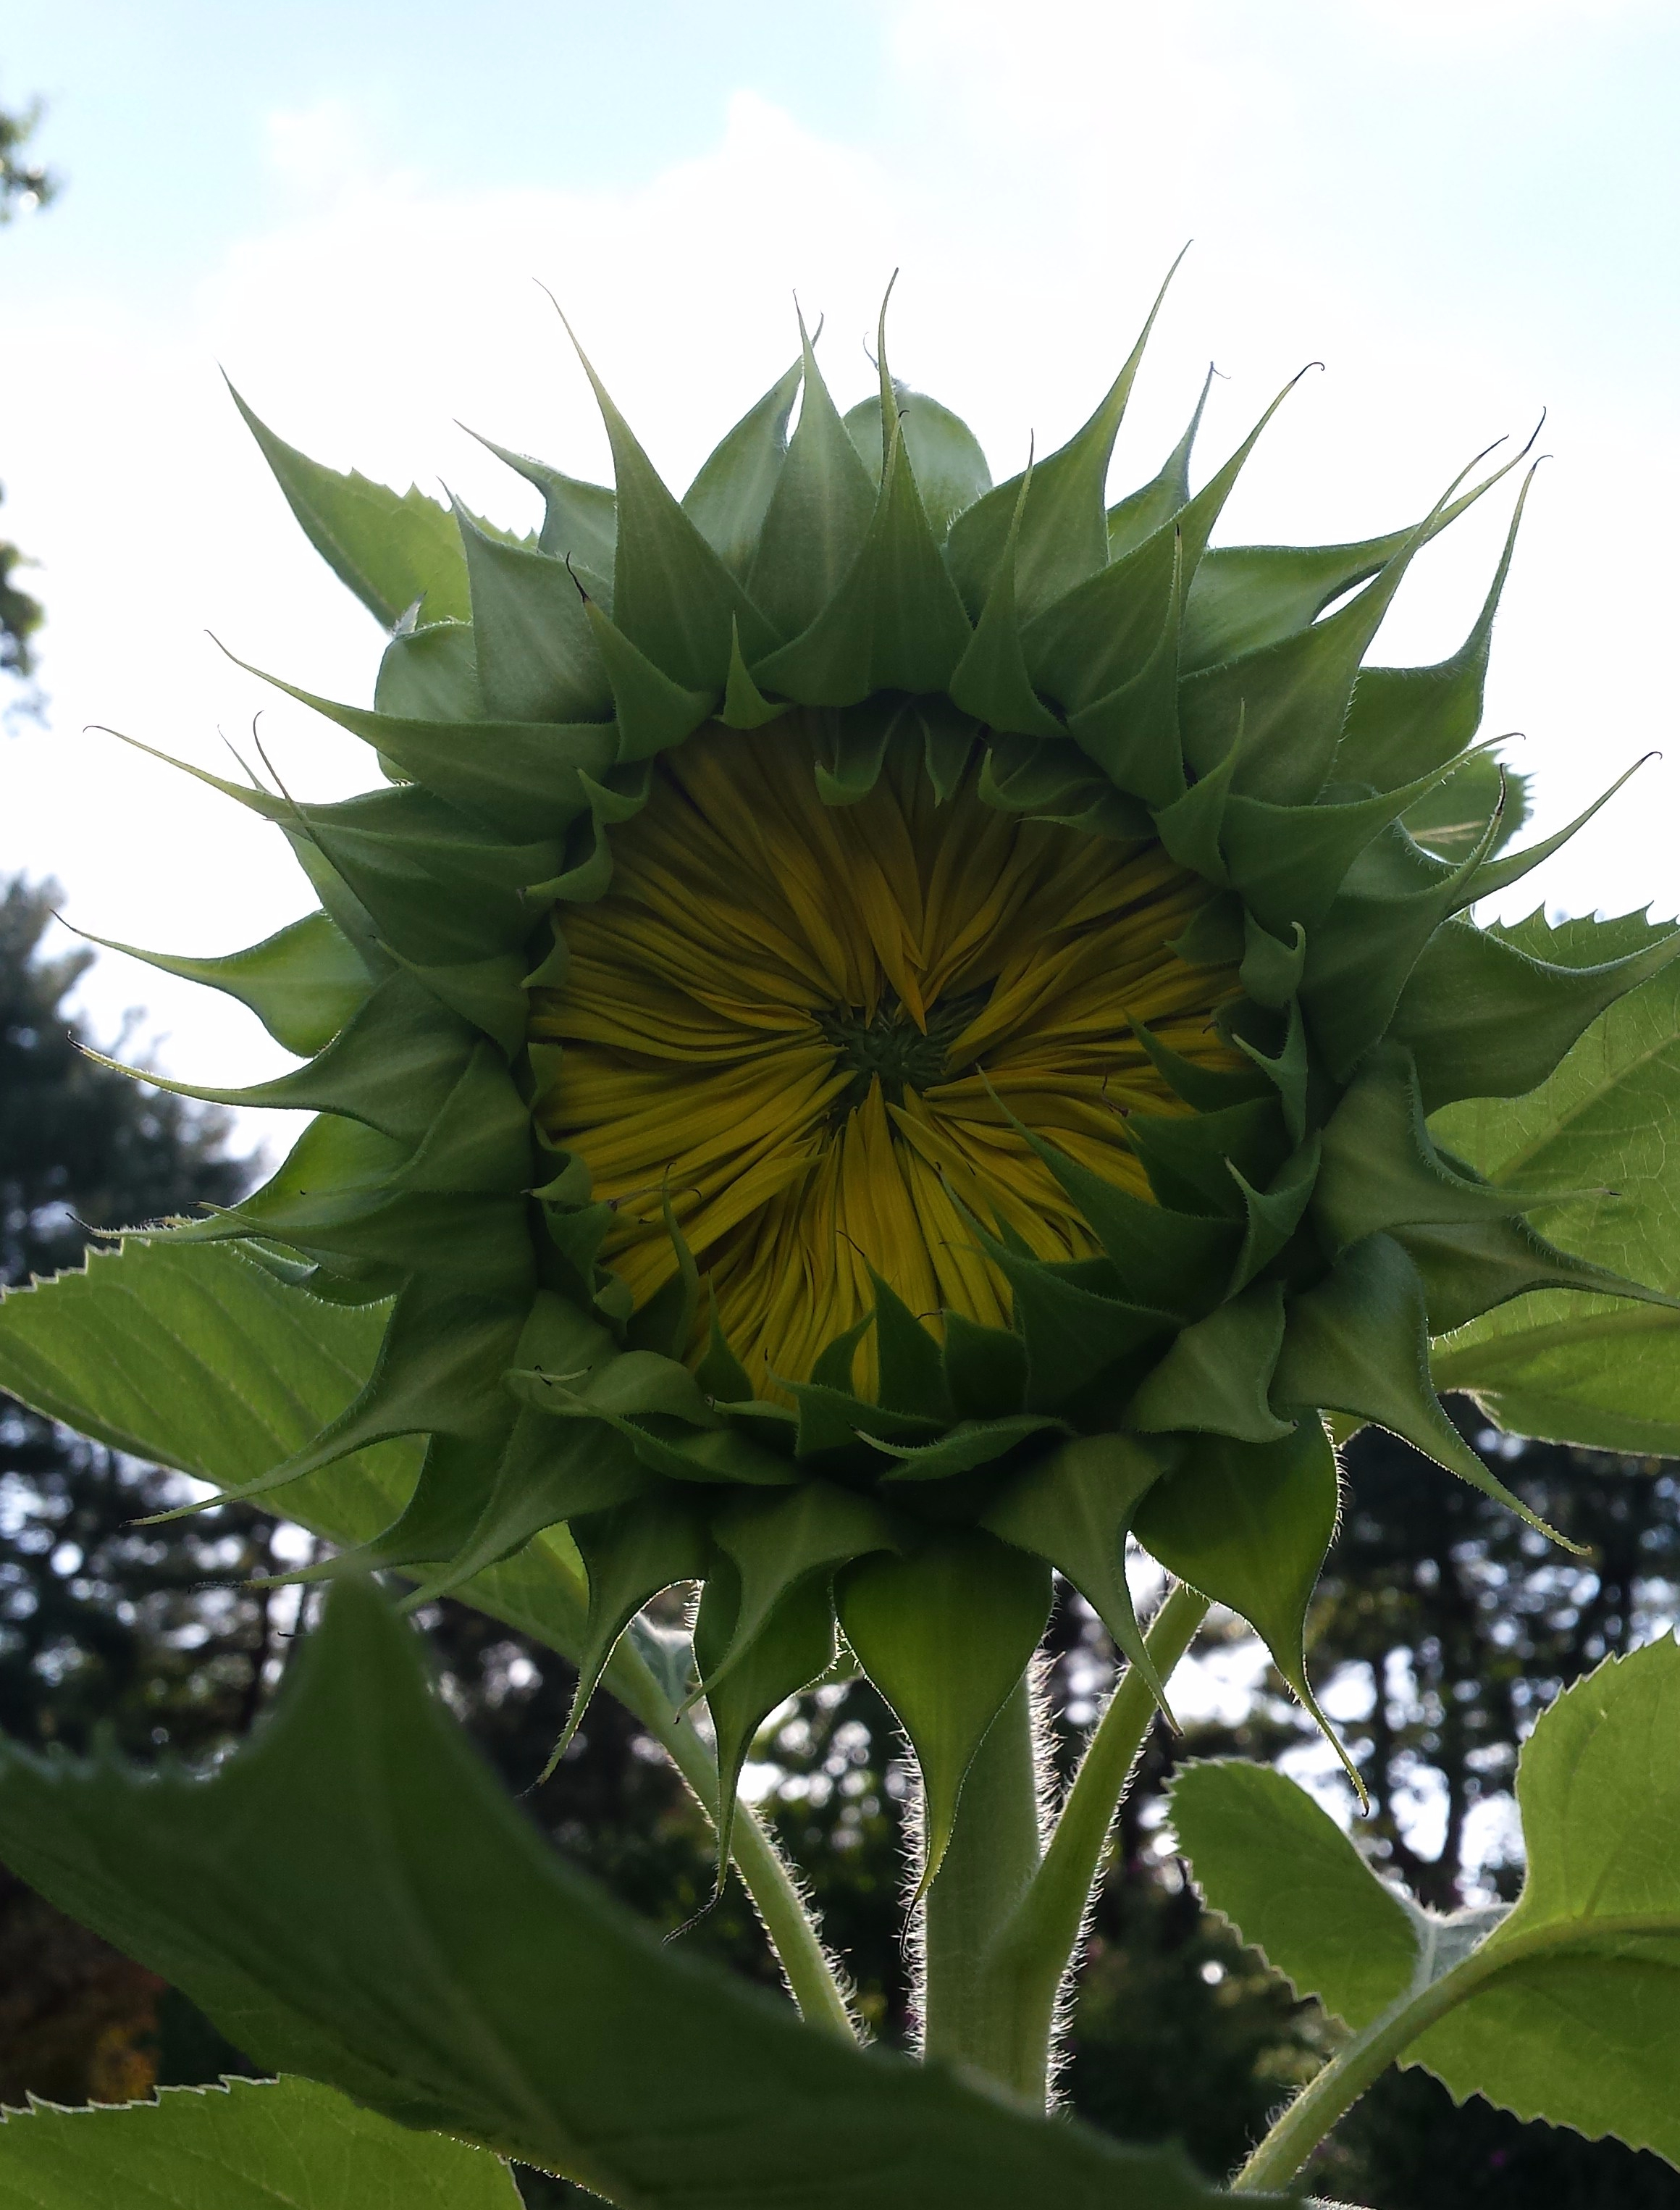
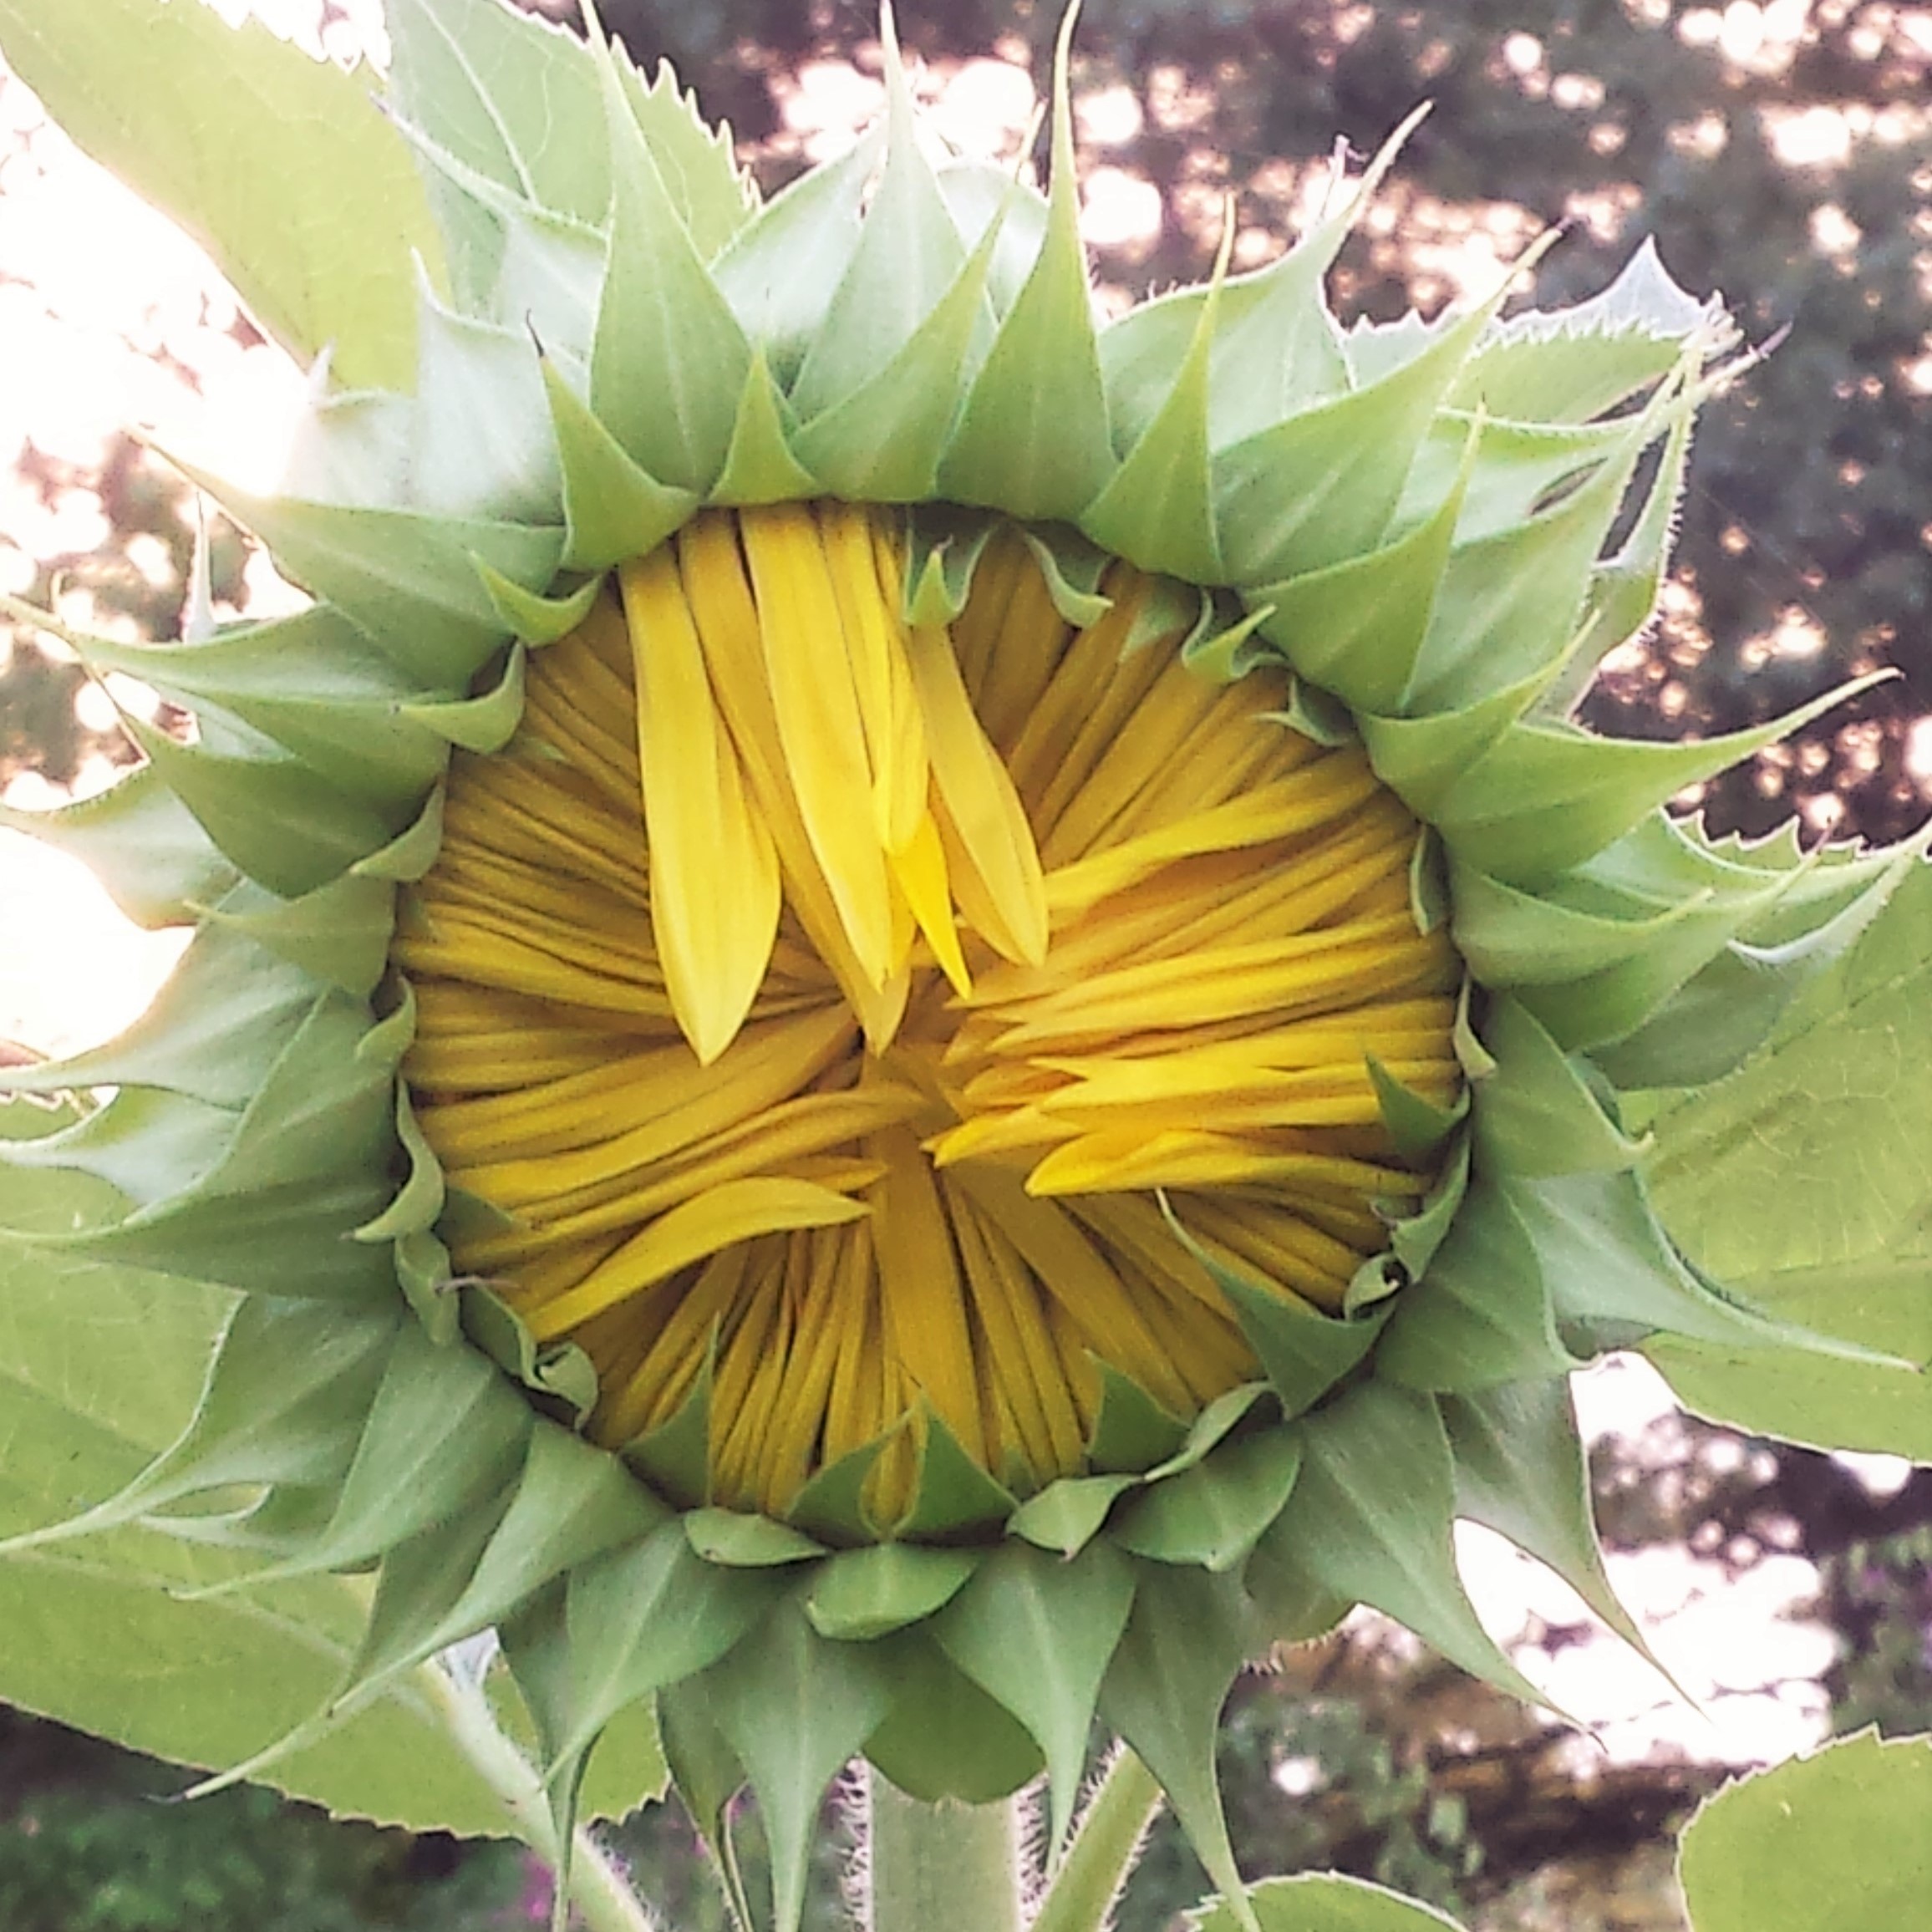
It was amazing to watch the single large flower on each stem slowly open and come to life over the course of four days.
Day 1 – Ready to Burst
Day 2 – Time to Wake Up
Day 3 – Almost There
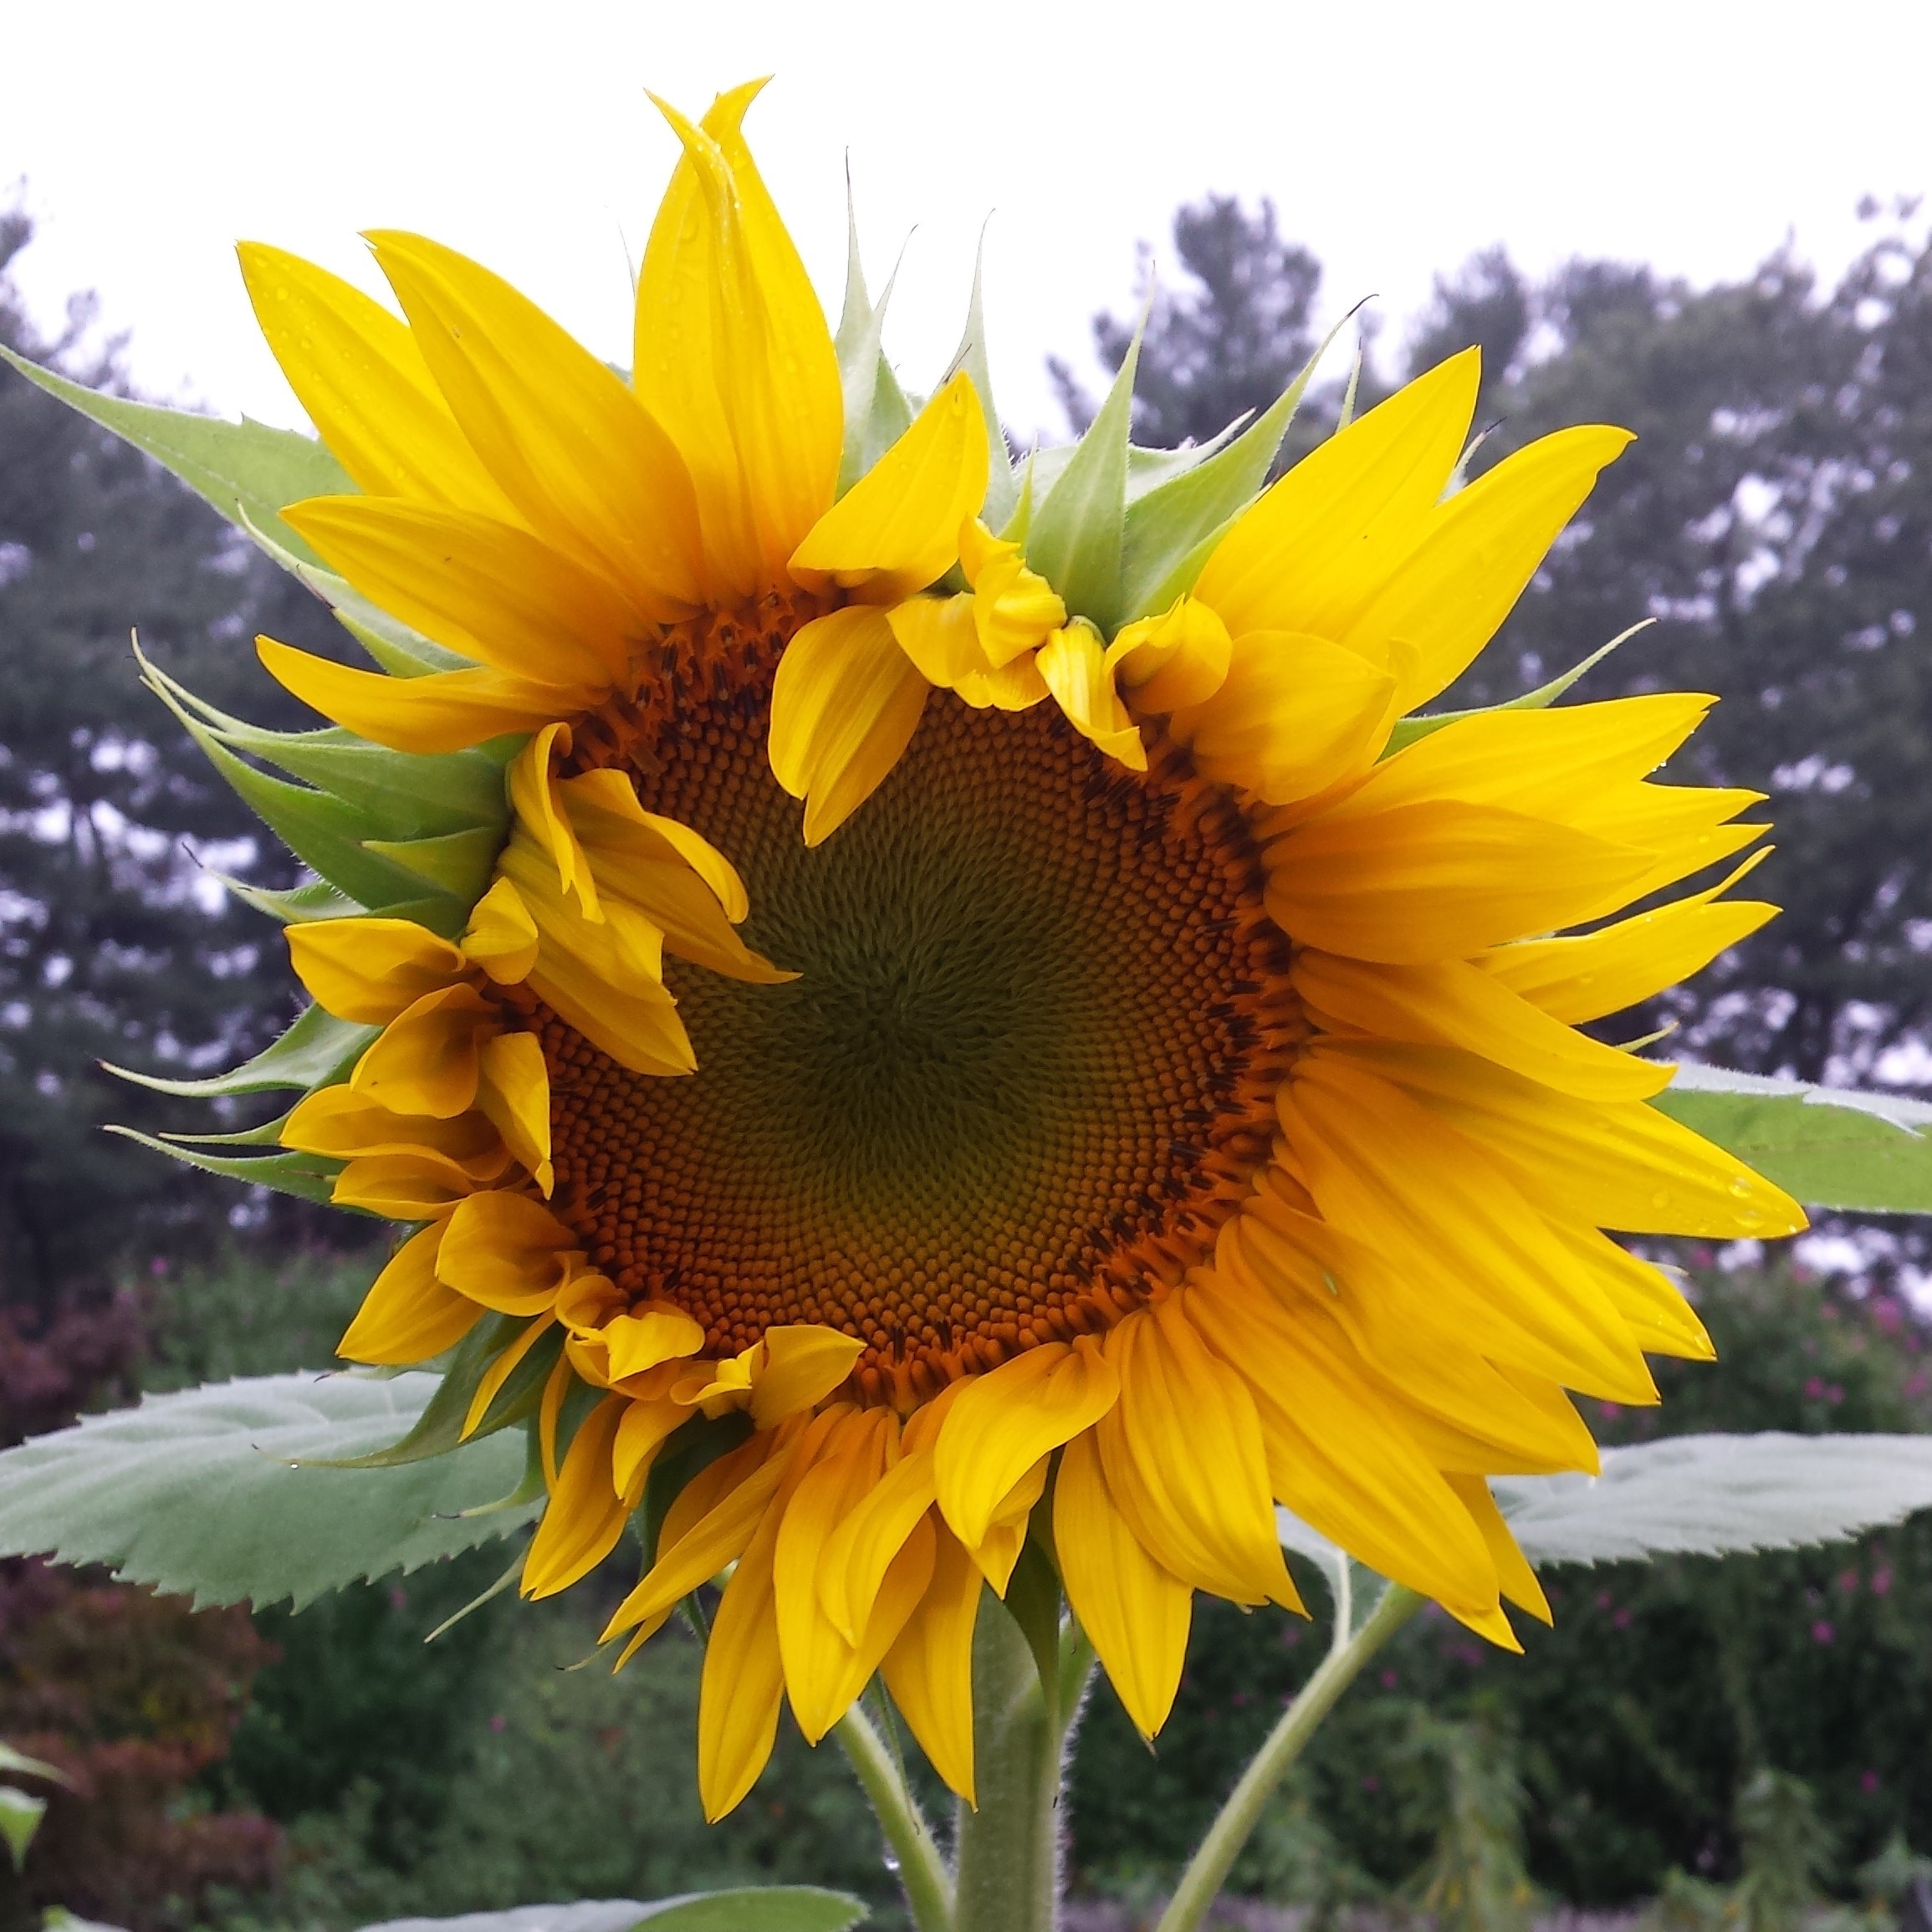
Day 4 – Hello Sunshine!
HELLO SUNSHINE!
Once each flower opened, the bees quickly began their pollination process. It was amazing to watch the bumble bees AND honey bees over the course of about 10 days navigate around and around the flowers’ centers to pollinate and bring the sunflower seeds to life.
As the seed head grew bigger and heavier each day, I was looking forward to harvesting some of the seeds to save for the 2017 garden. The plan was to leave the majority of the seeds for the songbirds to enjoy.
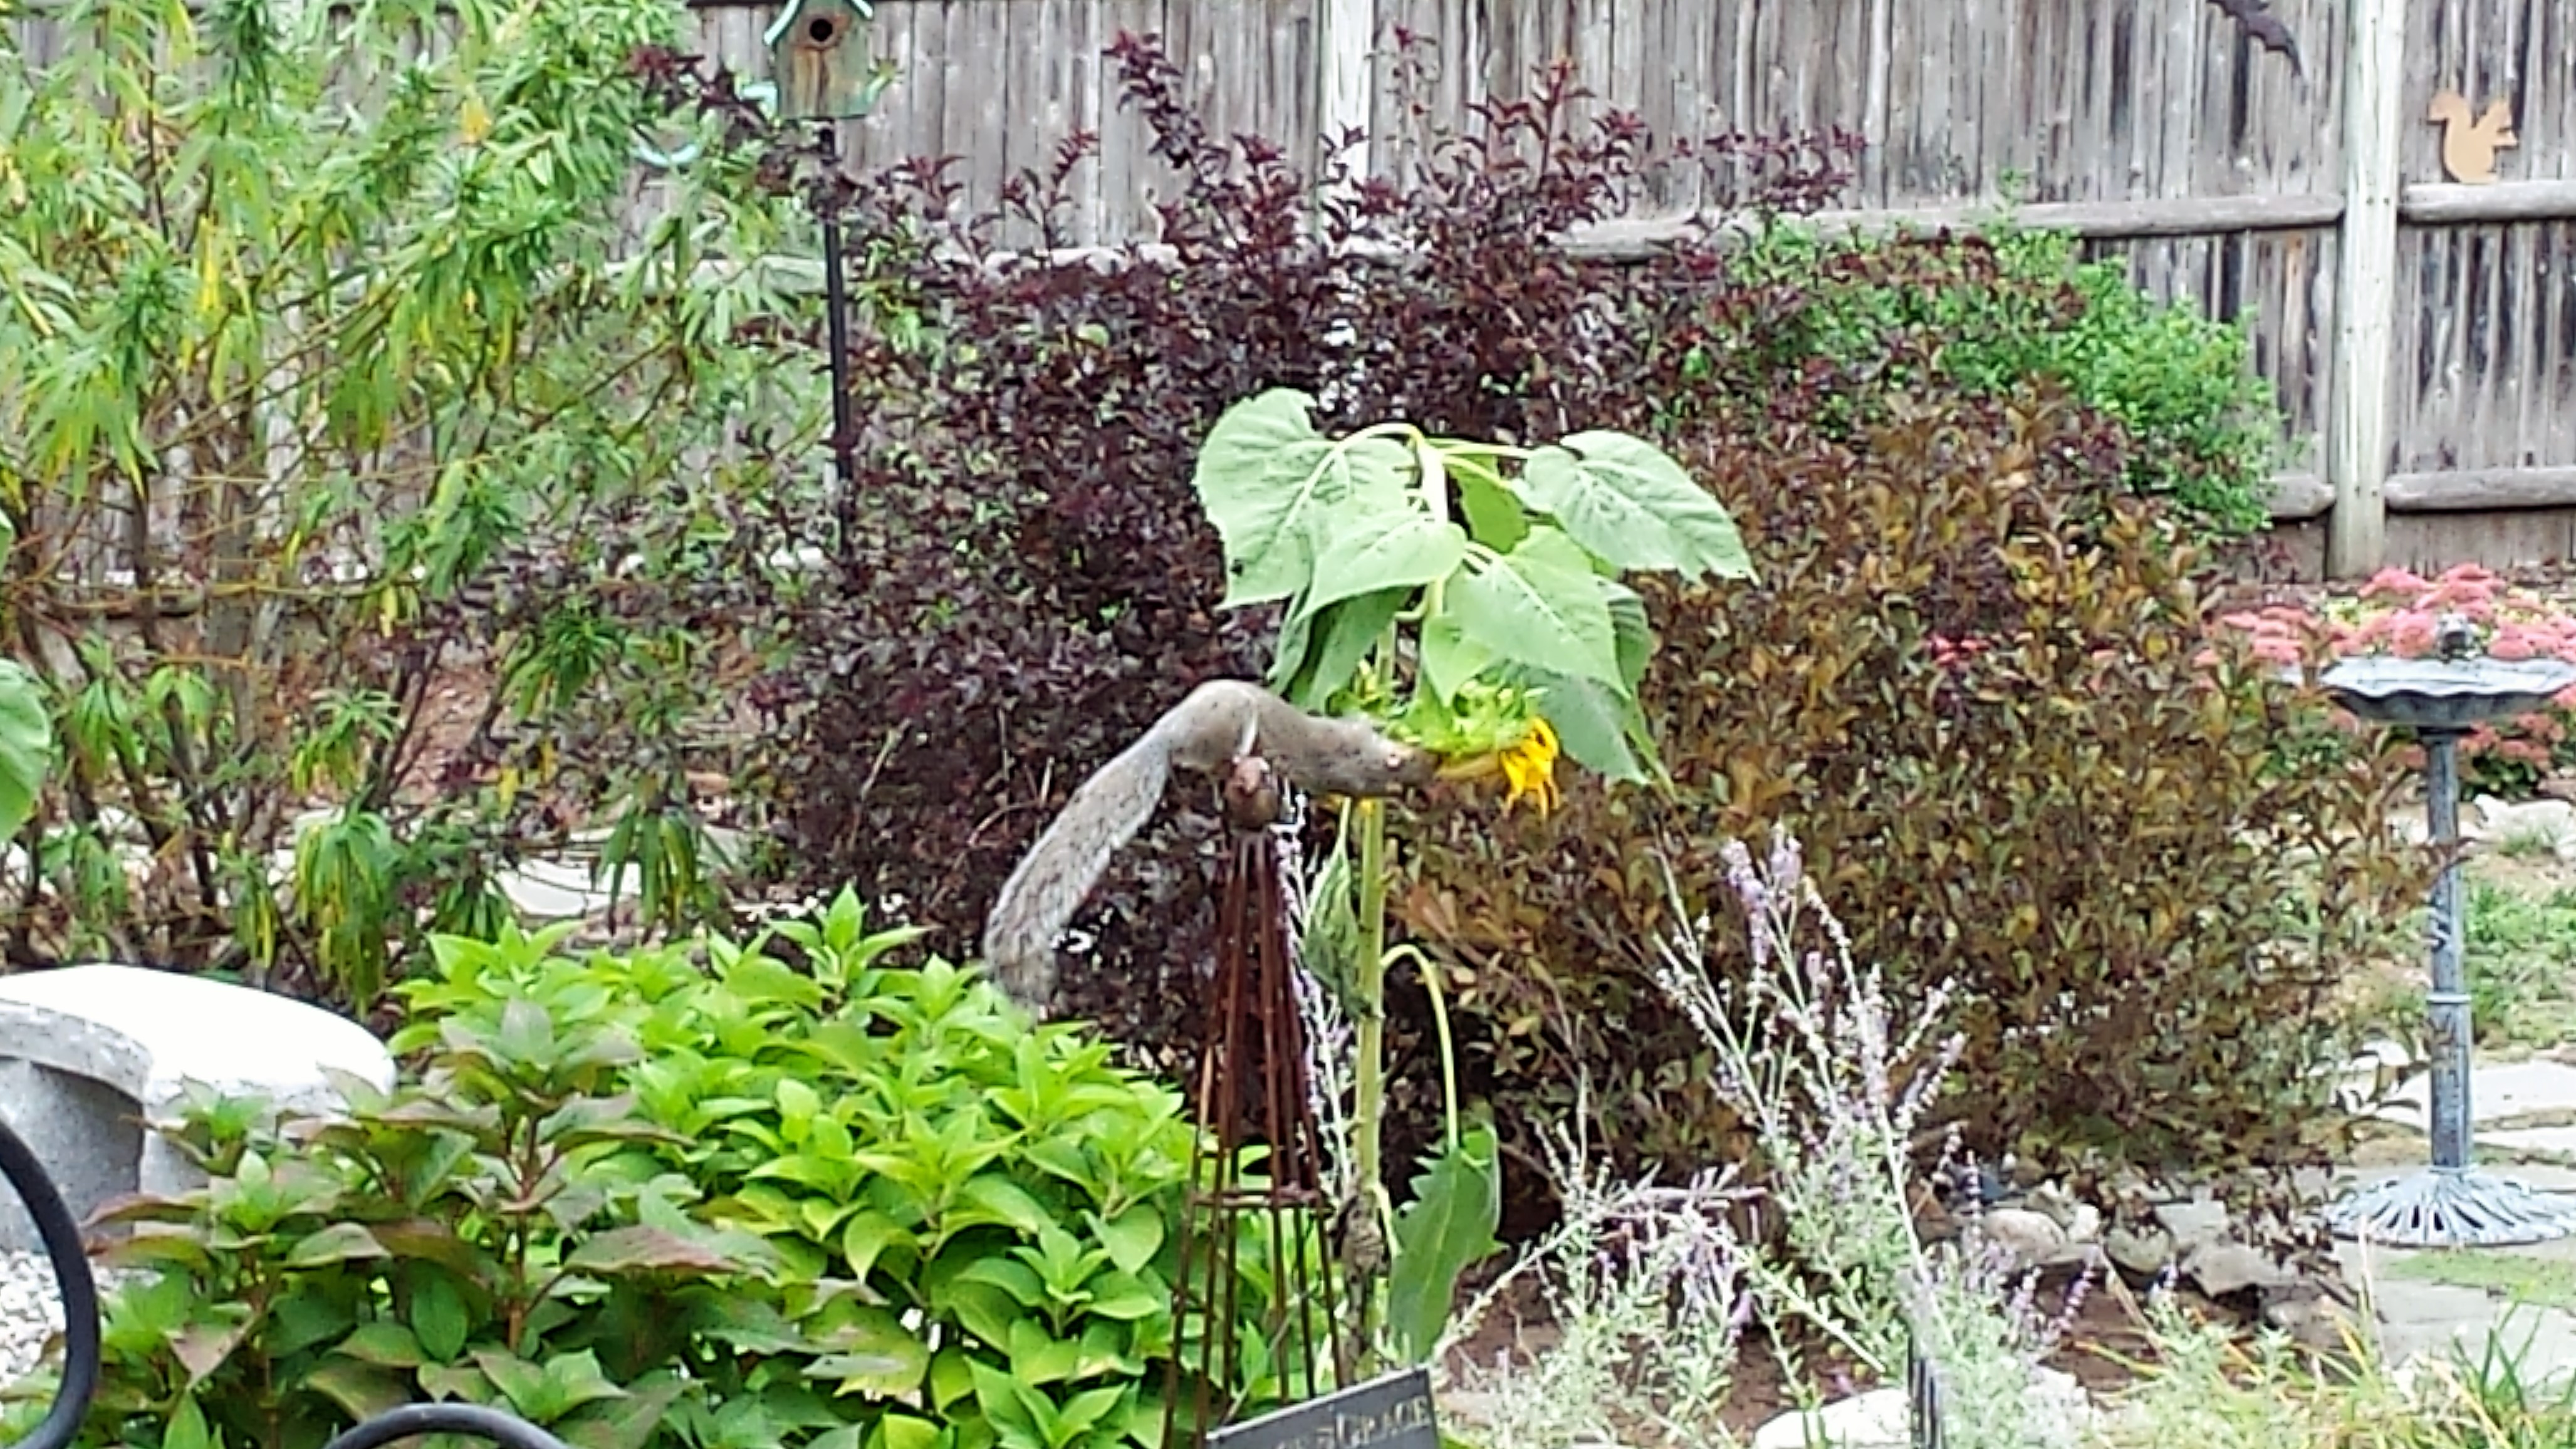
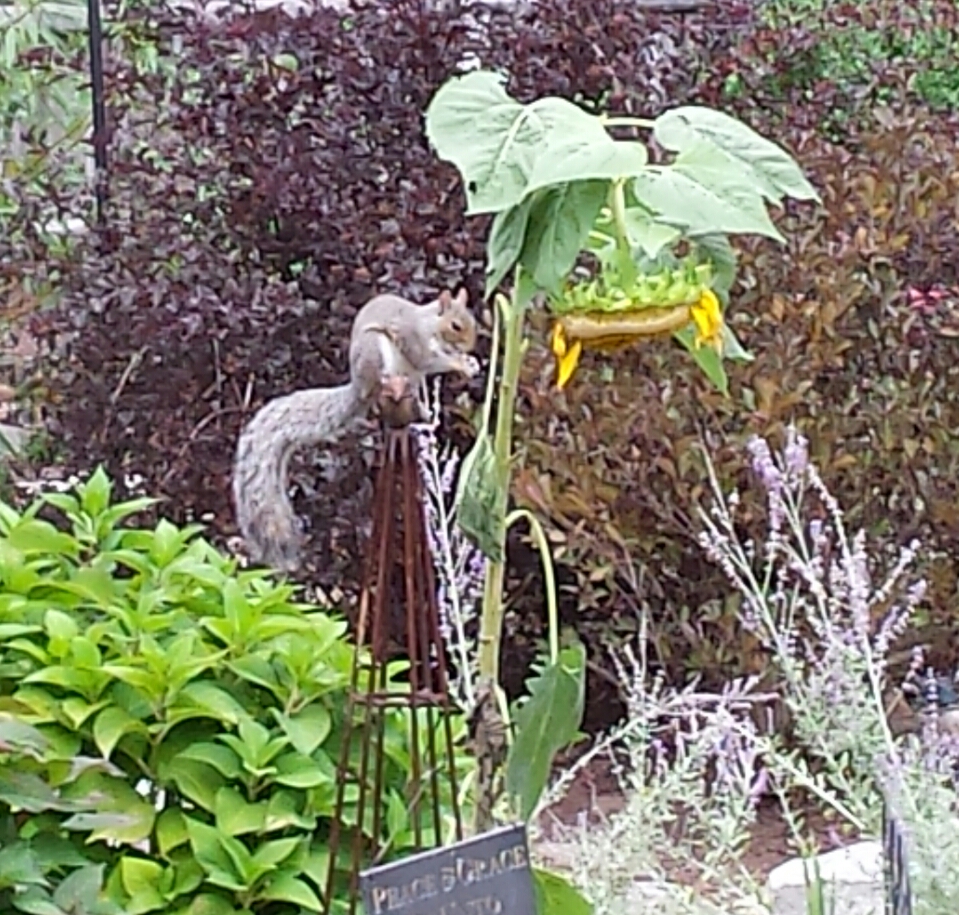
THEN THIS HAPPENED!
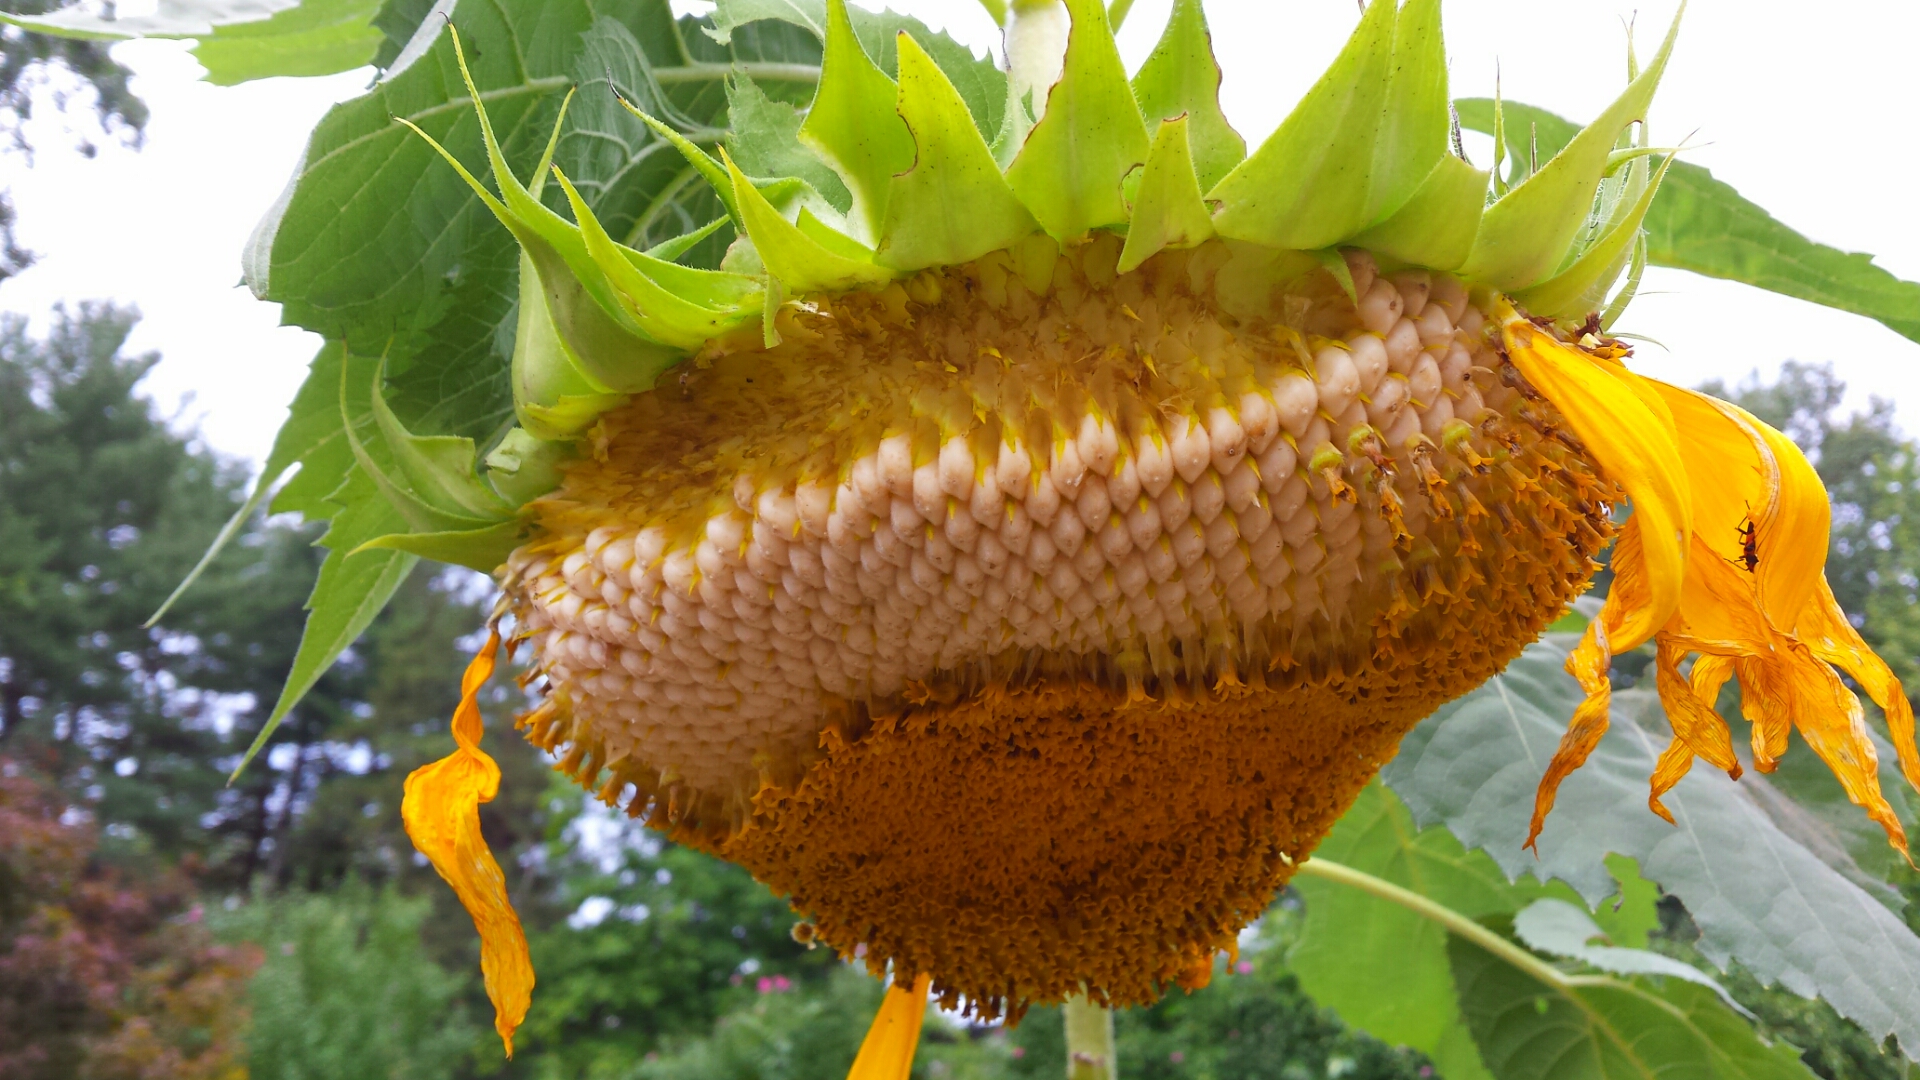
A squirrel used a nearby trellis as a ladder to reach the seeds. Fresh sunflower seeds became another menu item in the backyard garden buffet. Delicious!
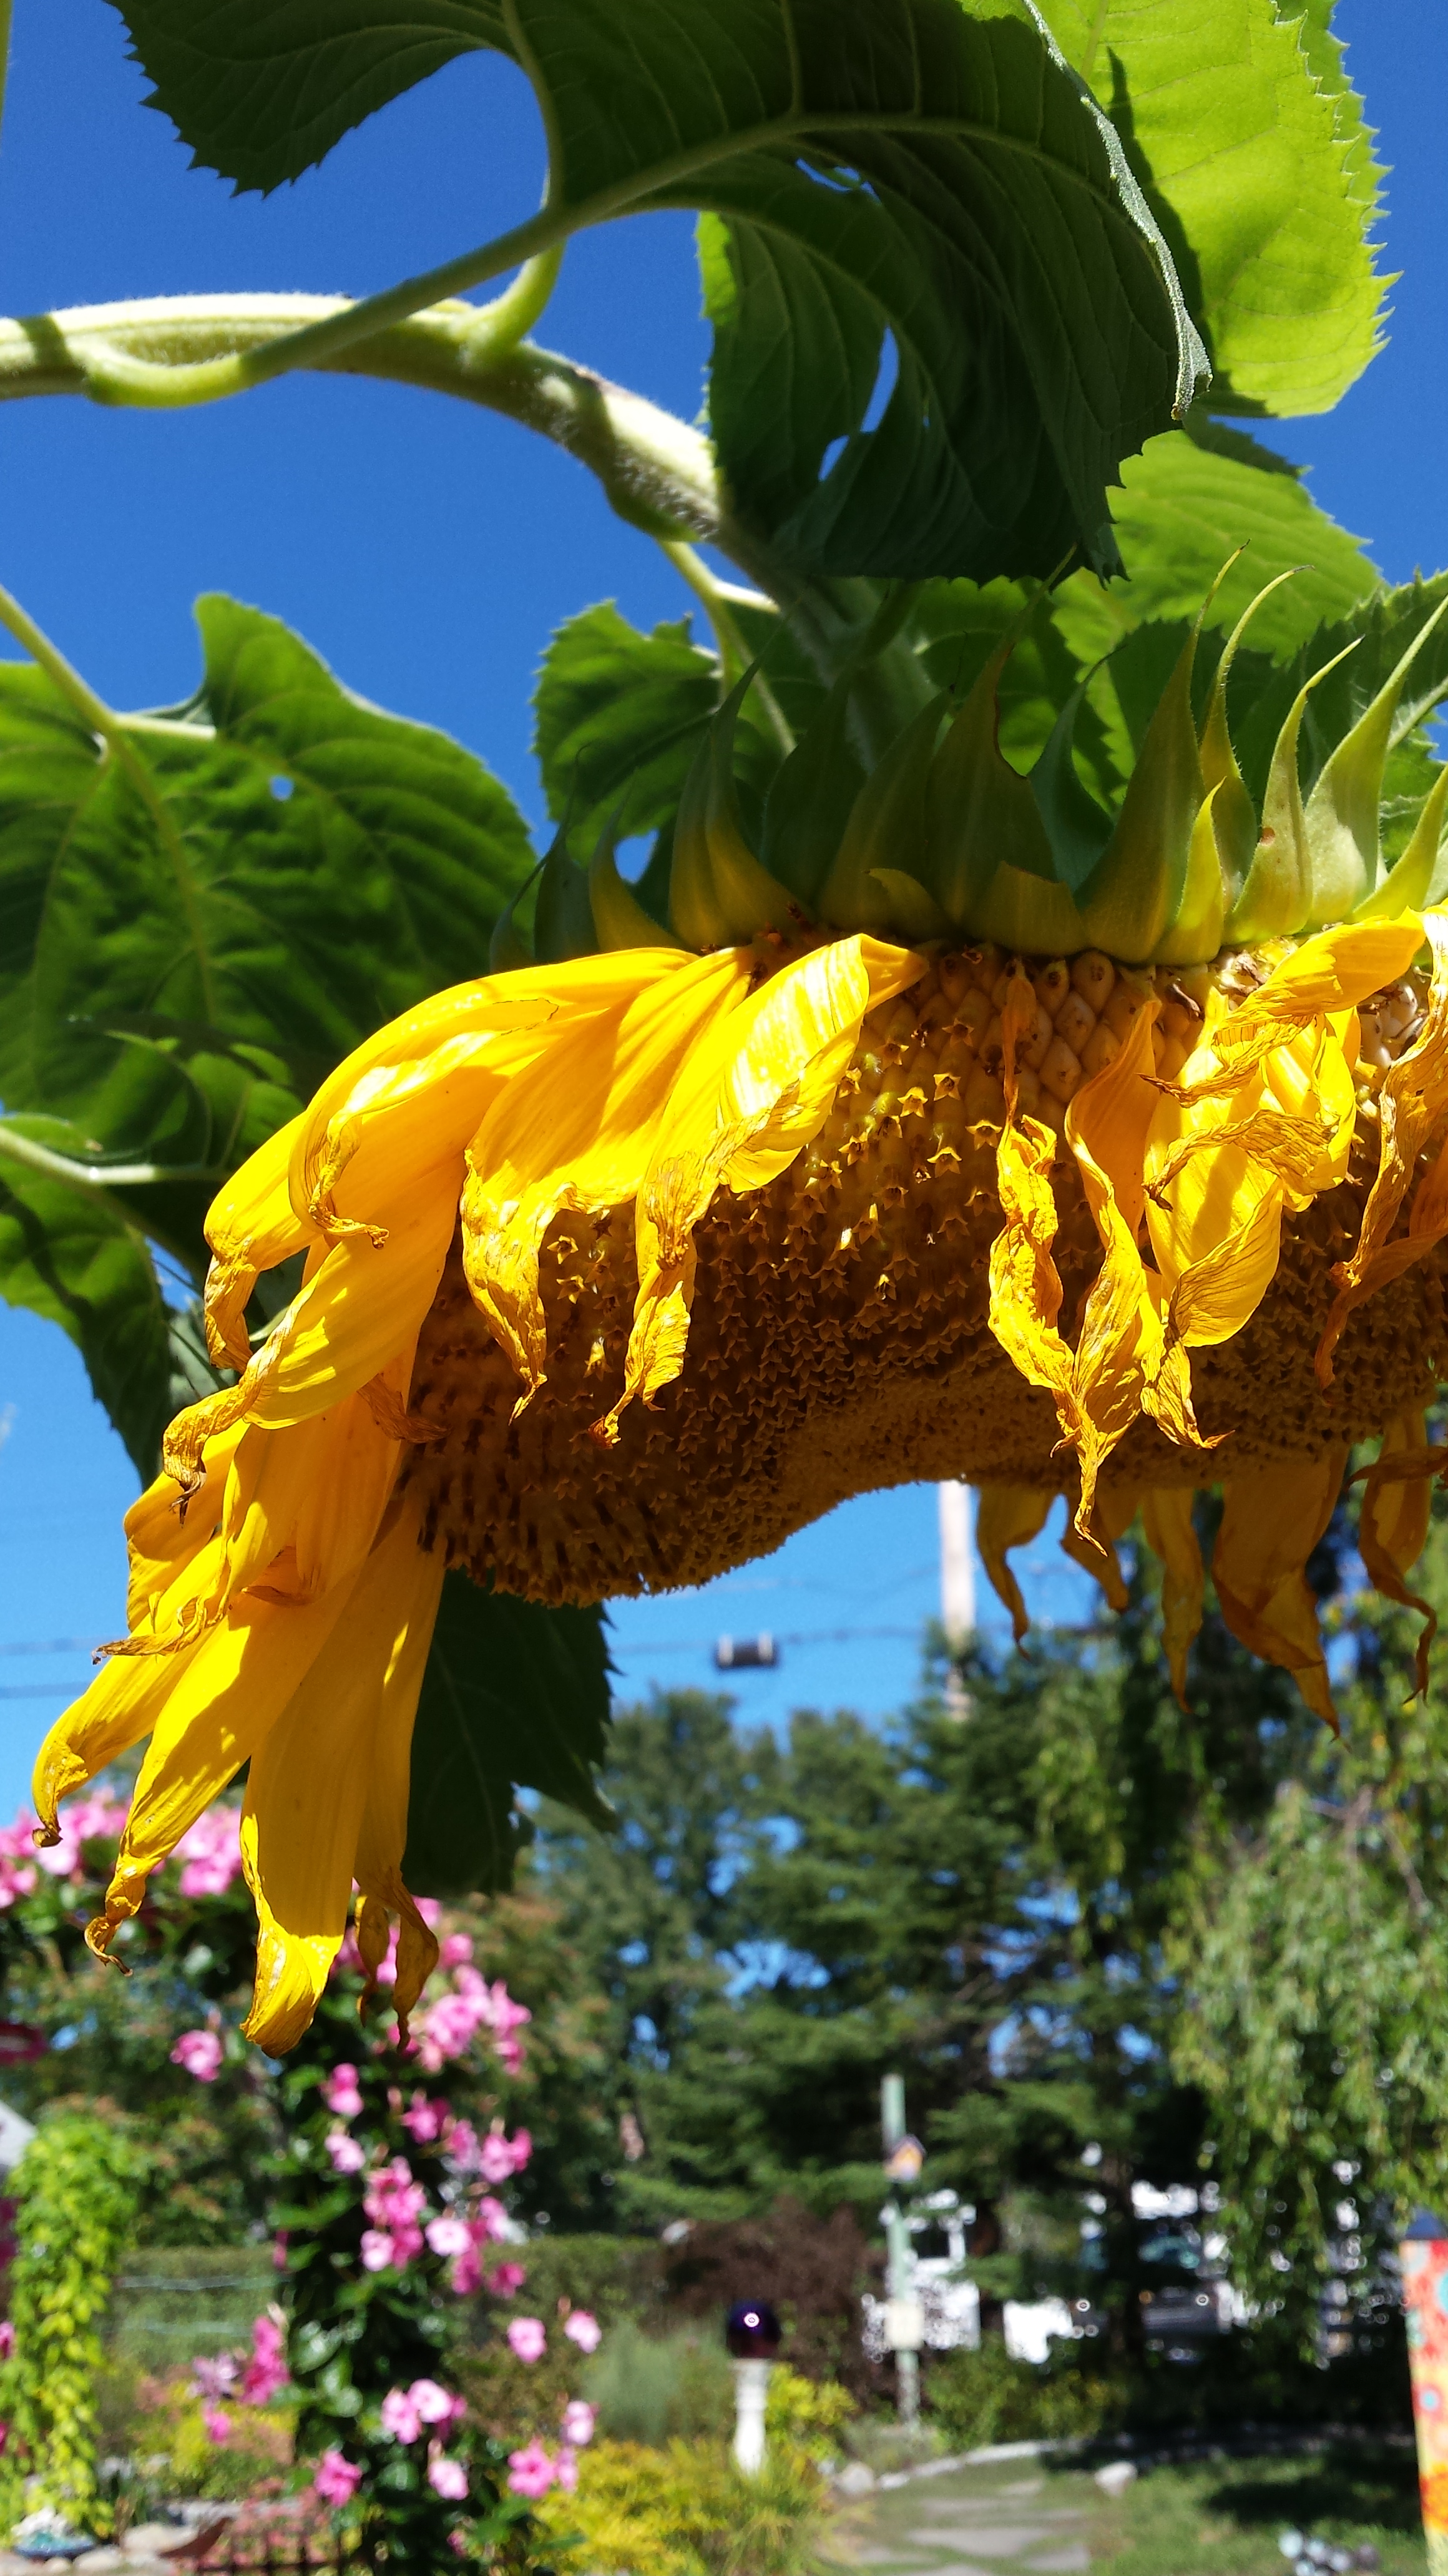
The seed head continued to swell for a few more days and approximately three weeks after the flower first began to show its sunny face, its head bowed deeply toward the earth as autumn set in. By day 30, the squirrel came back, hungry and in full force, to strip the seeds row by row – creating an interesting pattern.
Second to peonies, sunflowers have always been one of my favorite flowers (lavender would round out the top three.) After enjoying hundreds of sunflowers from self-sown seeds in the Greeley Park Community Gardens a few years ago, it was gratifying to grow sunflowers in our own backyard garden this summer. Perhaps in 2017, we’ll double our crop …. and raise four of them!
This feeling of optimism that sunflowers bring must be part of the story behind the Helen Keller quote that inspired me to share the story of our 2016 sunflower success:
“Keep your face to the sunshine and you cannot see the shadows.


 In the past, this was a week when remaining herbs would be removed and containers cleaned and put away until spring. However, with absolutely no frost or freezes expected in southern New Hampshire for at least two more weeks, these are staying put so I can enjoy the parsley and mint through October. Halloween Mojitos, anyone?
")


")


")